
What is the windowpane test? My friend asked me this question as I was talking to her about bread making. Even though I knew what it was, I had to figure out how to articulate the answer. She was making a new recipe and because she wasn’t familiar with it, knew the windowpane test would help her know how much to kneed her dough. I know what the windowpane test looks like and how to achieve it but I couldn’t figure out how to verbalize it without hand motions over a video. Although I was able to explain the process well enough, I realized the success of my communication had much more to do with the person listening to me than my explanation.
I know that I understand things better when I see or do them step by step so I decided to take pictures of the process myself. Keep scrolling for pictures detailing the step-by-step process for the windowpane test.
What is the windowpane test?
The windowpane test is when you take a small amount of kneaded bread or pizza dough and see how far you can stretch it without breaking to get it thin enough to see light pass through it.
Why is it important?
Because the more elastic (stretchy) your dough is, the better your bread will rise.
When should I do the windowpane test?
If you are unfamiliar with a recipe or don’t know if your bread has been kneaded enough, the windowpane test will help you to know where your bread is in the gluten development process. Make sure that your dough ingredients have incorporated with each other and have formed a ball of dough.
The test can be done on dough that has been hand-kneaded or kneaded in a mixer.
What does the test look like?
I am recipe testing a bread dough and took pictures of the process of my dough from it coming together until the windowpane test passed. As you scroll down, hopefully, the pictures help you see the different stages of the dough’s elasticity until it passes in the last photo.
What happens if my dough does not pass the windowpane test?
Knead. Knead. And knead some more. I was using my kitchen aid mixer to knead my bread dough and as it was nearing the end, my mixer overheated and shut off. I am so glad that it just shut off instead of burning out but kneading that much dough by hand was a lot of work. Bennett was laughing at me because it looked like I was about to break into a sweat. If you are kneading dough by hand, feel free to take a break every few minutes. Next time I will halve the recipe and hopefully, my mixer can do all the work.
However, if your dough has been kneading for about ten minutes and you’re not seeing any difference in the results of the windowpane test, try resting it for a minute or two. Resting the dough before trying to perform the test can sometimes help it to pass. At the bottom of the post, you can see the difference between trying to perform the windowpane test on dough that has just been kneaded versus dough that has rested for about two minutes.
How to perform the windowpane test:
In this first picture, you can see that the dough is still really loose and would be quite sticky if I tried to do anything with it other than knead at this point. This brings up the point that you shouldn’t start trying the windowpane test until your wet and dry ingredients have been fully incorporated and have been kneaded together for several minutes.
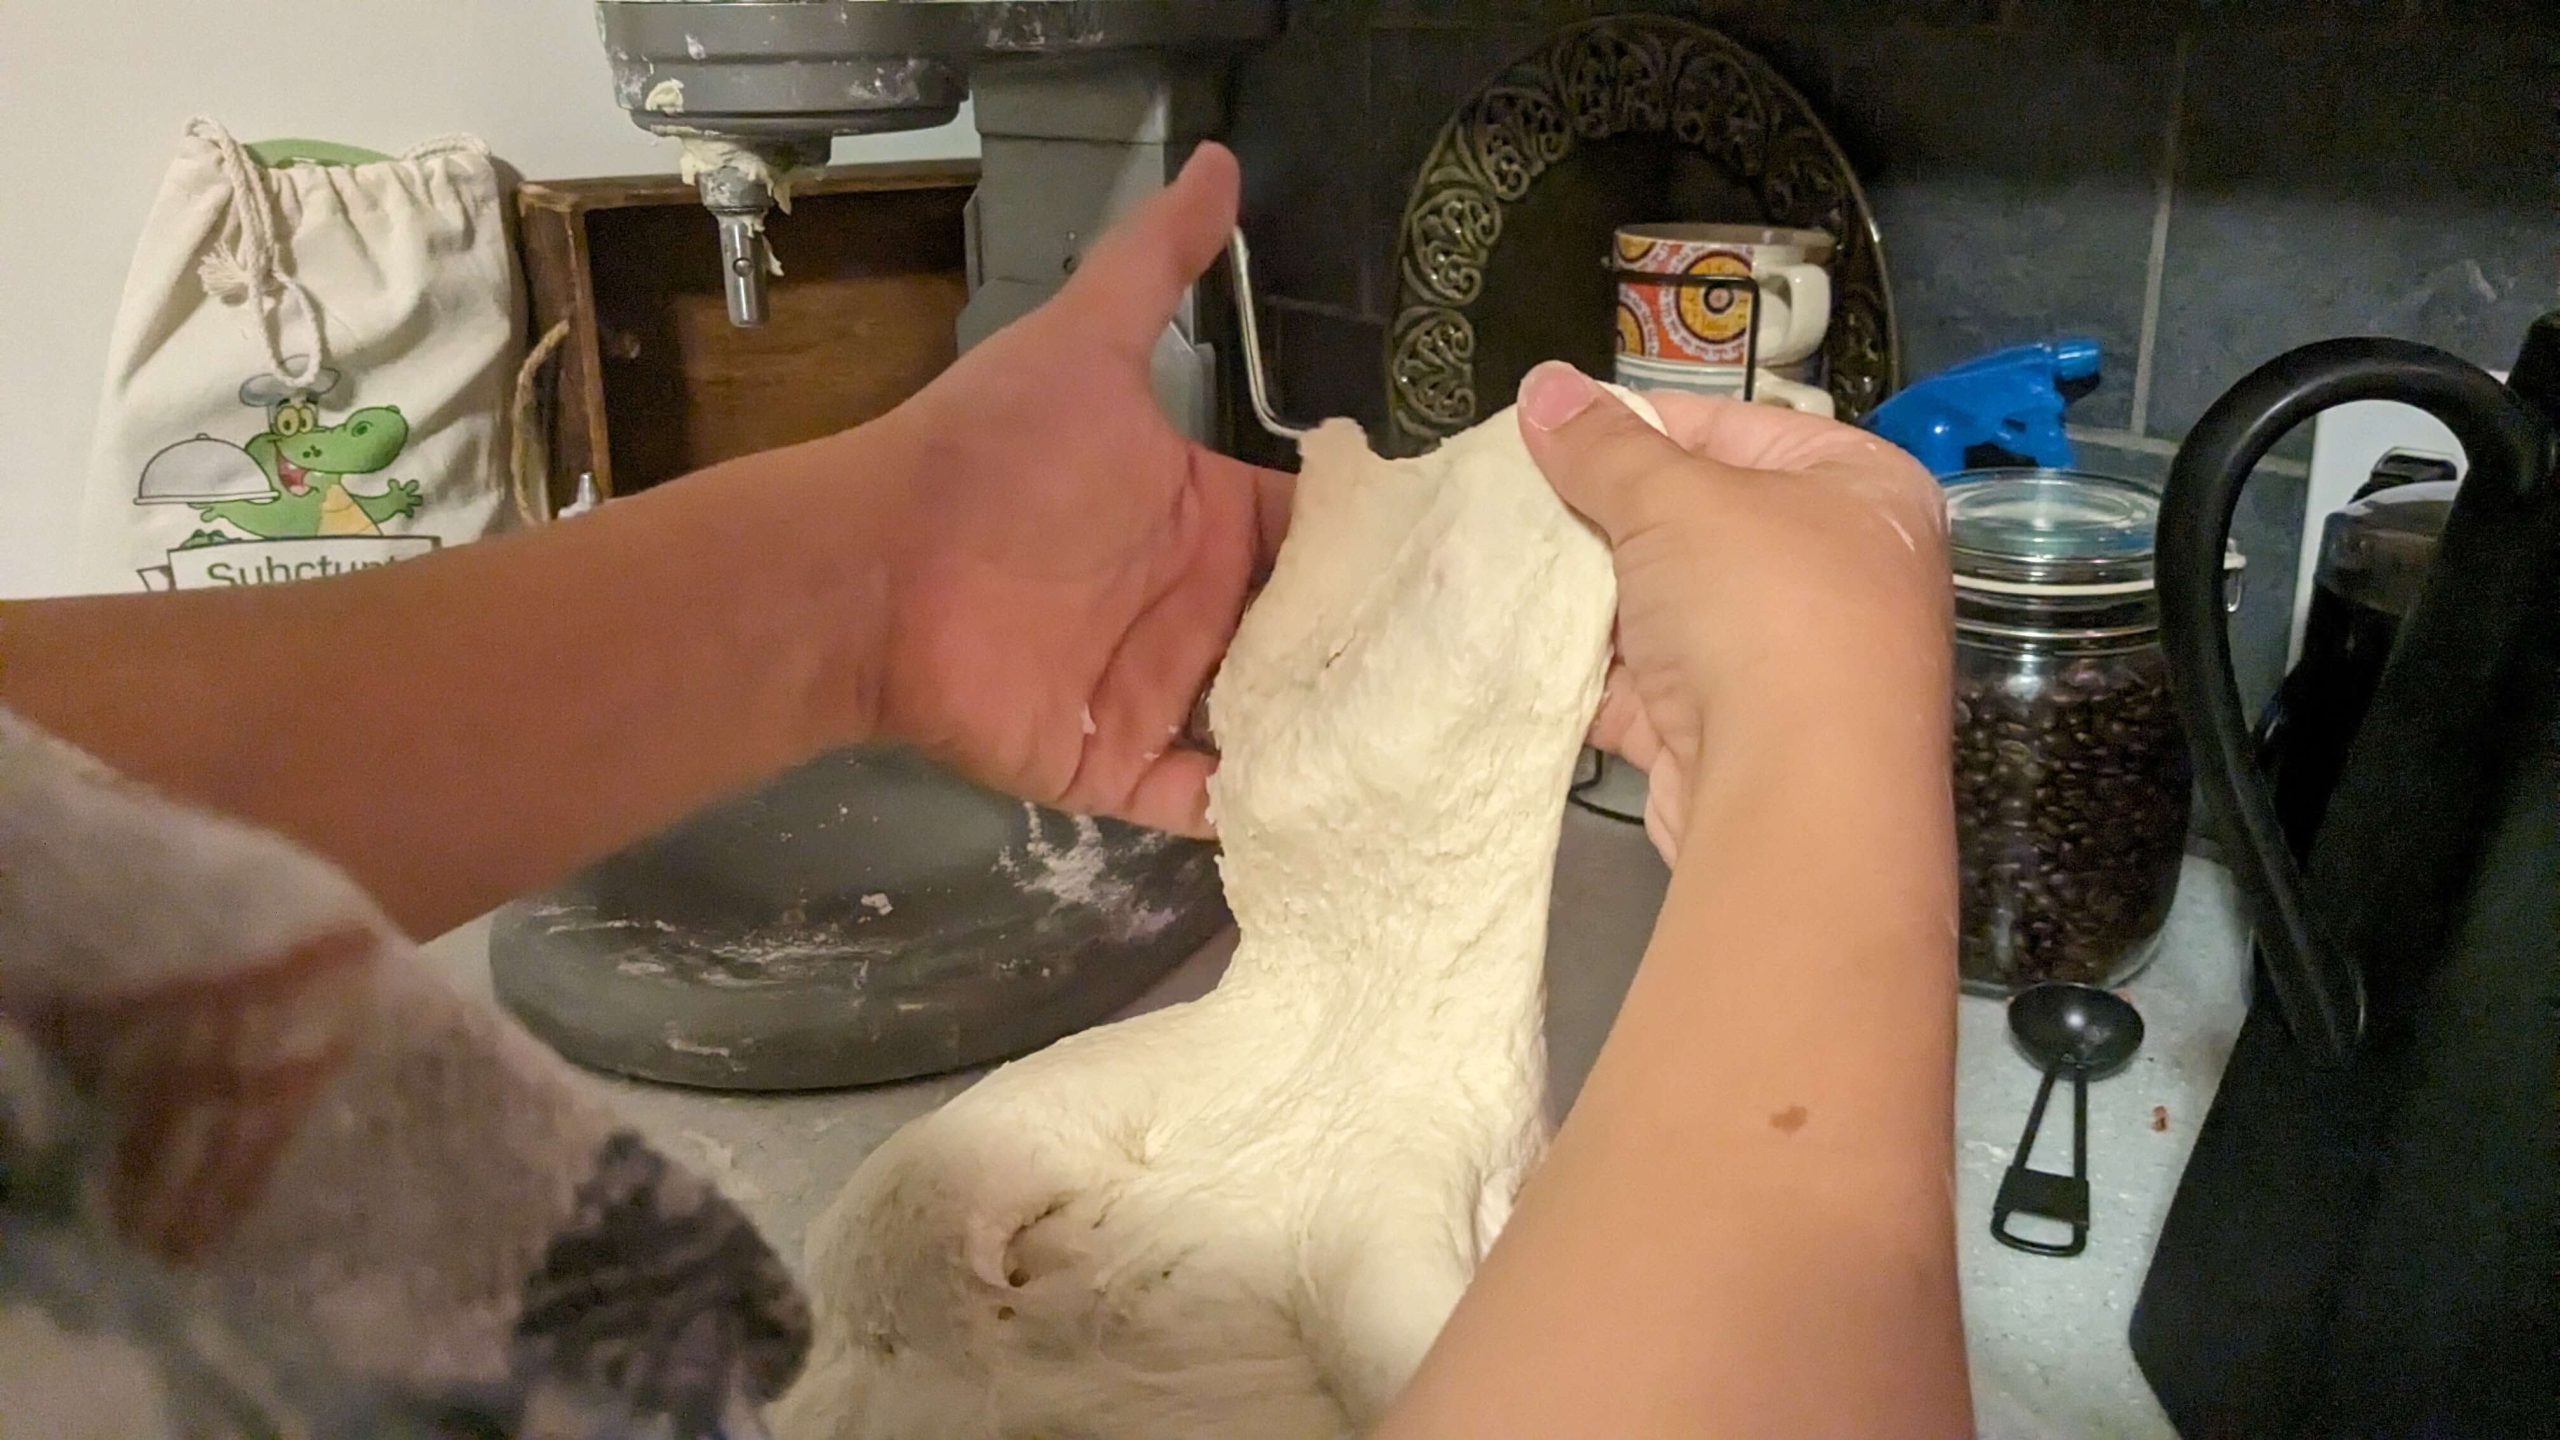
After a few minutes, you can see that the mixer is bringing the dough together because the dough is starting to get shiny and looks smooth, but when I stopped it and tried out the test, the dough stuck to my hand and didn’t stretch at all before it started to rip.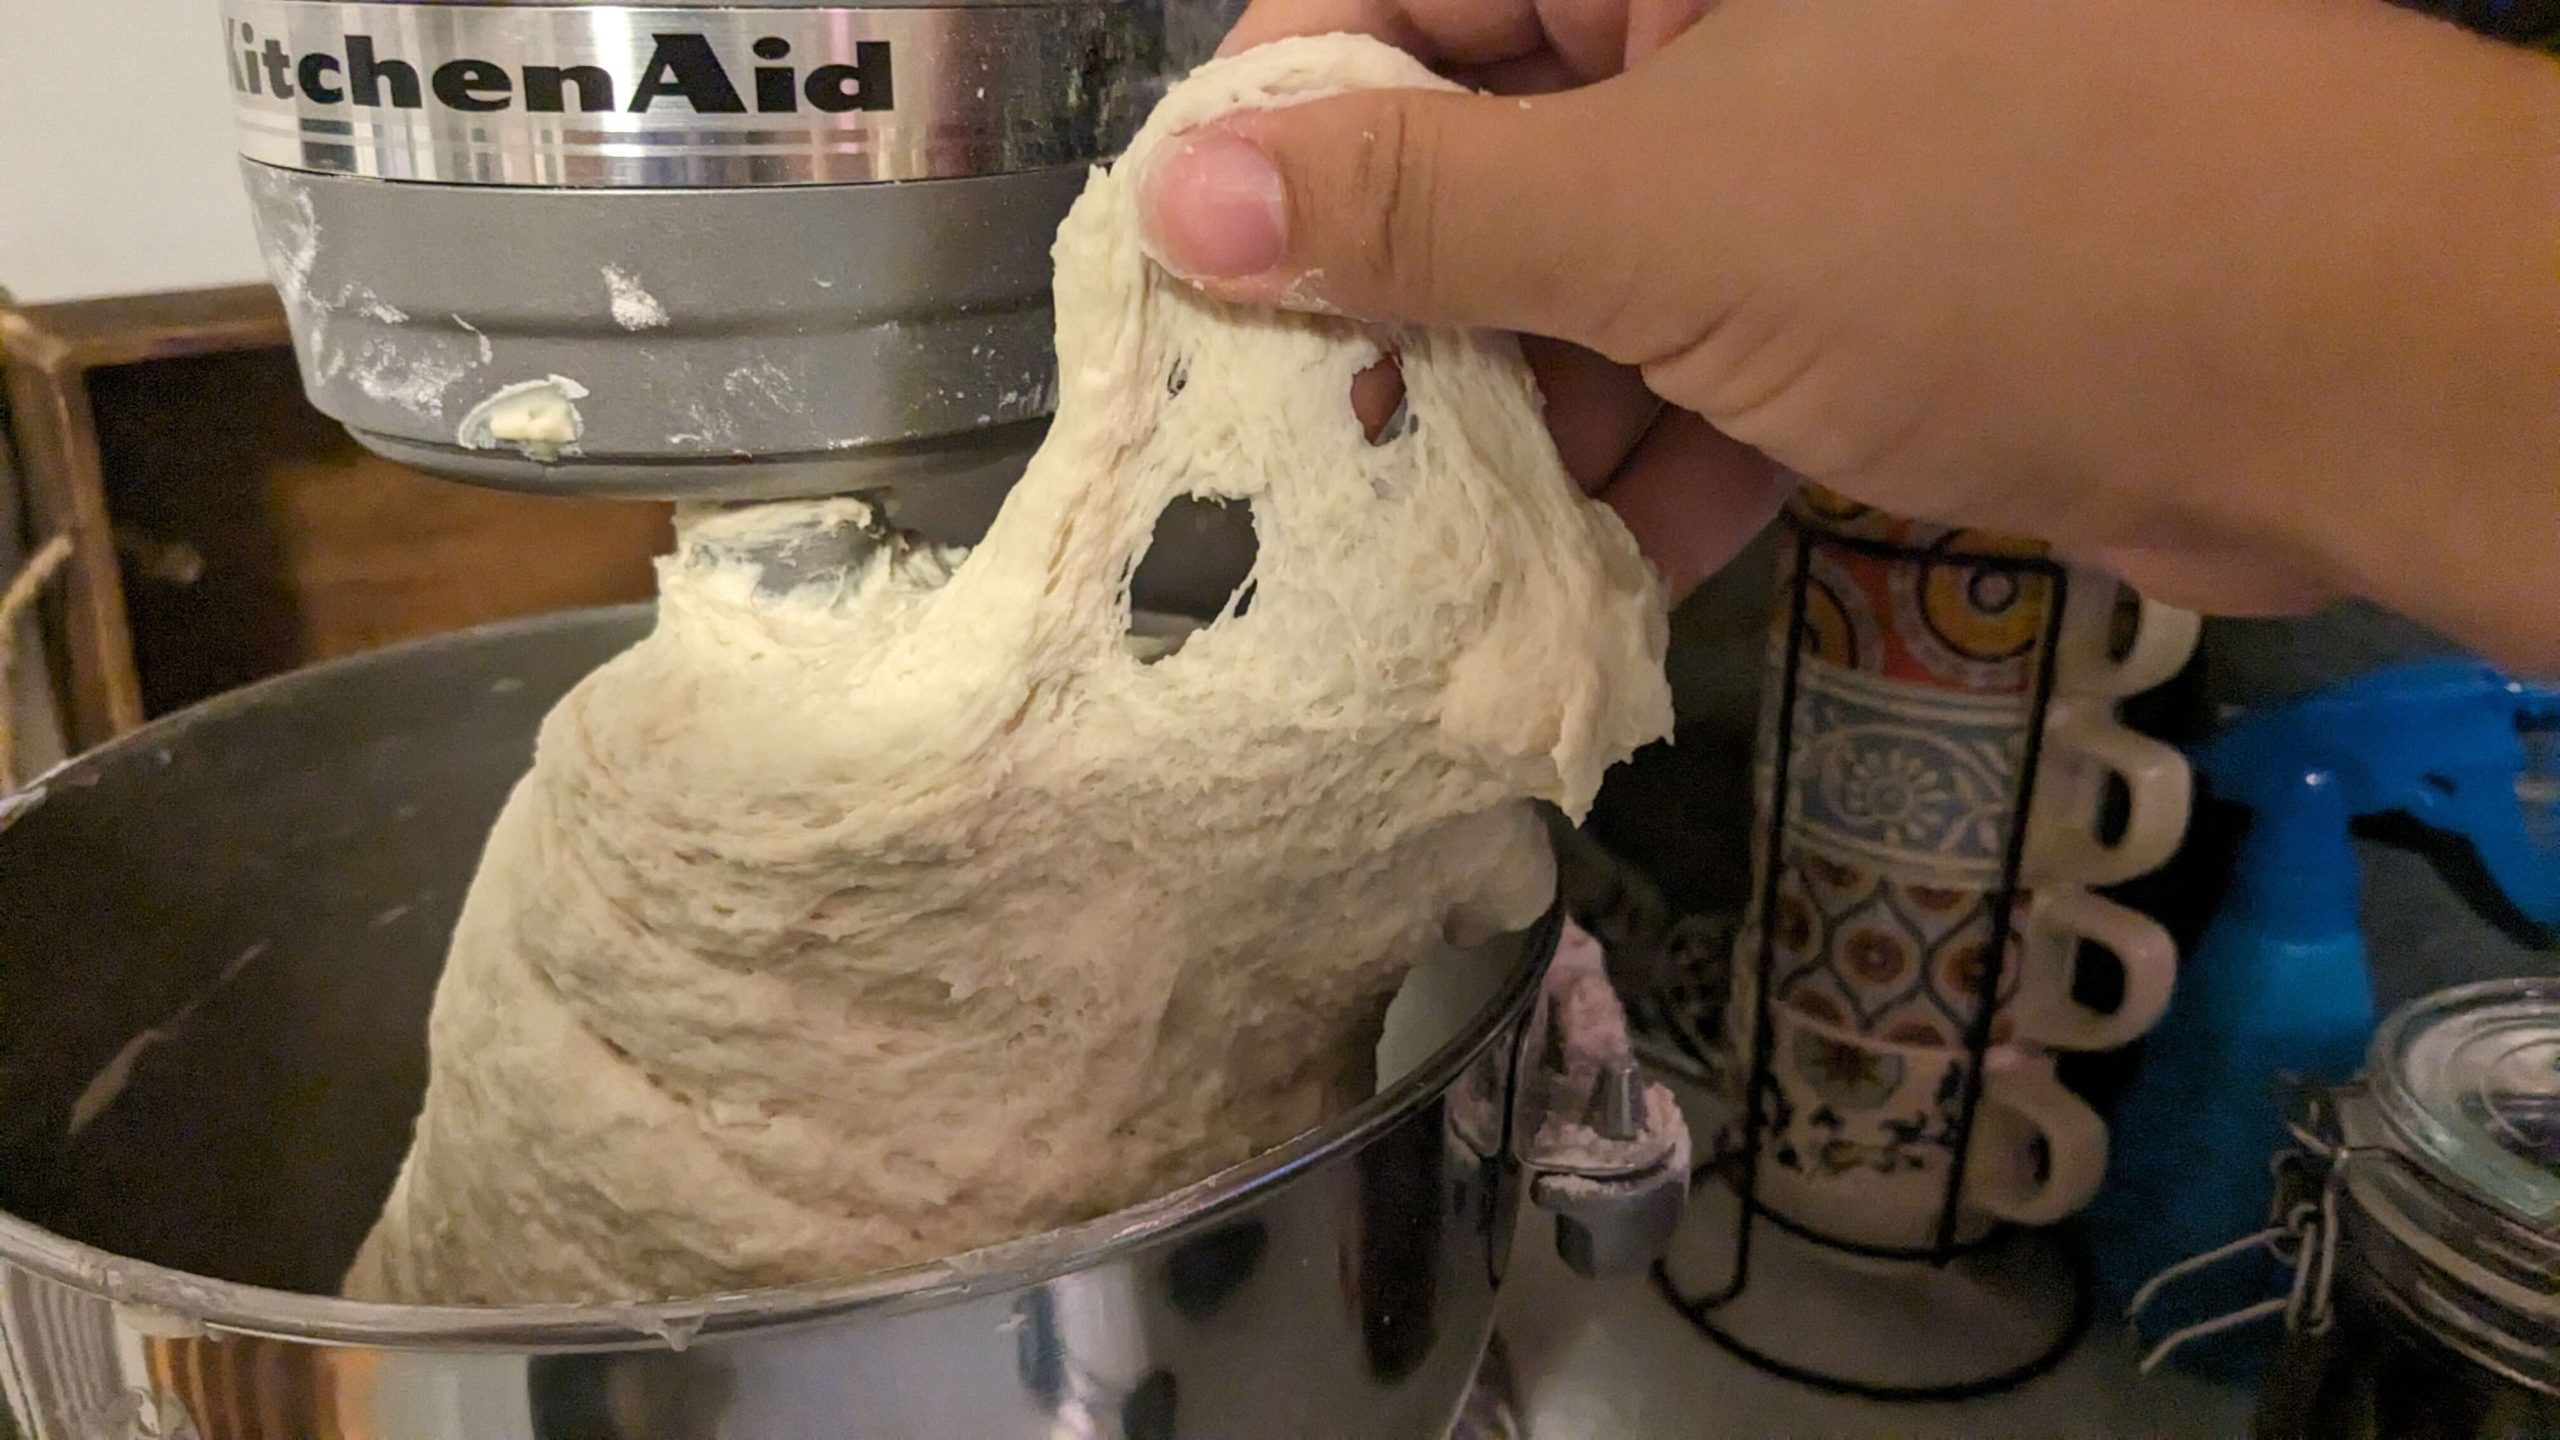
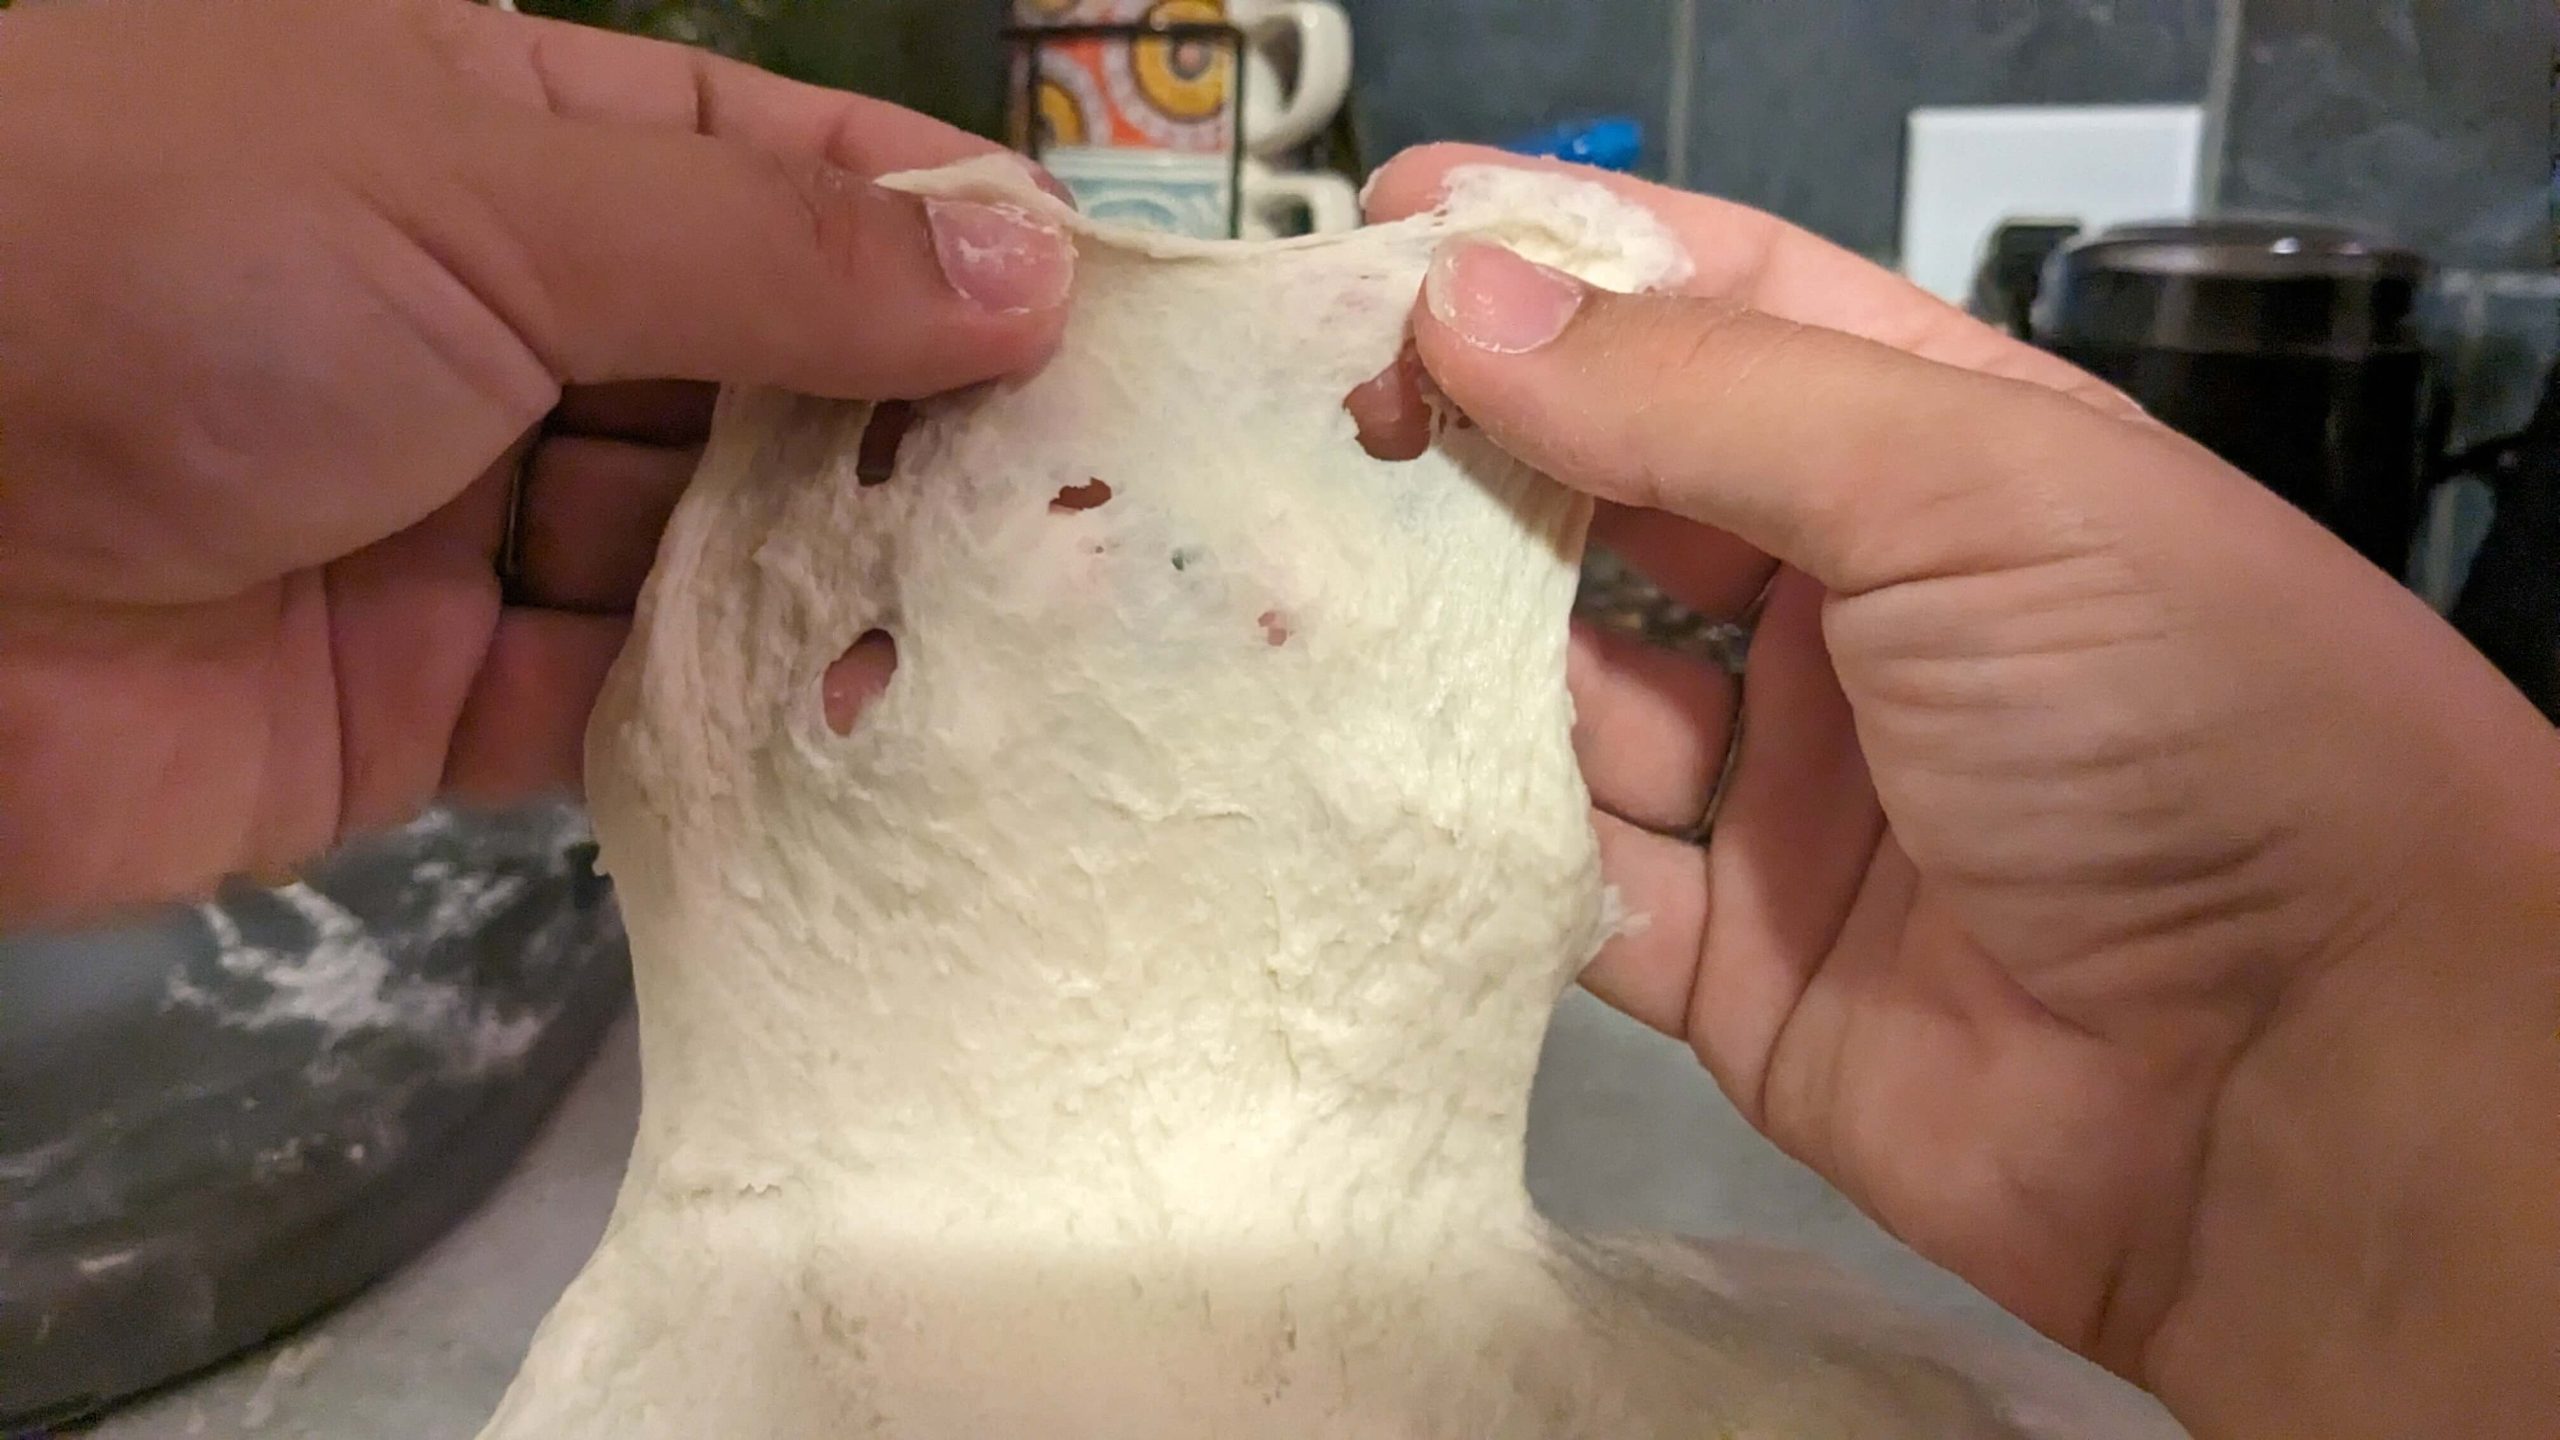
Here are a few more pictures of the dough NOT passing the windowpane test. These were taken after the dough was kneaded for about two or three minutes.
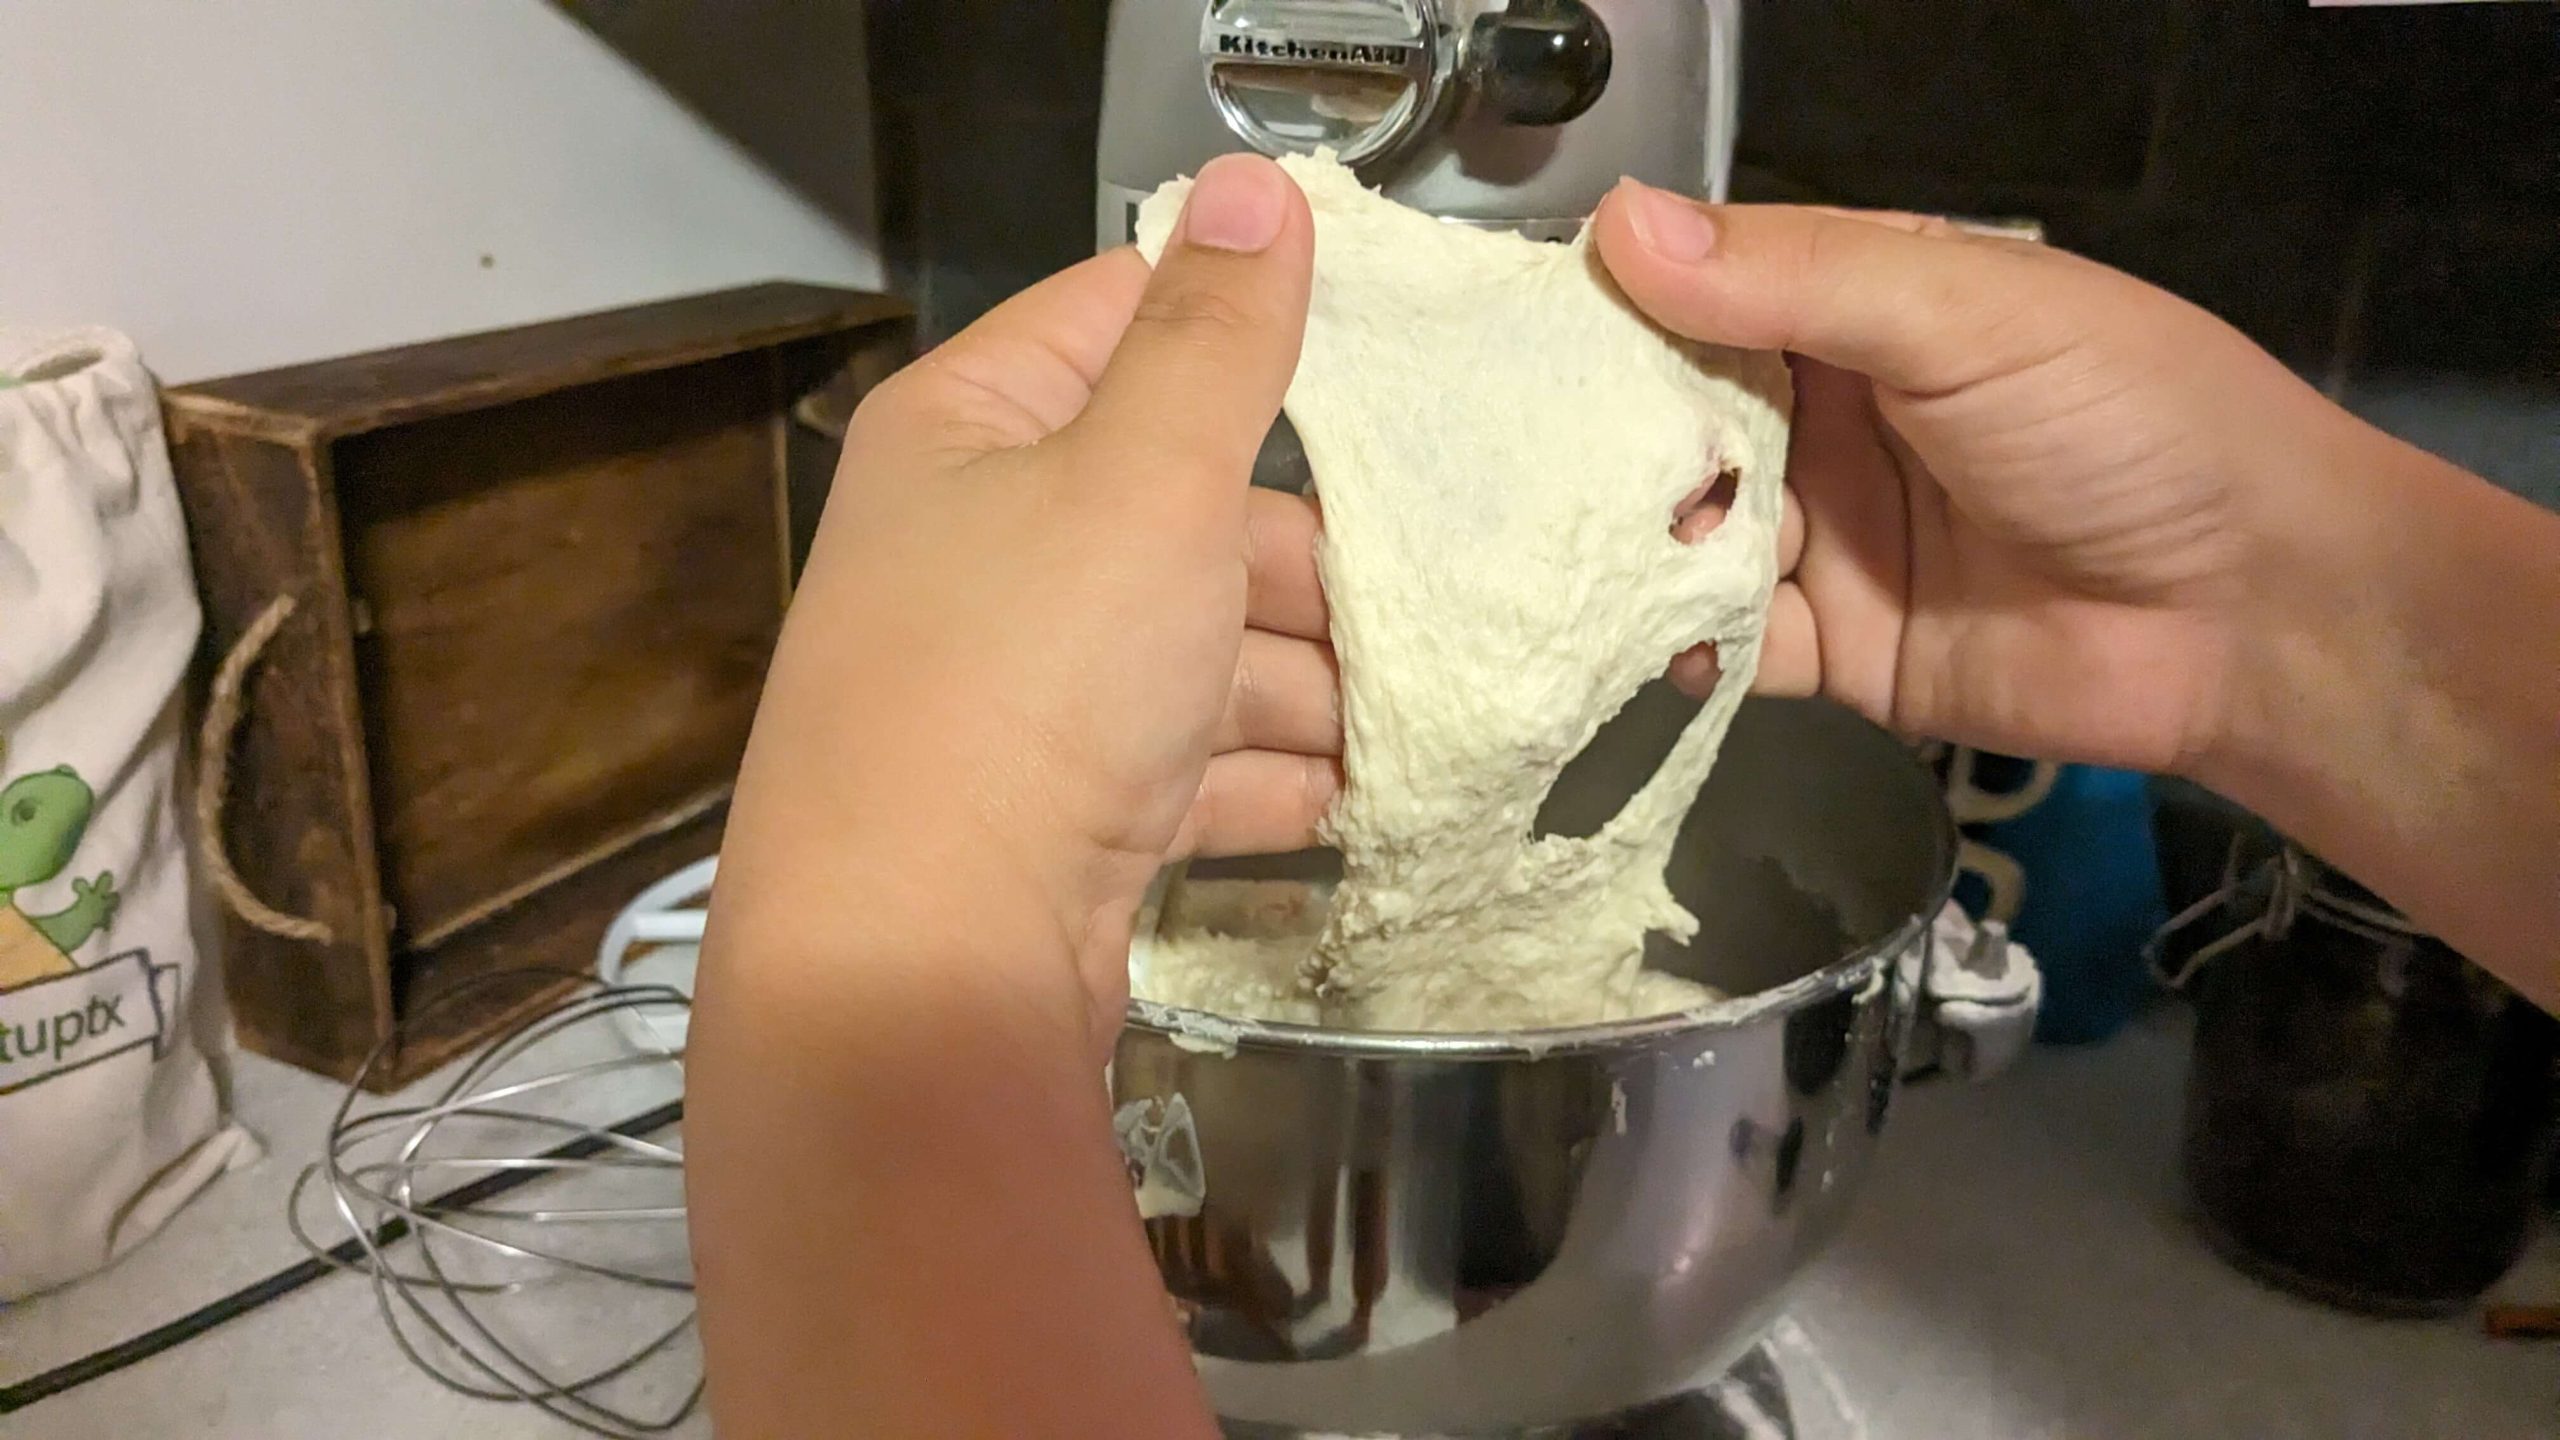

This photo though shows the dough getting closer to passing the windowpane test. It stretches a lot better than at the beginning and just as it starts to become transparent, it starts to rip.
At this point, my mixer overheated and I decided to let the dough rest before I tried the test again.
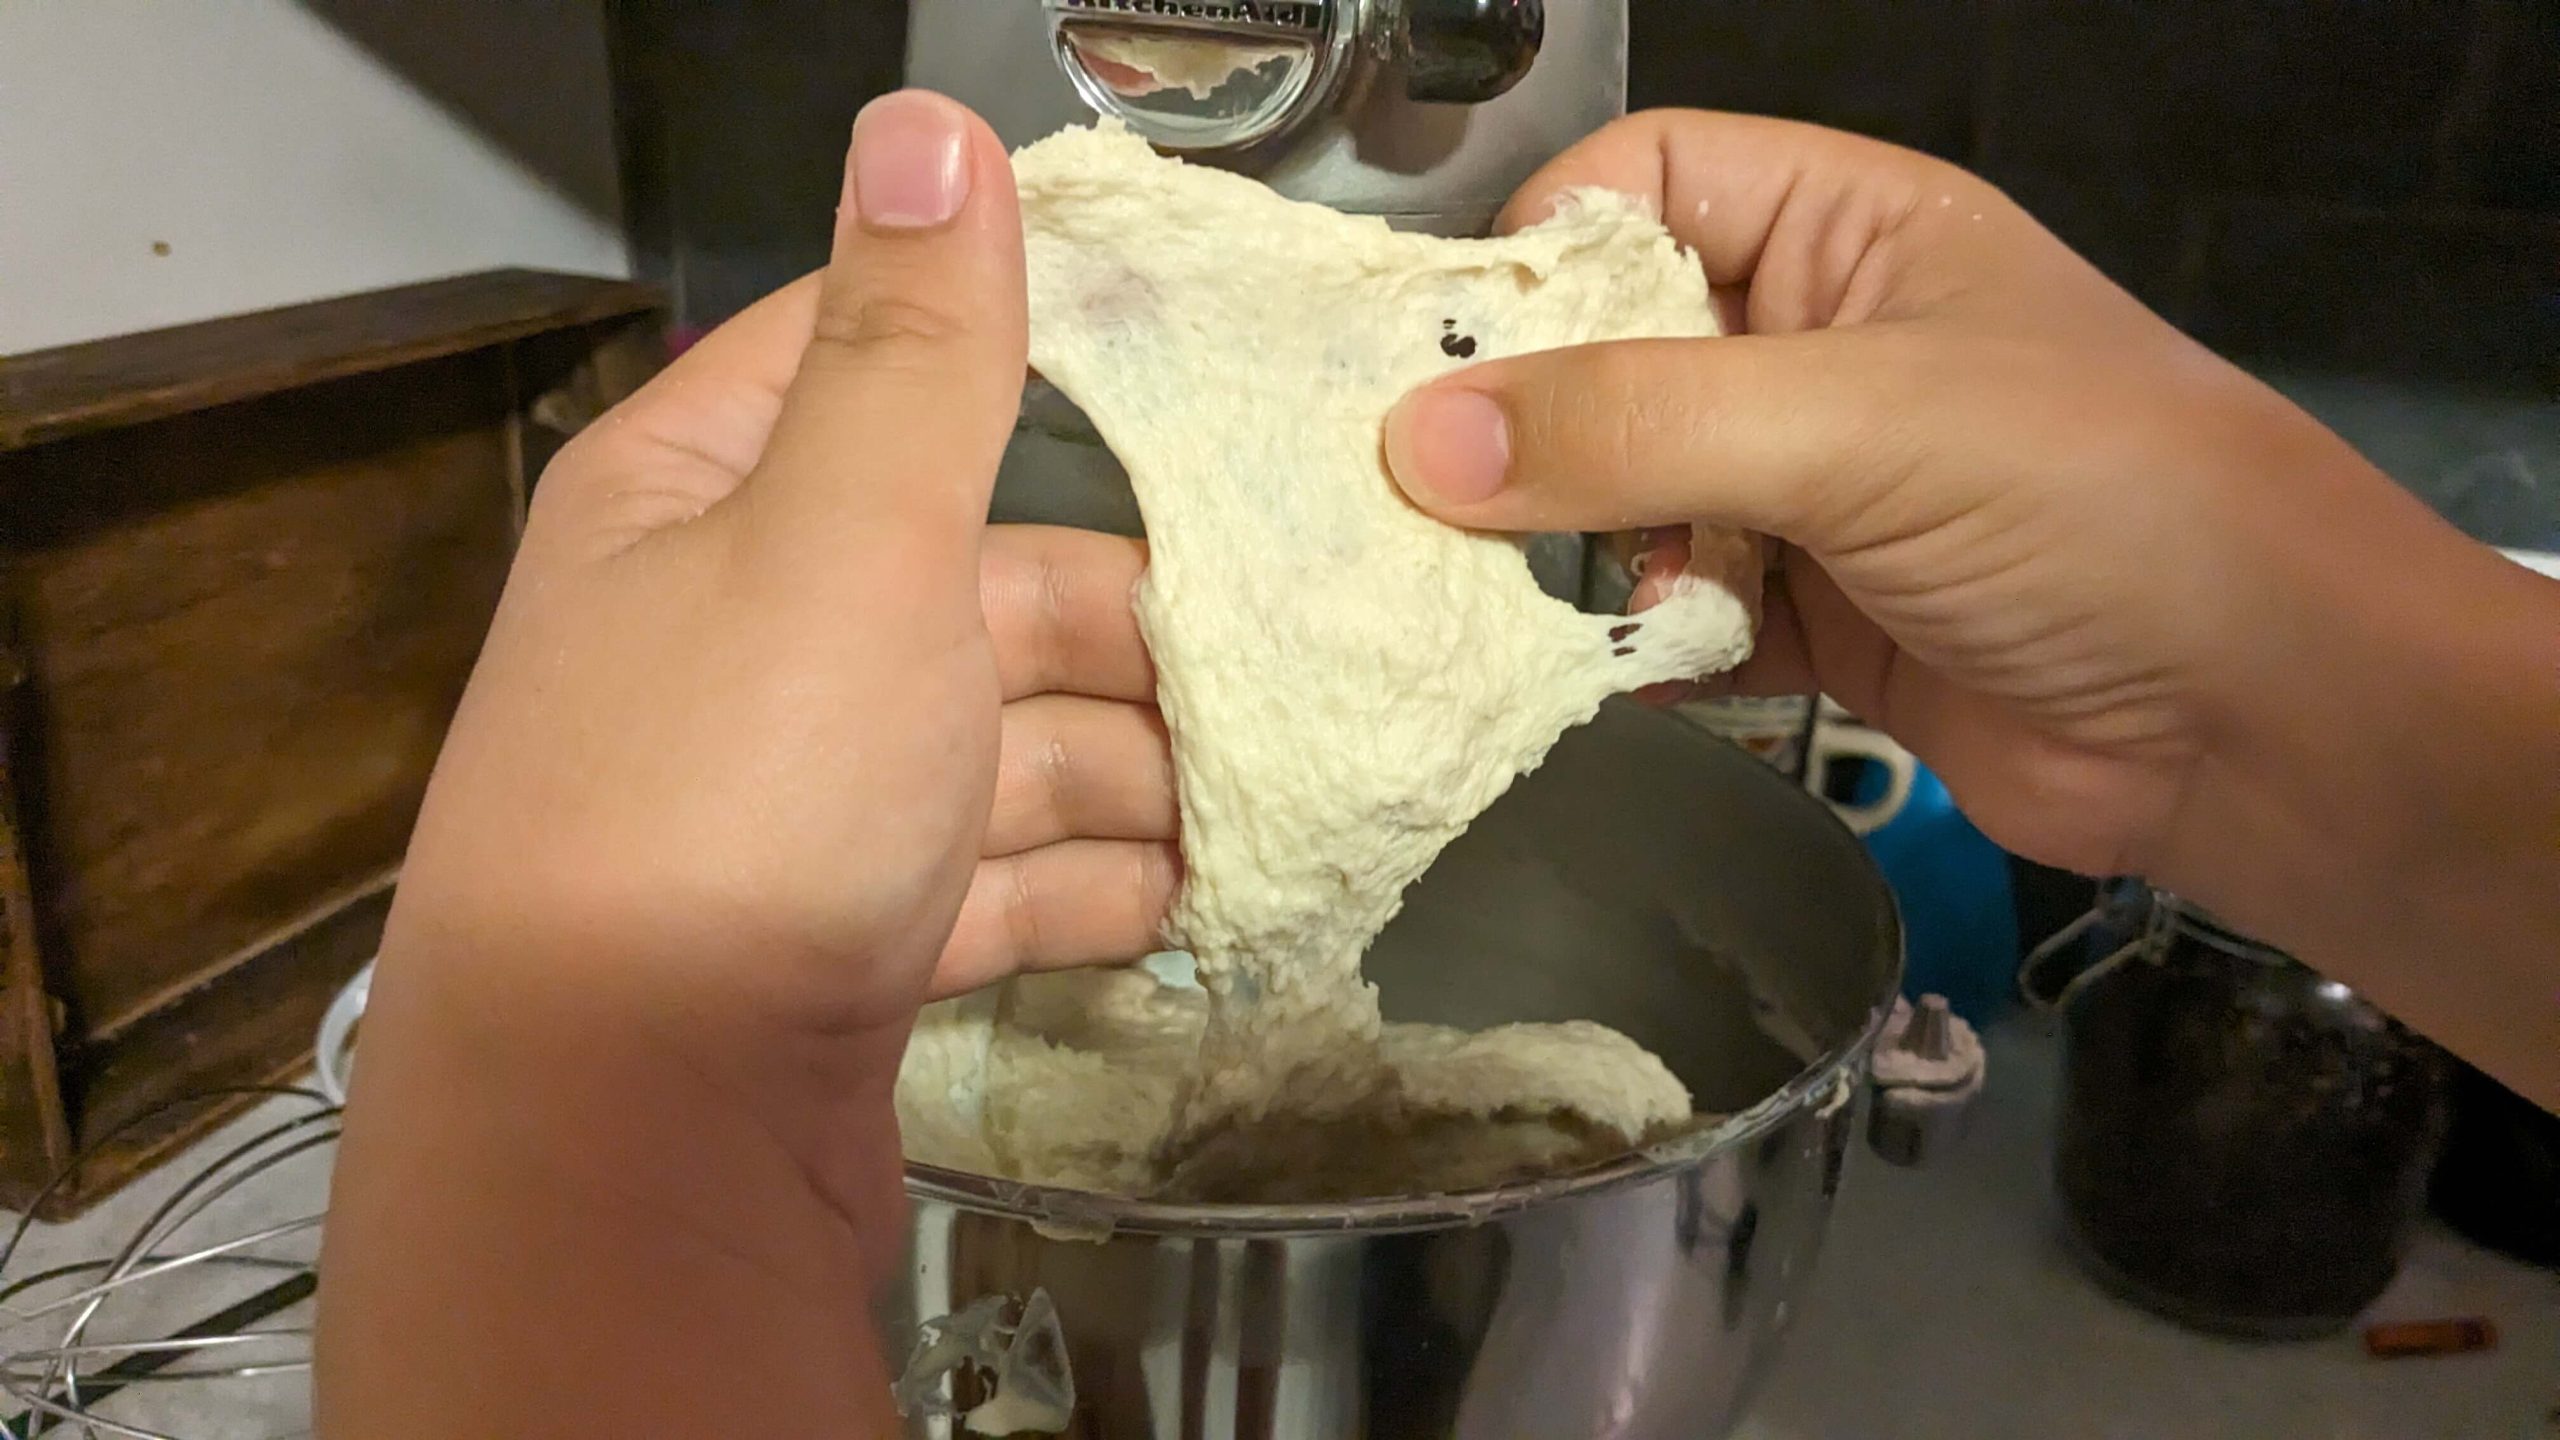
I didn’t like how it felt so I kneaded it some more and then tried the windowpane test immediately. At this point, I knew from experience that the dough was ready. These two pictures show you the difference between trying to test dough that has just been kneaded vs resting for about two minutes.
In this photo, you can see how transparent the dough is near my left thumb. You can see my finger through it and even the rim of the bowl. 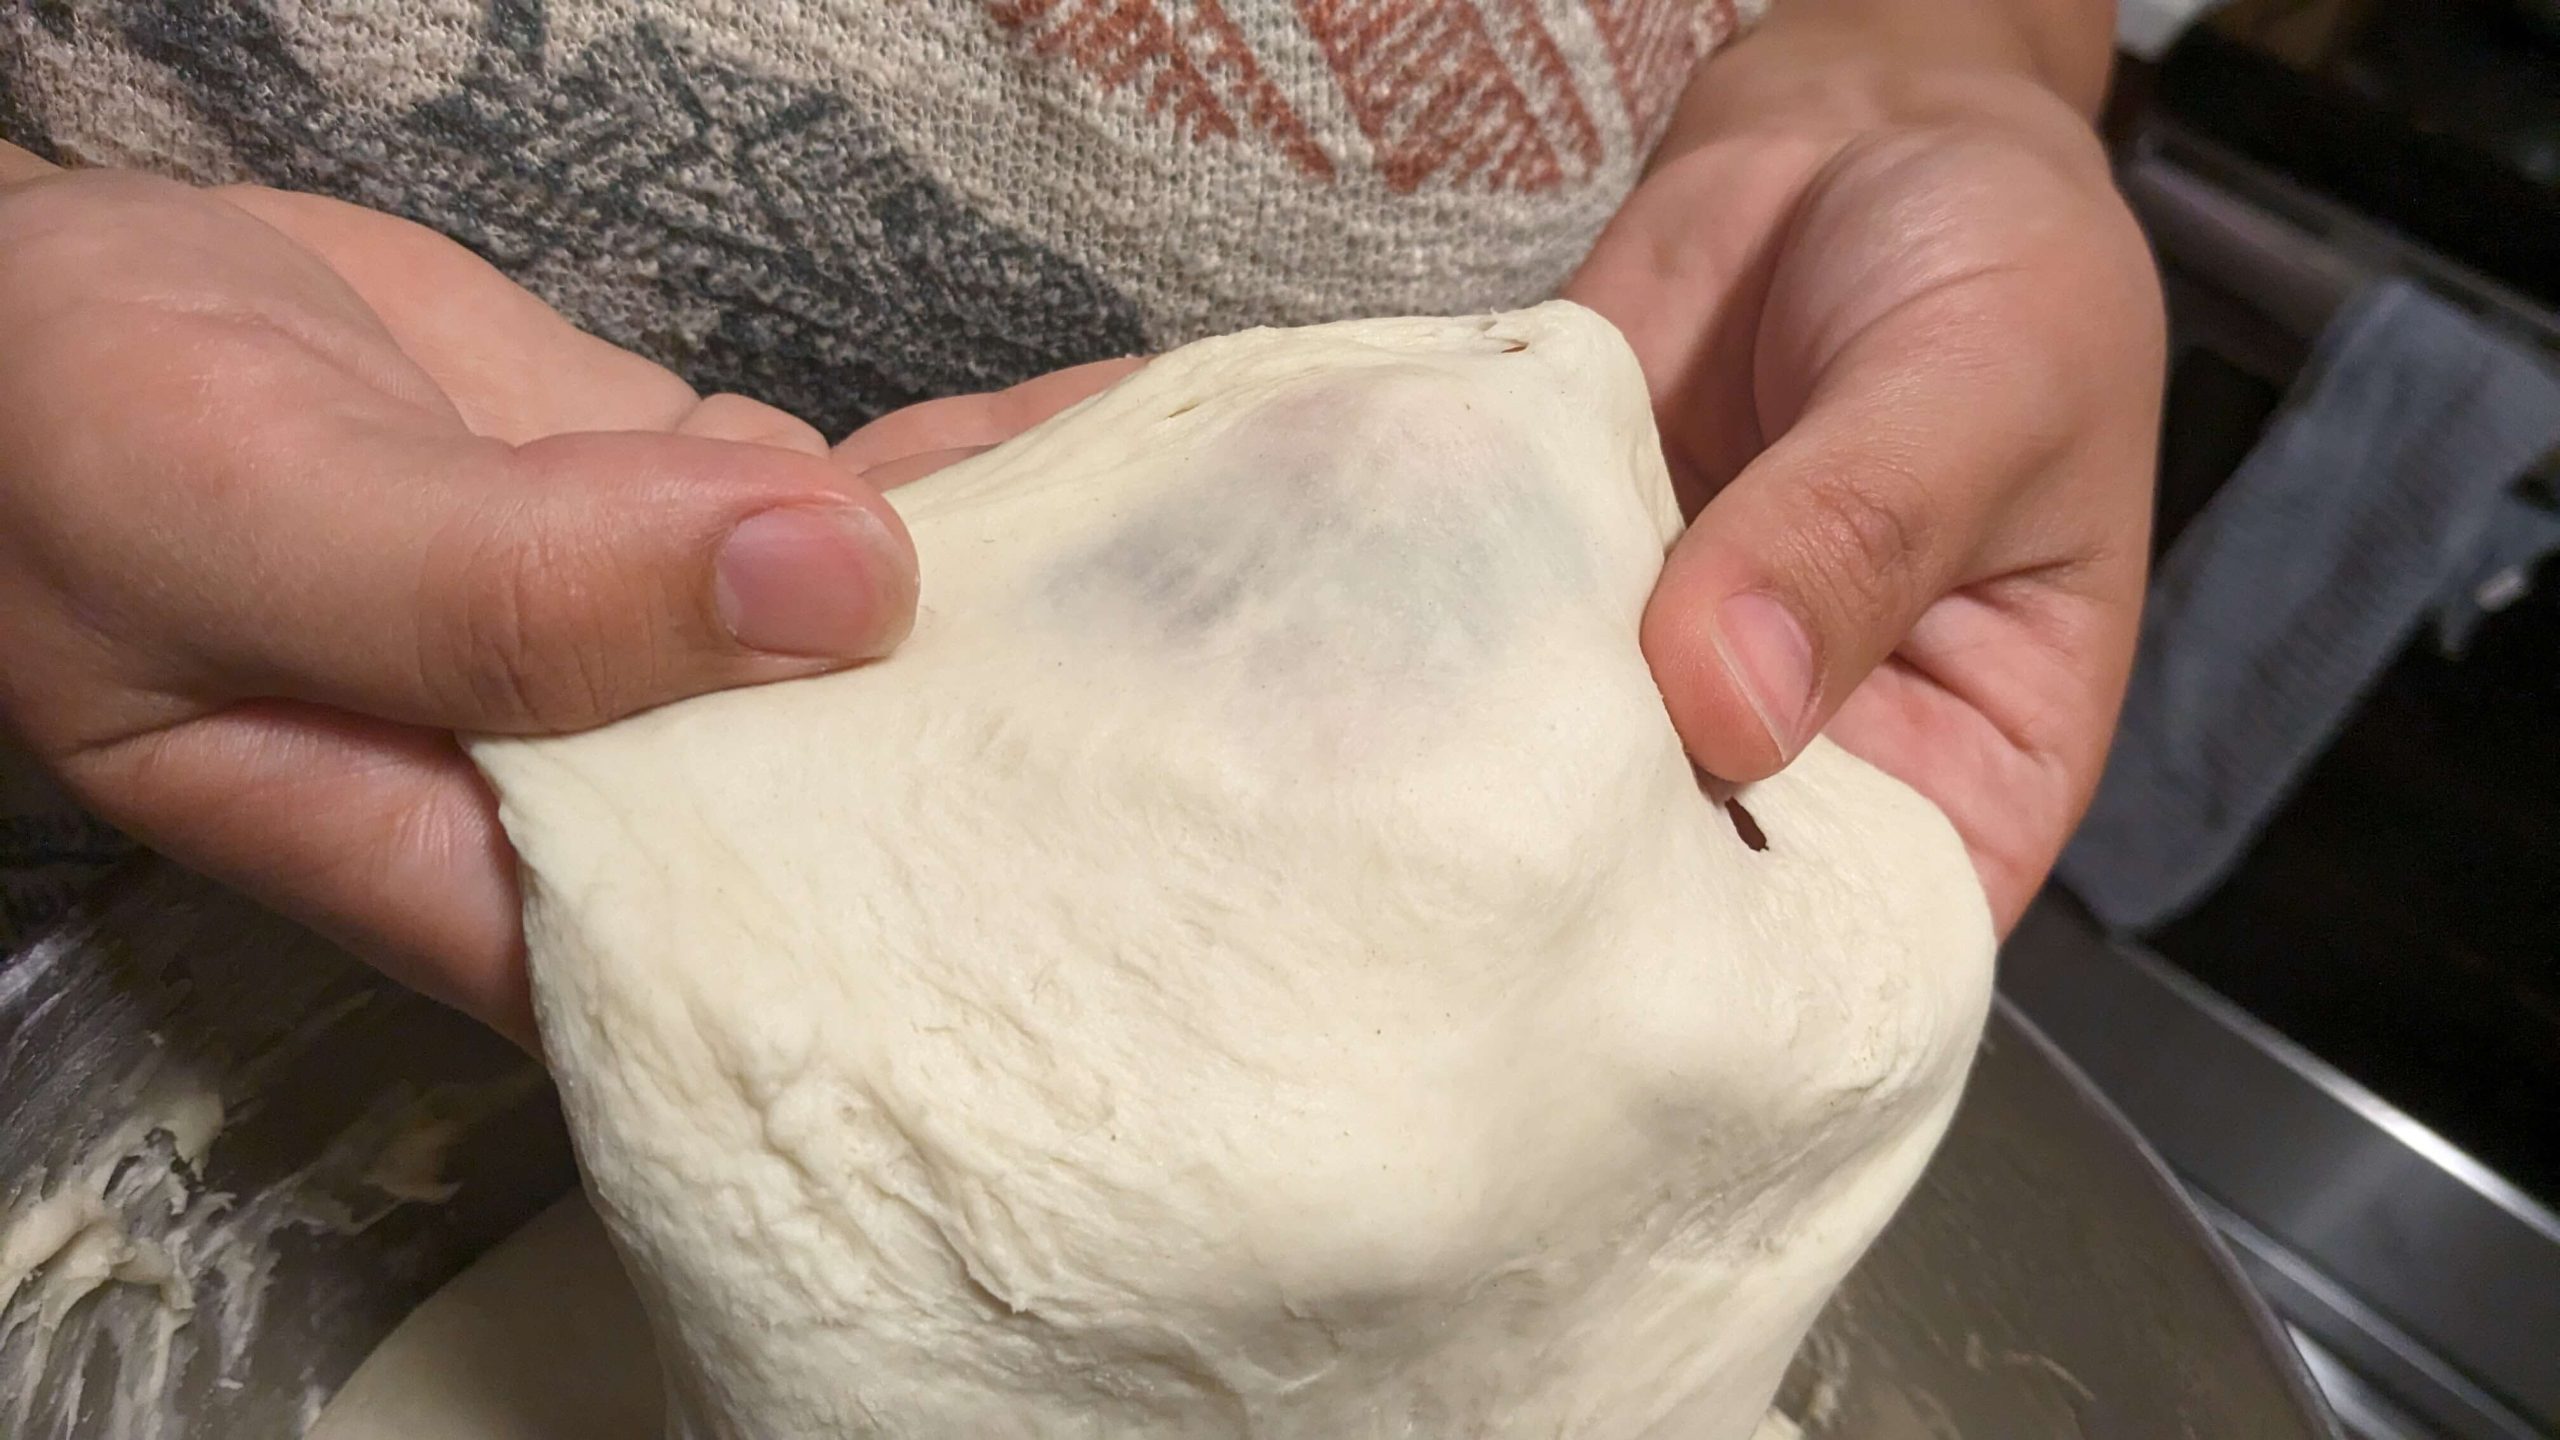
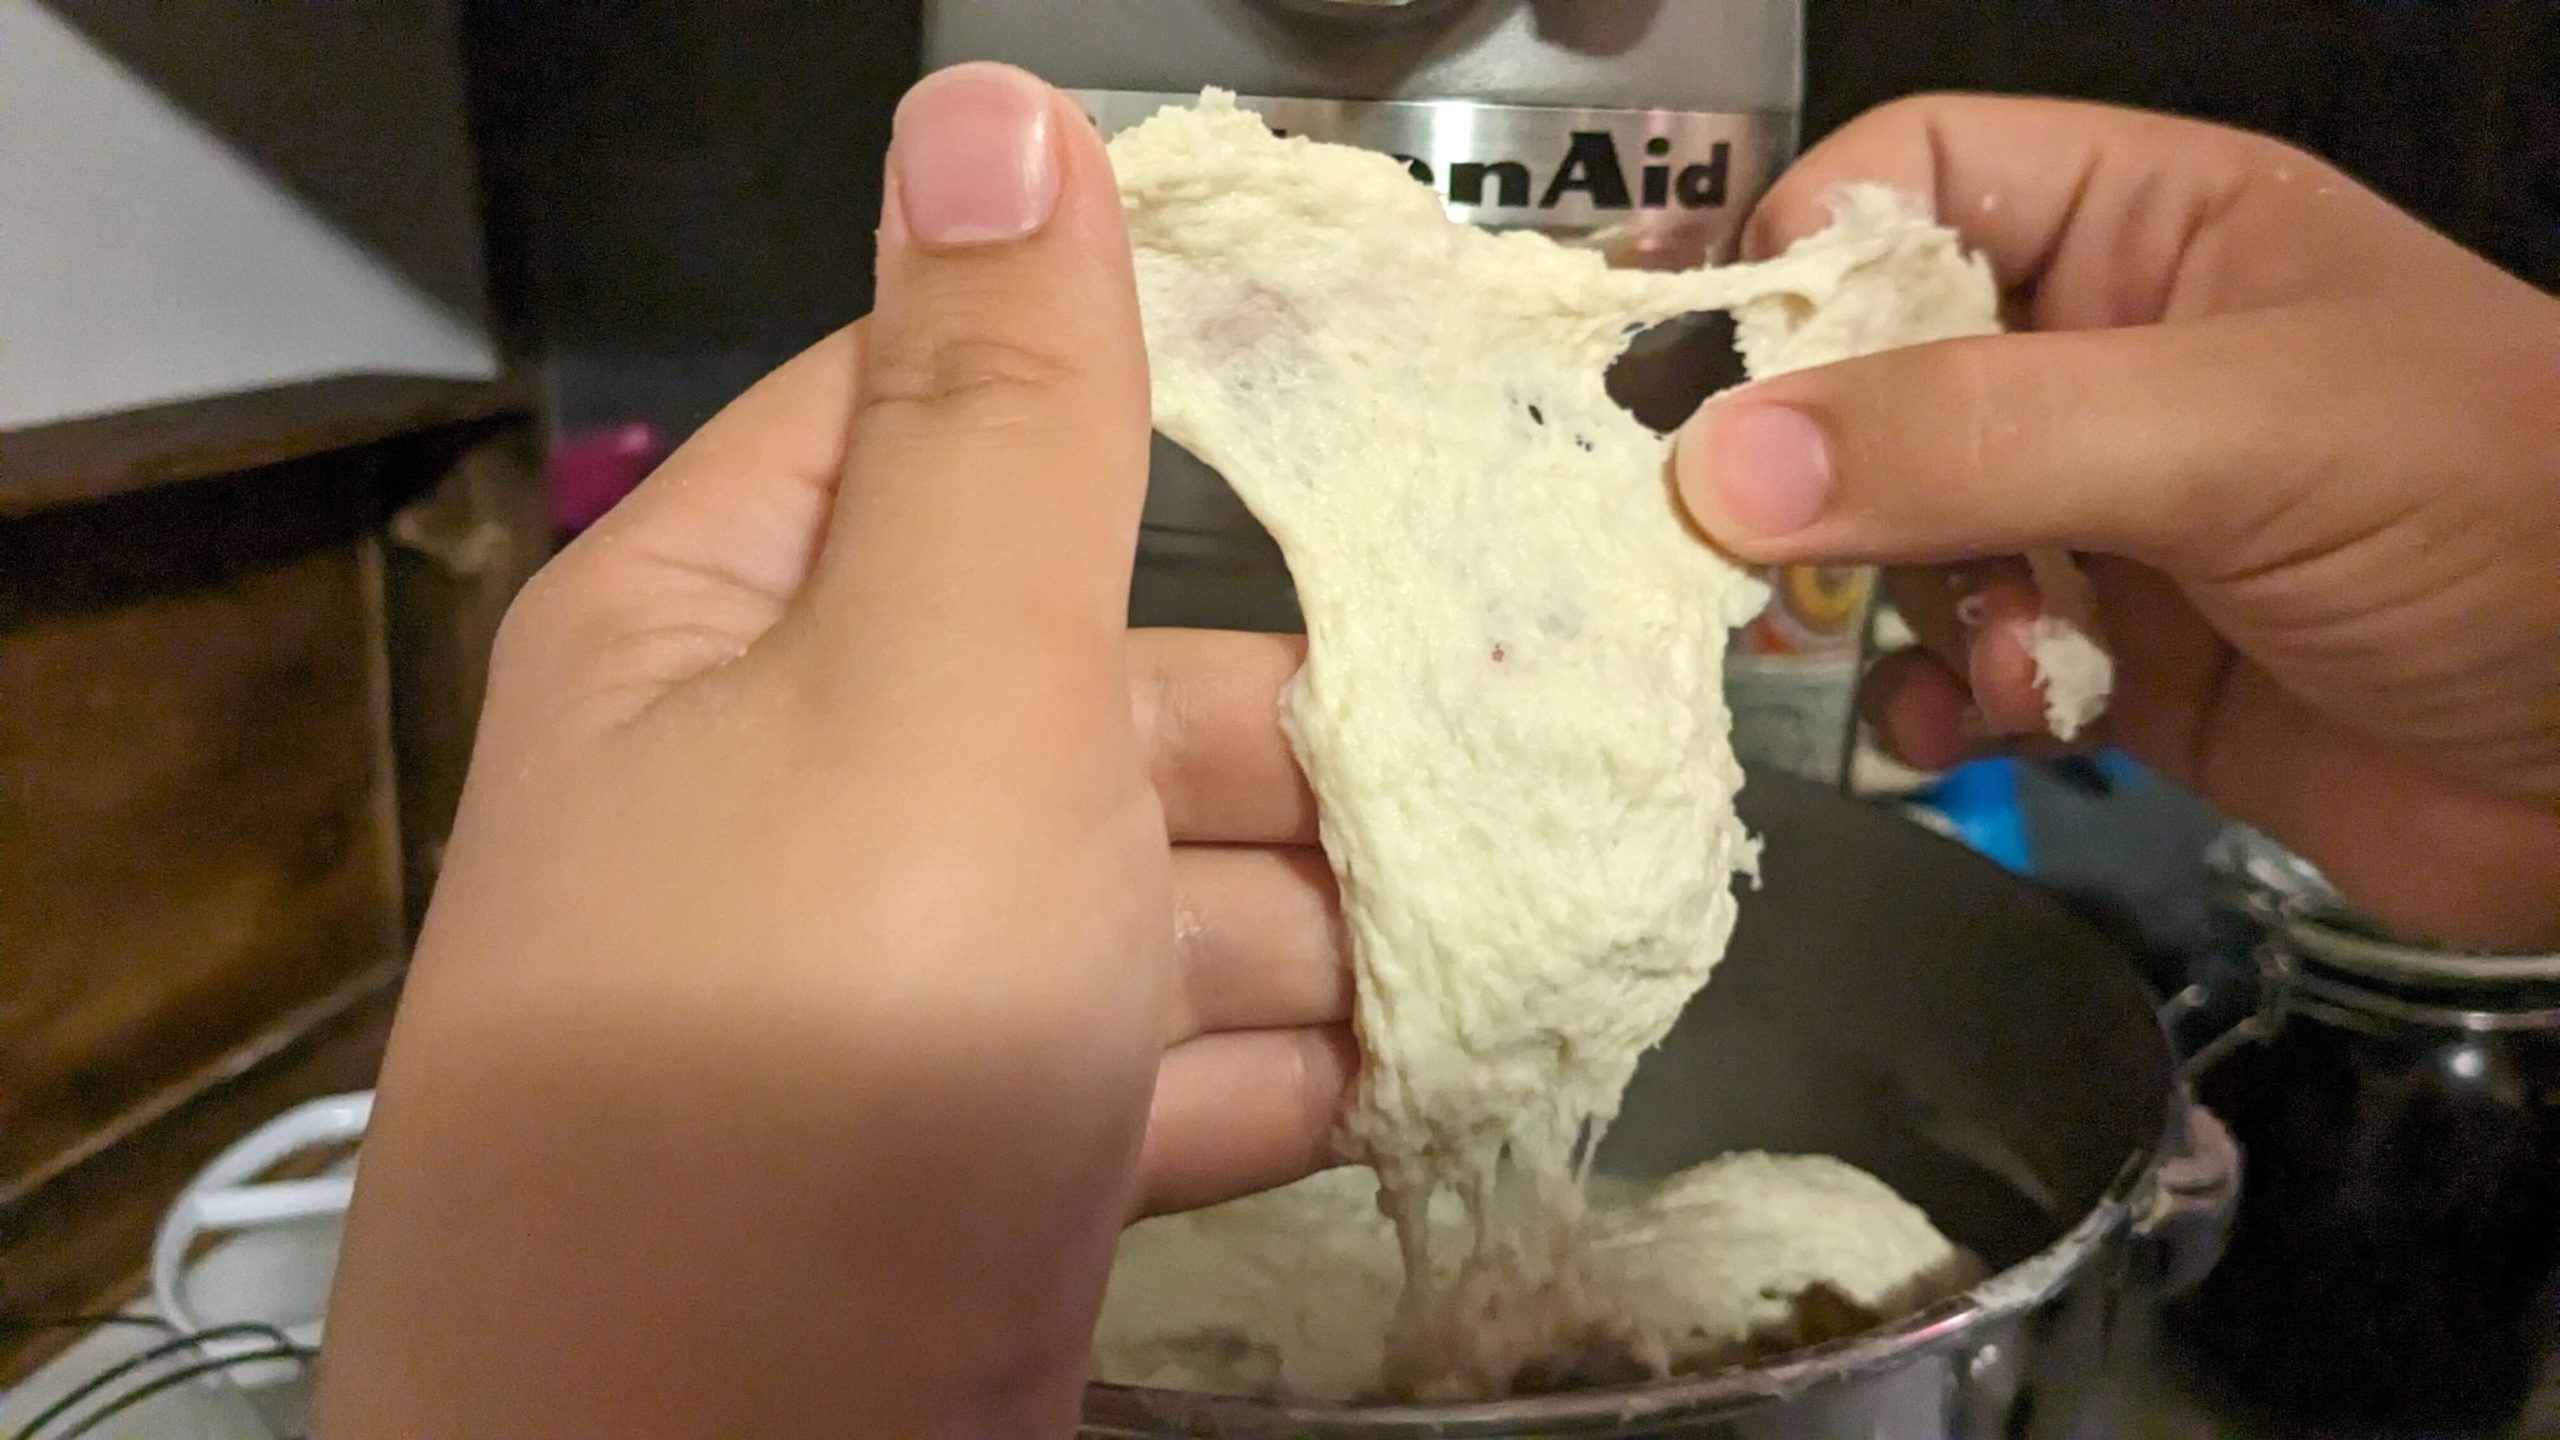
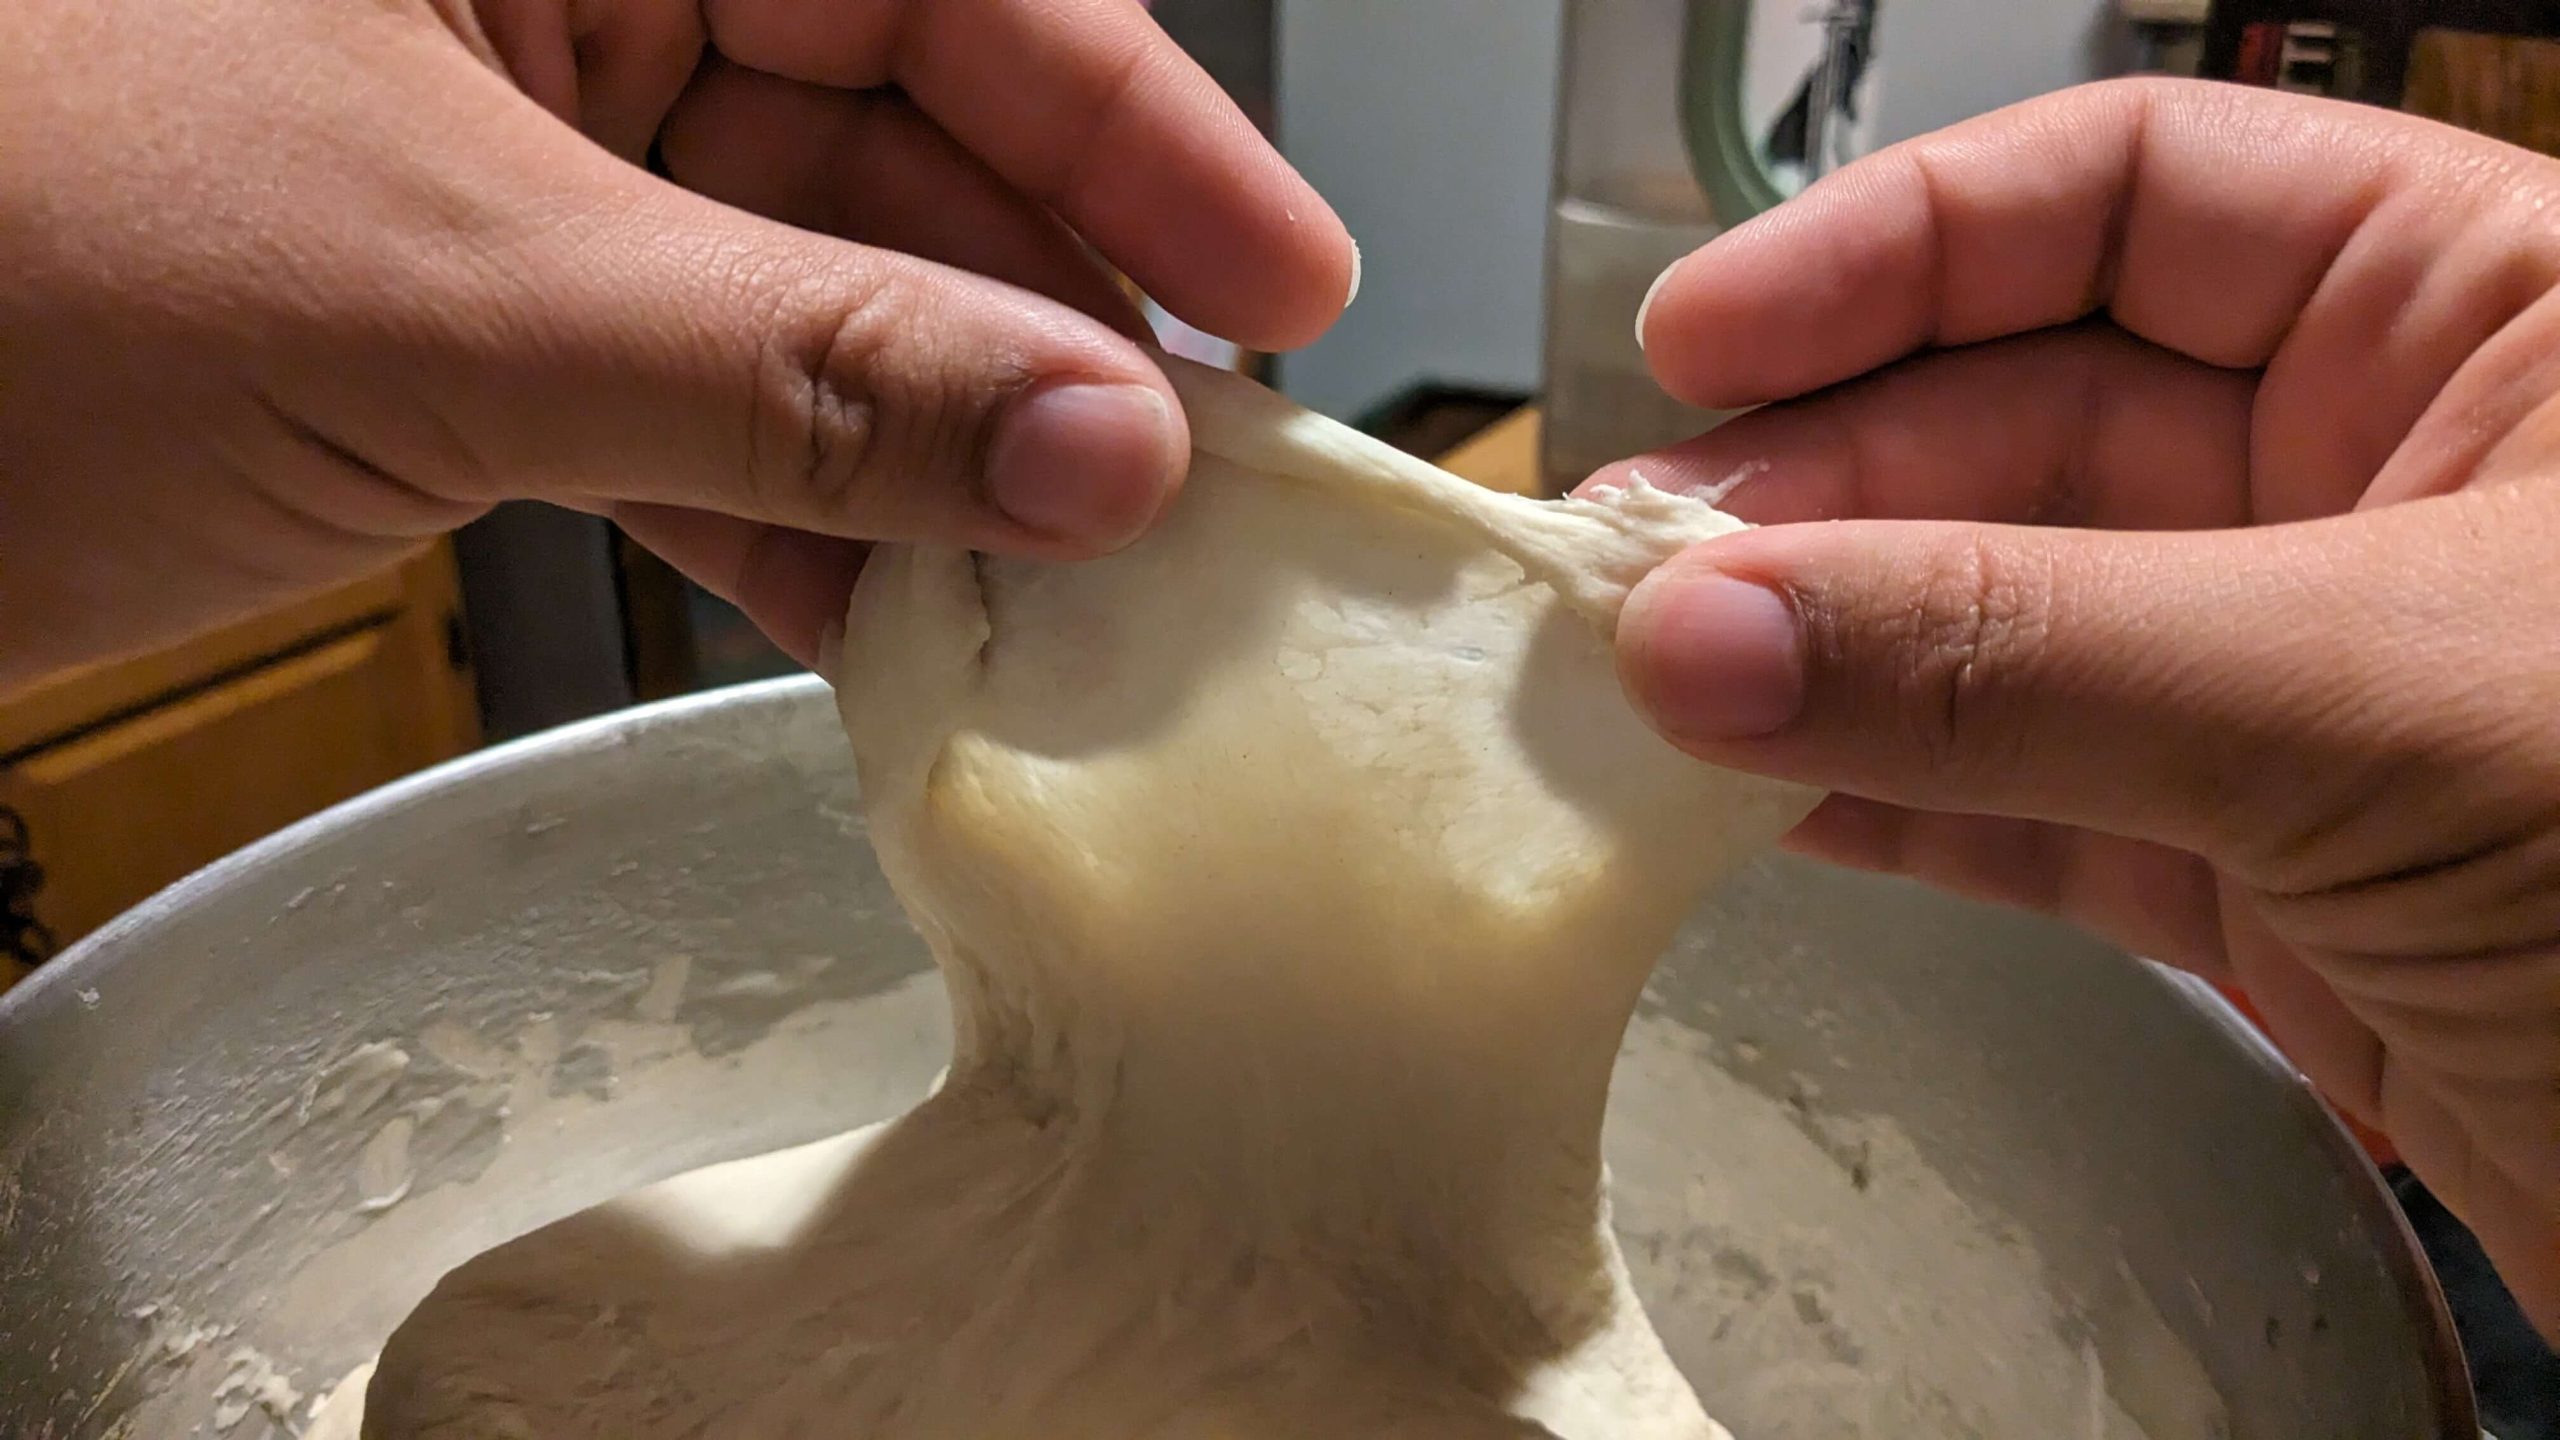
And then there is one final photo where you can see the light passing through the dough really well. This is what it looks like when your dough has passed the windowpane test.
And here’s a picture of sourdough sandwich loaves after they have been baked. These loaves passed the windowpane test and then bulk fermented for 12 hours before baking. 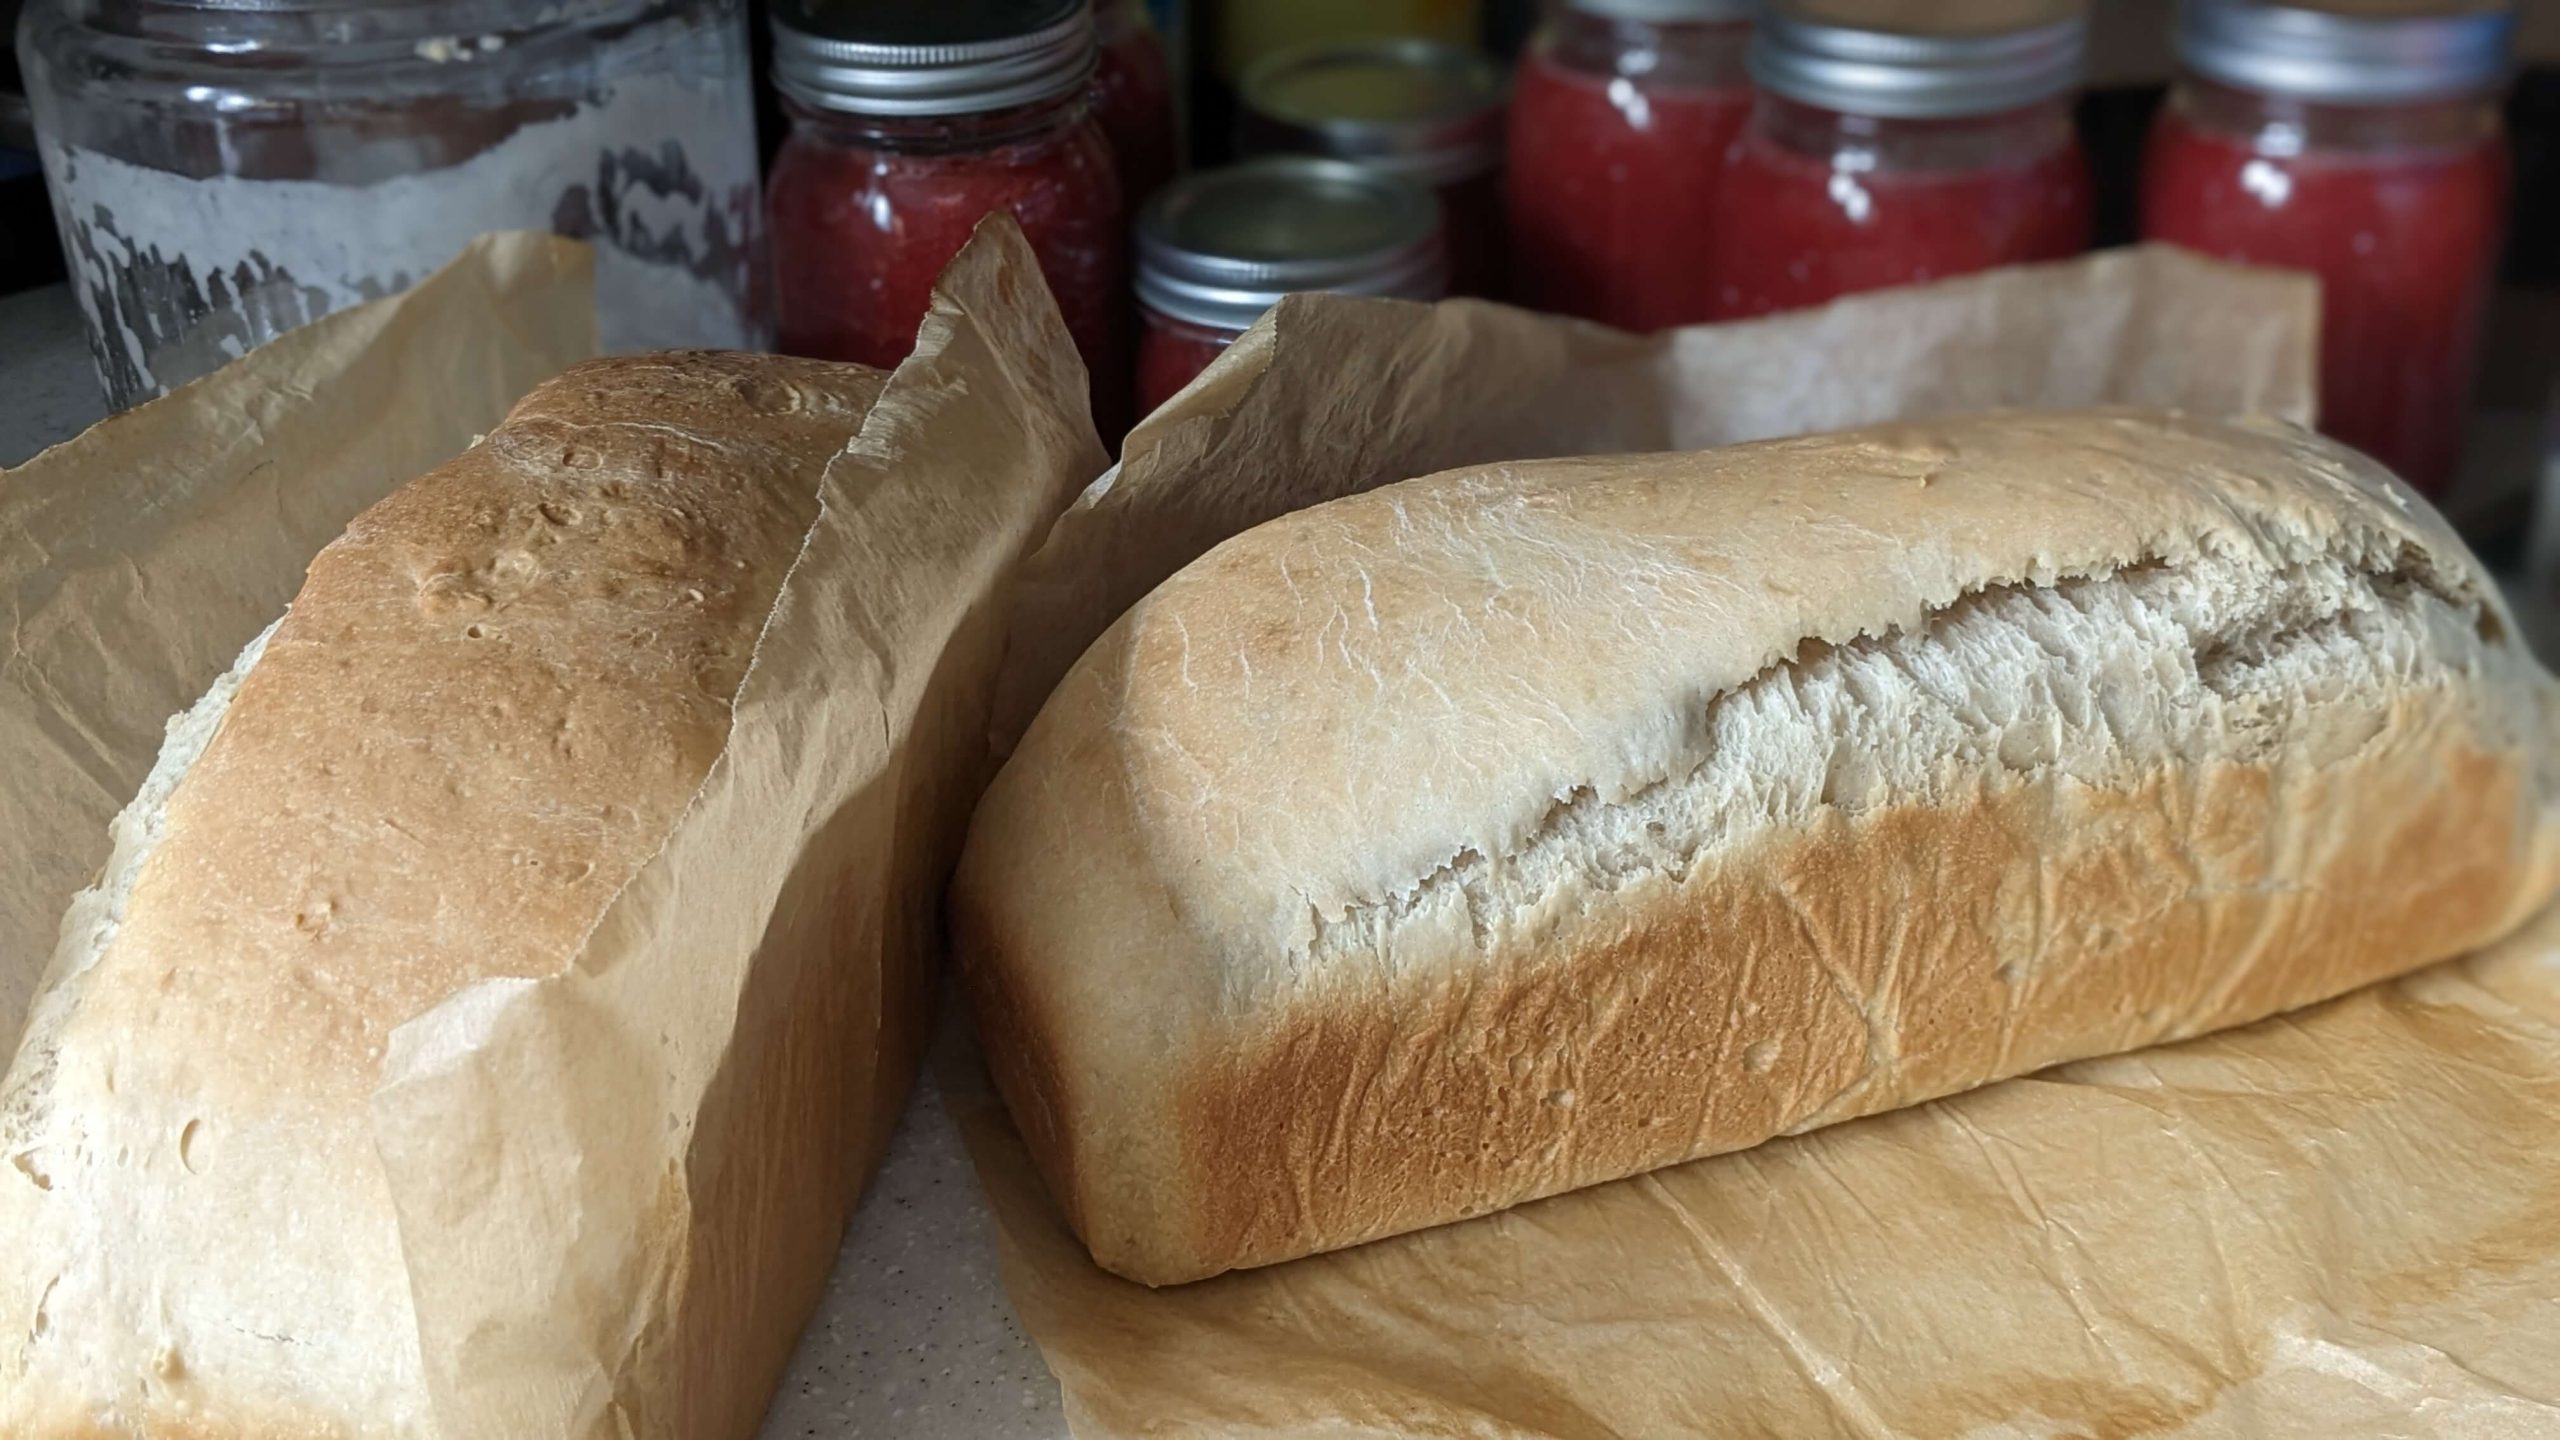
What is your experience with the windowpane test? Did these pictures offer clarity or mirror your experiences? Let us know in the comments below!
Wow! I finally know what the infamous “window pane test” is supposed to look like 🤣
It was confusing to me until I had a visual. Hope this is helpful!