
Since creating my own starter in October of 2021, I have made hundreds of loaves of sourdough bread. My first several batches did not turn out well, but that was because my starter was immature. I also didn’t really know what I was doing. I needed a visual step-by-step guide to making an artisan sourdough loaf. Unfortunately, I never found one that I felt was helpful.
After a lot of practice, my sourdough loaves come out the way I want them to most of the time. I find it to be a relaxing and fun process to make it. This is the step-by-step artisan sourdough loaf post that I needed when I was first starting. Hopefully, it’s helpful to you!
Initially, it can be overwhelming and discouraging if you’re not seeing the results that you want, but like most things, it does take practice. Read on for my artisan sourdough recipe and the tips that I use to successfully make my sourdough loaves.

Can you make sourdough bread if you don’t know a lot about it?
Absolutely! Like I said, I’ve been making sourdough bread for 2 and 1/2 years which isn’t necessarily a lot of time in the world of sourdough, but my loaves come out successful. Plus, everyone who eats it enjoys it.
The thing is though, I do not use the correct terms, I am not perfect with my measurements, my time is rarely planned out perfectly, and I use the ingredients I have on hand. This means I don’t use organic flour typically, I sometimes have to use bleached flour. I also never use bottled spring water or anything other than my tap water.
The sourdough community online can be really intense. There’s fantastic information that is helpful but sometimes all the information and the rigid rules can become overwhelming. This recipe is a very basic one that allows you to not be perfect or precise in the process.
Here are some common sourdough questions before I get to the recipe:
What is artisan sourdough bread?
Sourdough bread is bread that is a healthier option than traditional white bread or store-bought bread because it is easier to digest. Sourdough bread uses wild yeast, instead of baker’s yeast, and lactic acid to help the bread rise. Artisan means that something is made in a traditional, non-mechanical way.
Is sourdough bread hard to make?
It’s not harder to make than other bread, but it takes more patience and planning.
What ingredients do you need to make sourdough bread?
What’s crazy to me is that you only need flour, water, salt, and an active sourdough starter to make sourdough bread. I don’t have a post about making your own sourdough starter. You can find some great resources like Pro Home Cooks on YouTube or Farmhouse on Boone’s blog.
What special supplies do you need to make sourdough bread?
For my recipe, you need a kitchen scale like these on Amazon. A Dutch oven that can be used at 500-degree heat, I use this one. You will also need bannetons (also known as proofing baskets) or bowls lined with towels for the final proofing.
I also use a Danish dough whisk and a bench scraper that are included in the banneton set but you can get them individually if you would like or you can go without, they aren’t necessary but definitely convenient.
I also use a razor to score my bread, you can use a razor ( the banneton set comes with razors and a wooden lame) or a very sharp knife.
Can you freeze sourdough bread?
This recipe makes two loaves, which our family can go through in 2 days. I understand though that that’s not the case for everybody. if you would like to freeze sourdough bread you absolutely can and the method that I have found to be the most convenient is slicing the whole loaf once it has been cooled, separating each piece by a small piece of parchment paper, and then putting the whole loaf in the freezer. this way you can take out the whole loaf at one time, or individual slices as needed. all that it takes is a few minutes at room temperature to slightly defrost and then you can toast it in the oven or toaster.
What if my sourdough bread doesn’t turn out right?
First of all, take a deep breath and remember it’s okay. It’s disappointing to take the lid off of your Dutch oven and realize you didn’t get the rise, or the elephant ear, or that your bread is a flat disk. Take that as a learning opportunity. Figure out where in the process something went wrong and try again.
What should I do with sourdough bread that didn’t turn out right?
Sometimes if the bread is gummy or dense we will still eat it but with more butter or jelly than usual. You can always turn failed sourdough bread into breadcrumbs orr cut it up for sweet or savory frittatas.
Some of the links below are affiliate links. This means that, at zero cost to you, The Homesmiths will earn an affiliate commission if you click through the link and finalize a purchase.
Recommended supplies for artisan sourdough:
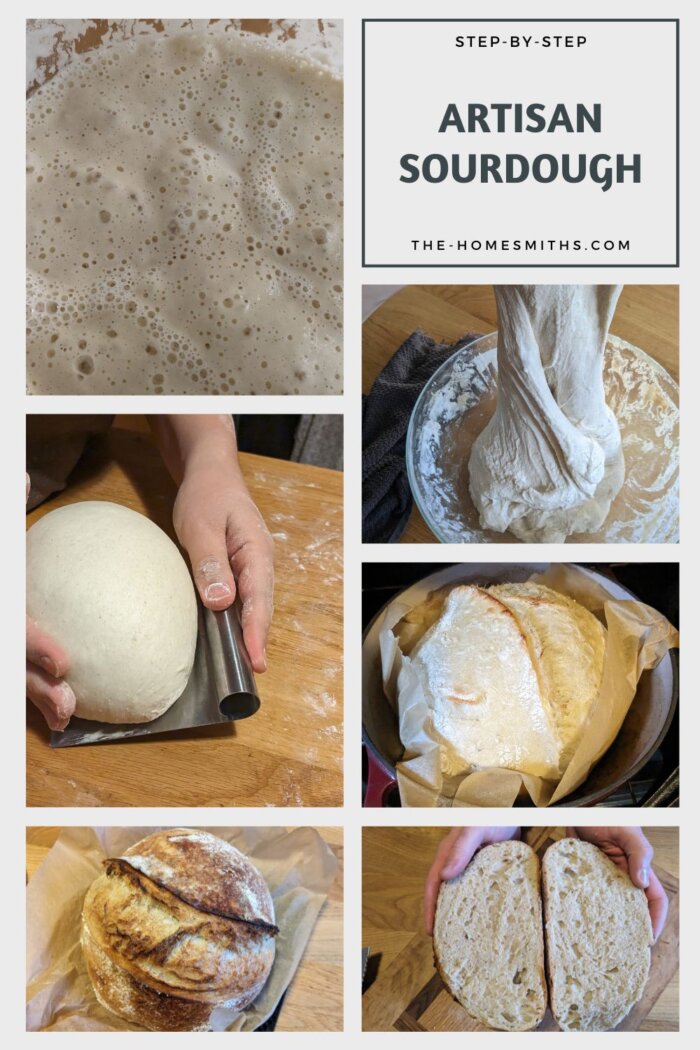
Artisan Sourdough Bread Recipe and Step-by-Step Instructions
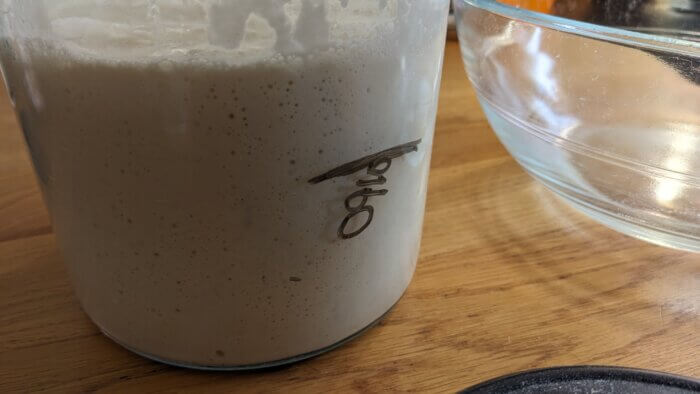
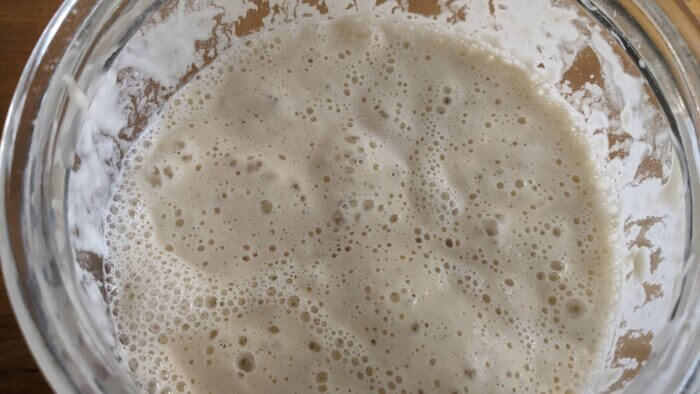
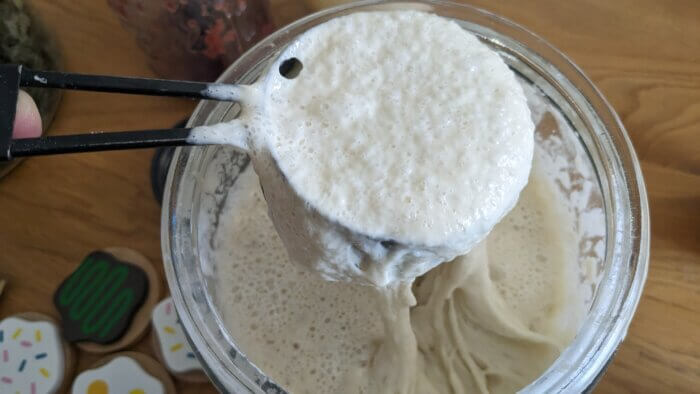
Make sure that your starter is active and bubbly. This is the first step.
Autolyse:
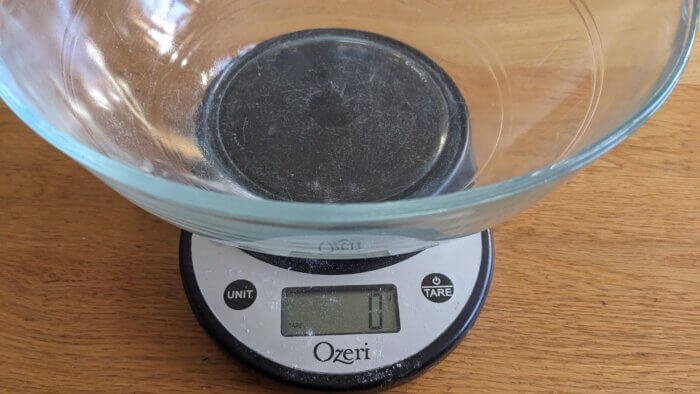
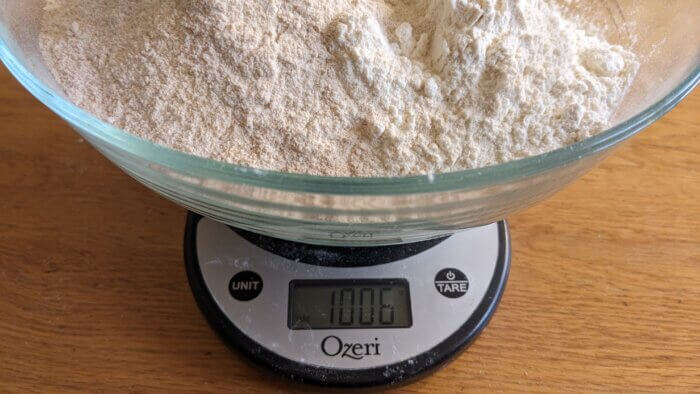
The next step is called autolyse which is when you let the flour and water sit together for anywhere from 15 minutes to 60 minutes. Using a scale I have placed a clean glass or plastic bowl on, I zero it out (tare) and pour in 750 grams of white flour. This could be all-purpose, occident, bleached, or unbleached (I’ve used all of these). And then add 250 grams of whole wheat flour. This brings it to a total of 1,000 grams of flour (I have successfully made this bread with 50 grams over or under of flour).
Zero (tare) the scale again and add 650 grams of room temperature water. (I have successfully made this bread with up to 50 g more of water, but more than a total of 700 grams of water will make the bread more difficult to roll and form due to the high hydration). If you are not comfortable trying to get that amount of water in without going too much over, just use a different container. Zero it out and measure out the 650 grams of water and pour that into the bowl of flour.

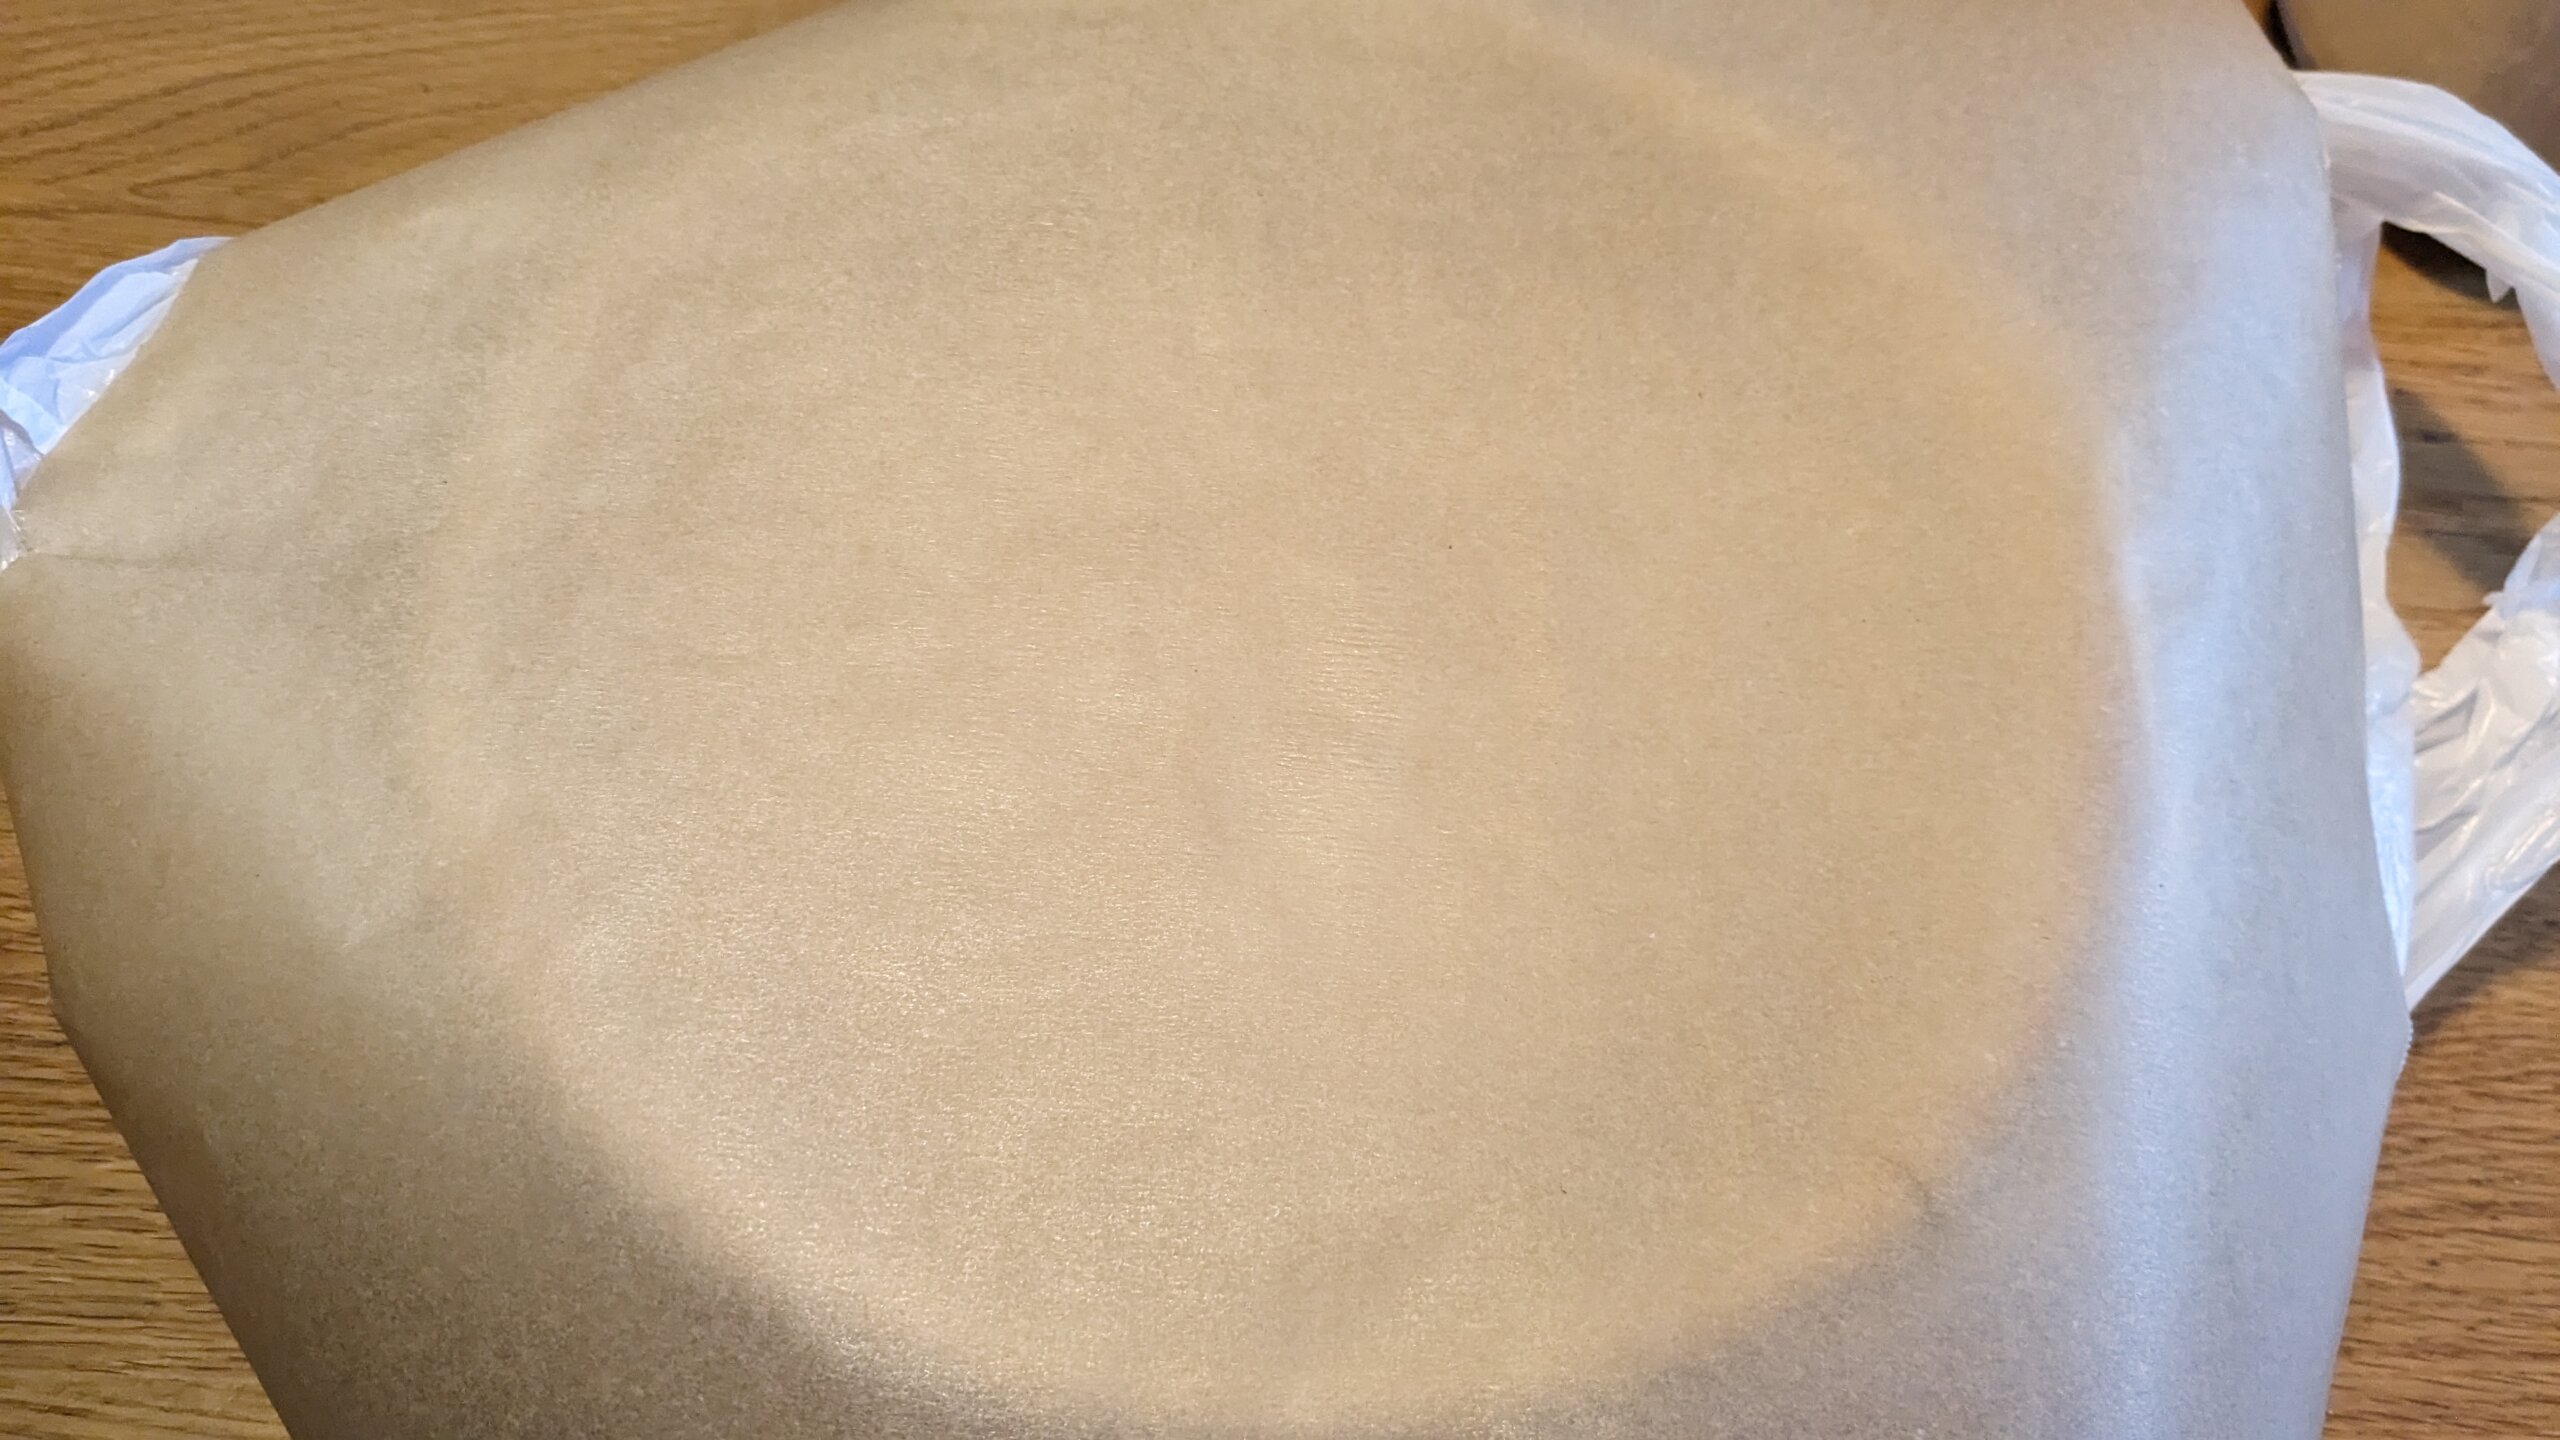
Mix the water and flour together with a dough whisk, your hands, or a wooden or silicone spatula. I then wet a dish towel, ring it out, cover the bowl, and let sit for 15 to 60 minutes.
Forming the dough
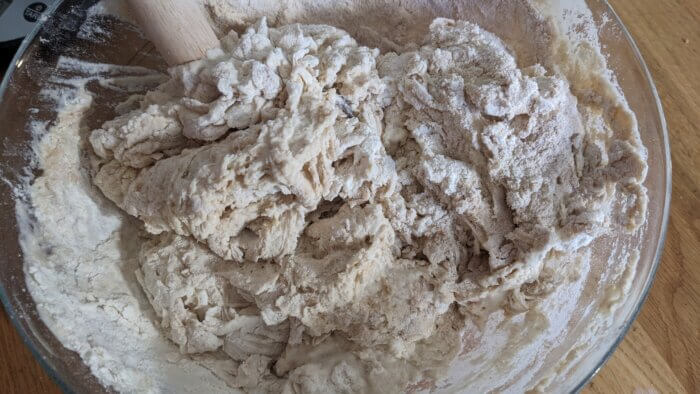
After 15 to 60 minutes have passed, measure out 18 to 20 grams of salt, and 250 grams of bubbly and active starter. (I have successfully made this bread with up to 50 grams more of starter, but not more than 300 grams). I add these directly to the bowl after I have zeroed out the scale. Again, if you are uncomfortable, just measure it out into an empty bowl. Then pour that into the flour and water mixture. Some people will incorporate the salt fully before adding the starter. Doing that isn’t recommended though as salt can affect your starter’s ability to rise. I’ve done both and not noticed a difference.
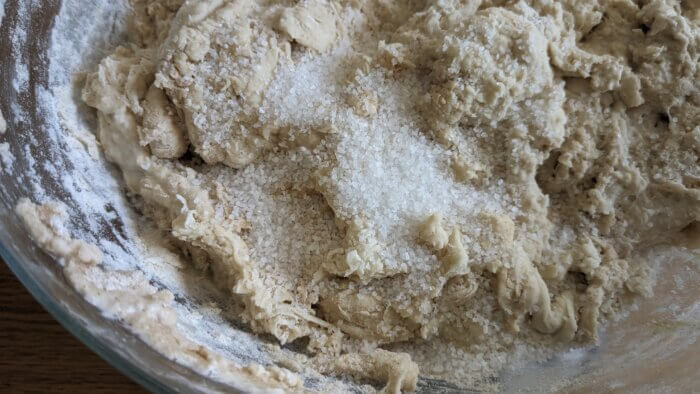
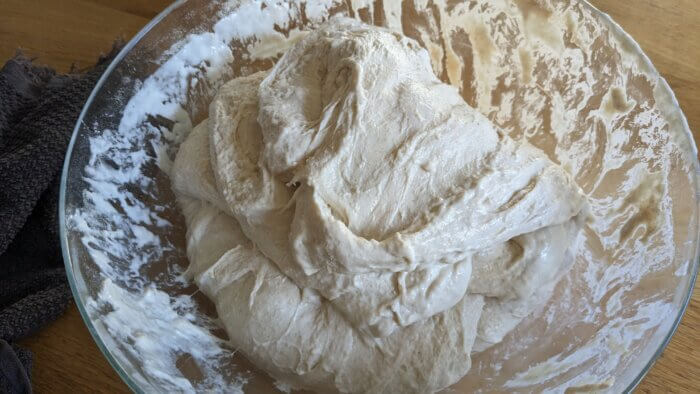
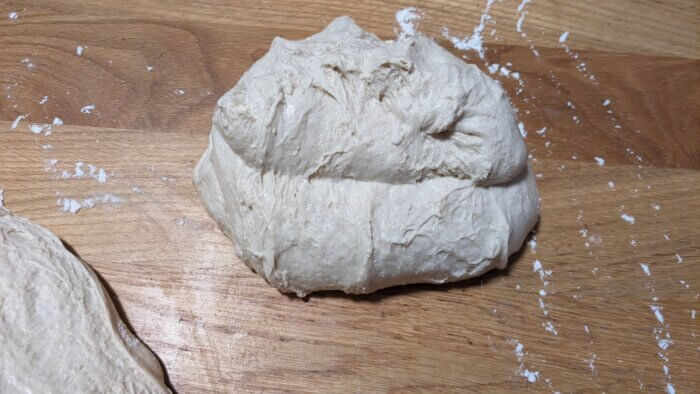
Combine using the dough whisk, your hands, or a wooden or silicone spatula. This will be a shaggy mixture and probably will not resemble dough quite yet. Cover with a damp towel and let sit for 20 to 30 minutes.
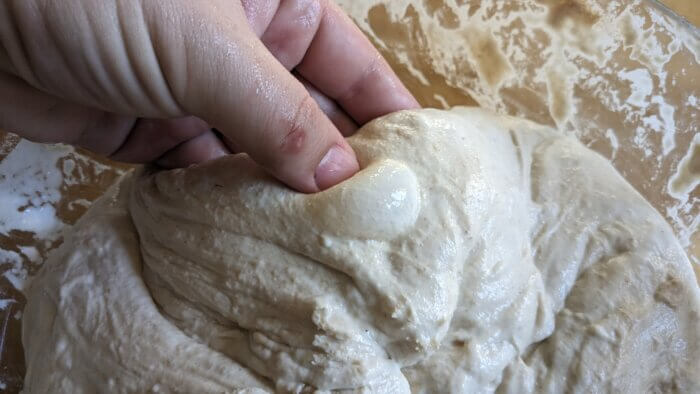
Stretch and folds:
The next step is called stretch and folds. Some people do stretch and folds and some people do coil rolls. Some people do both. I just do the stretch and folds.
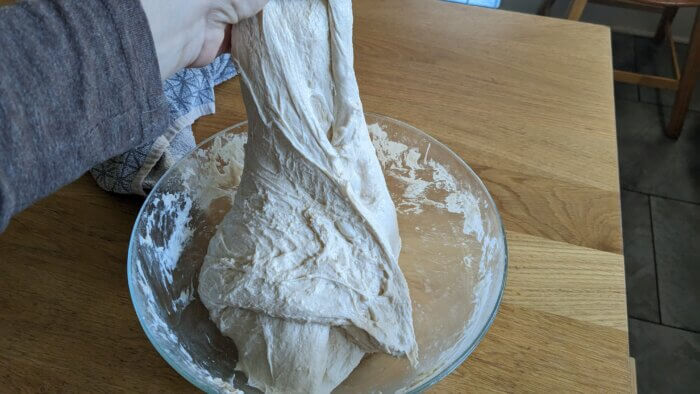
For the first few sets of stretch and folds, I use my dough whisk. Once the mixture is more of a dough, I use my hands. If you do not have one, I thoroughly wet your hands and then do the stretch and folds.
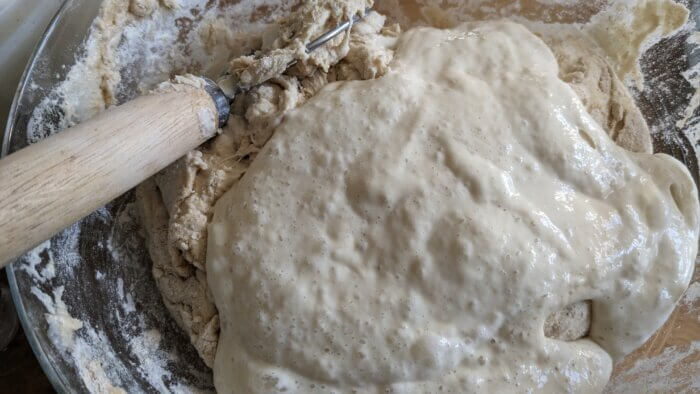
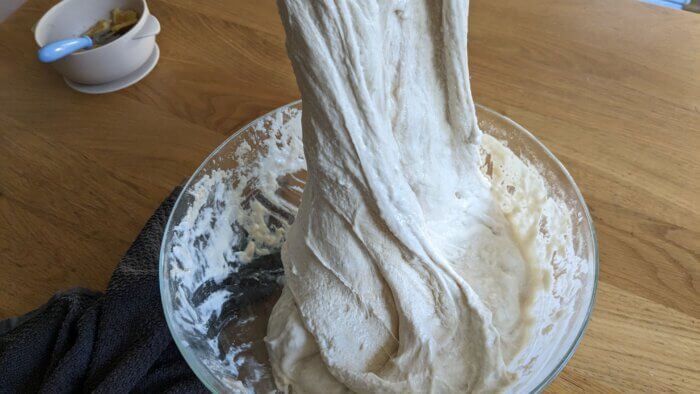
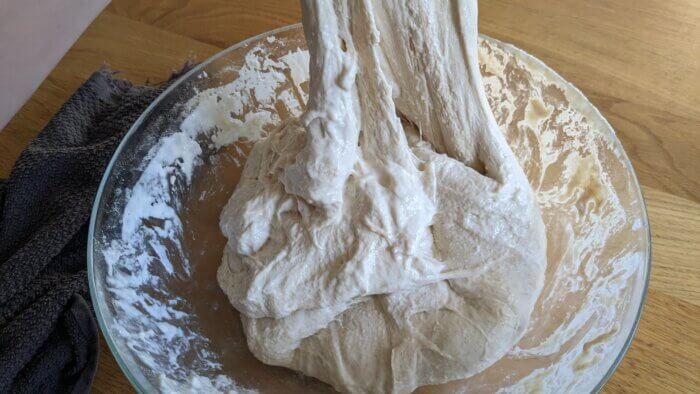
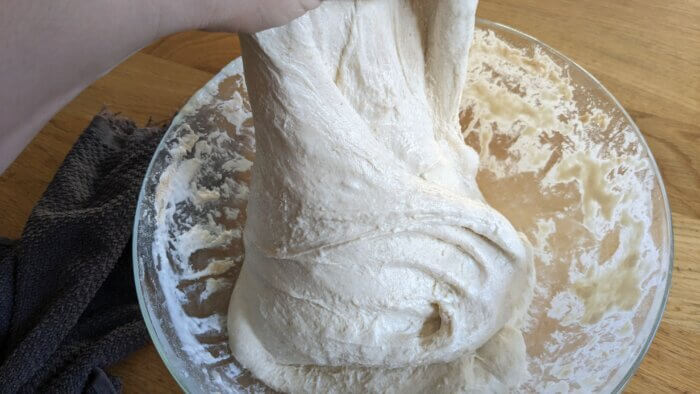
Stretch and Fold #1, using a dough whisk.
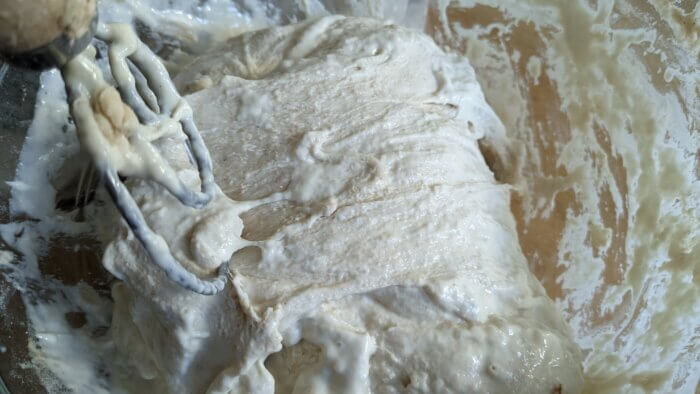
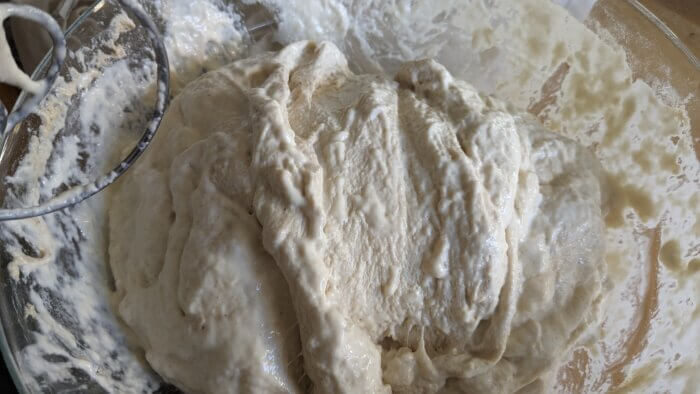
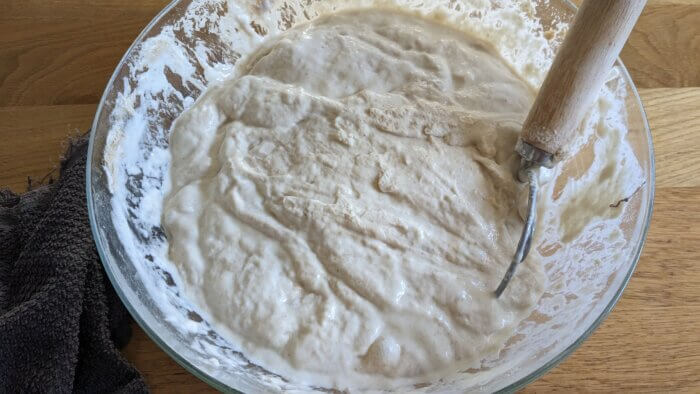
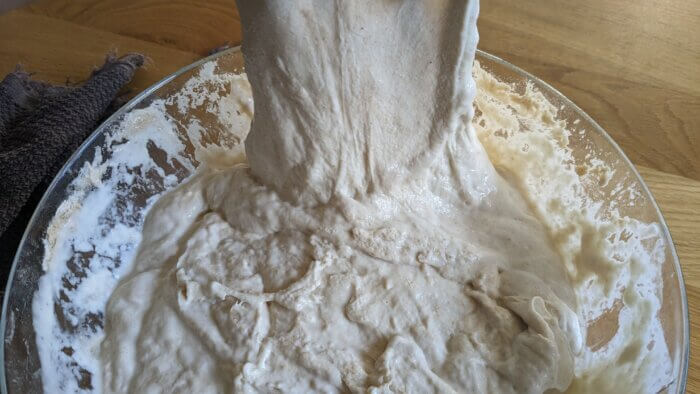
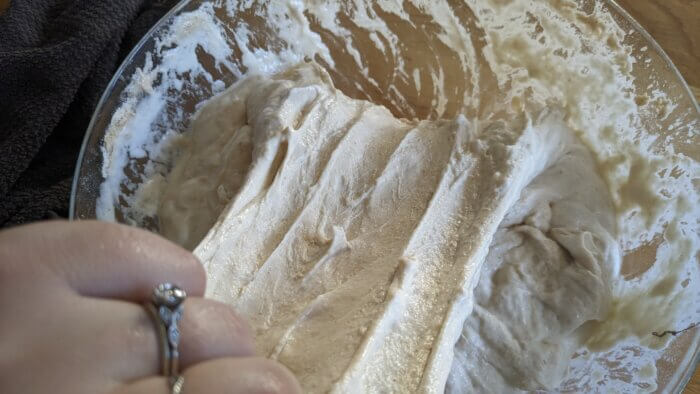
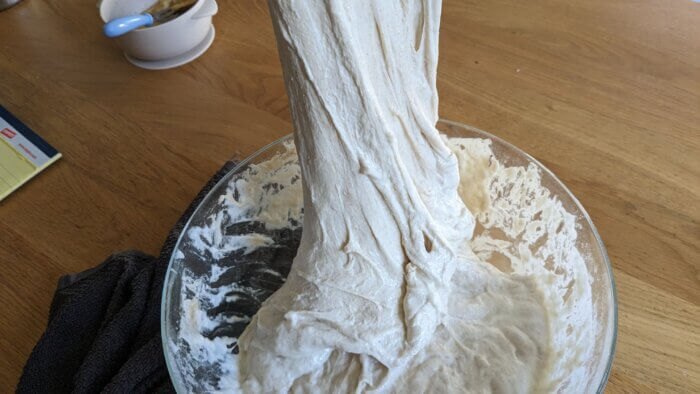
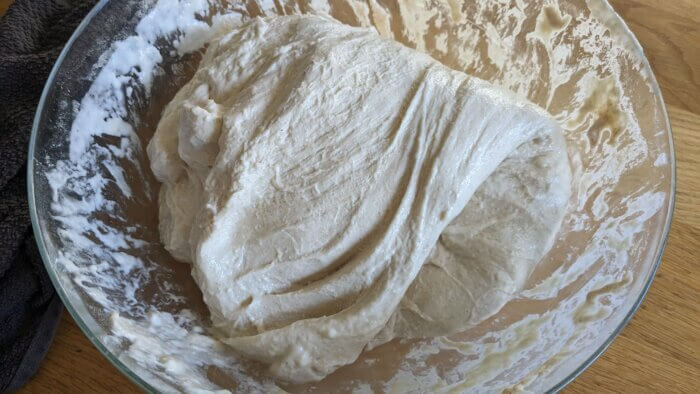
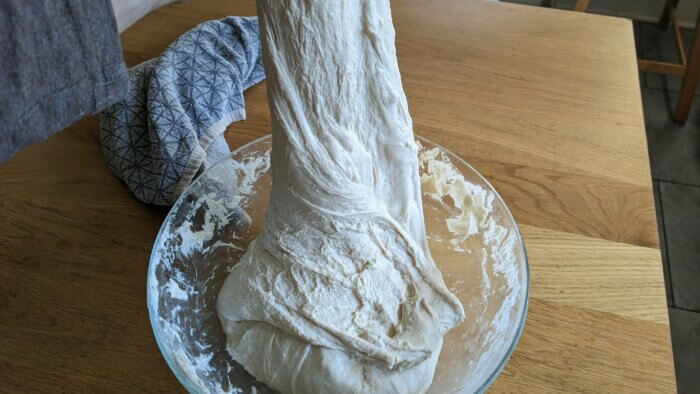
To do a stretch and fold, all that you do is with your hand or your whisk you start at the top of the bowl, pull the dough up (stretching it), and then fold it onto itself. Then do a 90° turn of the bowl and stretch the dough on top of itself again. You do this a total of four times until the dough has been pulled and folded on itself four times. If it’s a few more times than that that is fine. You will notice though as you keep going, the dough will become stiffer and less stretchy. This is the gluten developing. After this, cover the dough with the damp towel again (re-wet and wring out the towel if you need to). Repeat the series of stretches and folds about four times, waiting about 20 to 30 minutes in between.
Second Stretch and Fold
Third Stretch and Fold
Fourth Stretch and Fold

Fifth Stretch and Fold
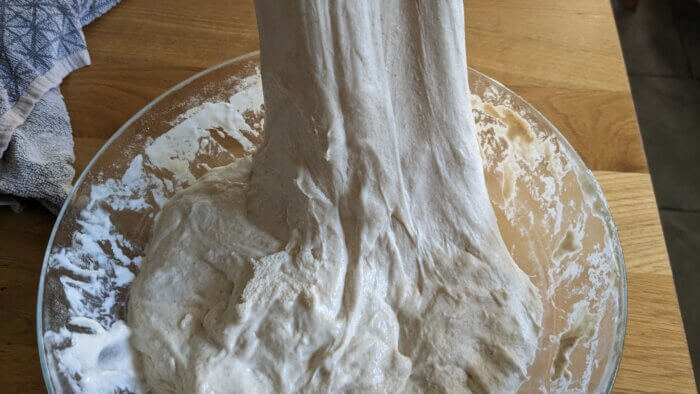
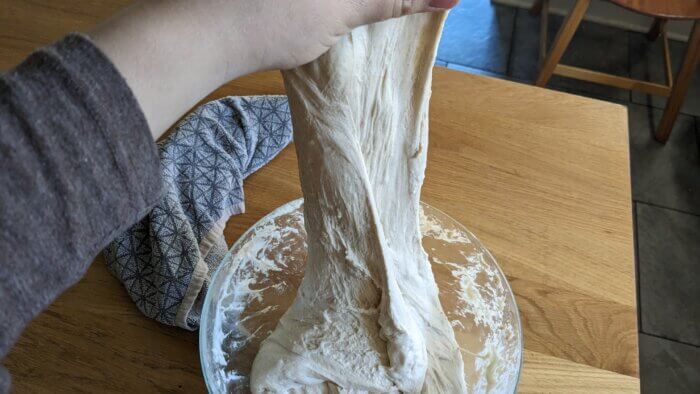
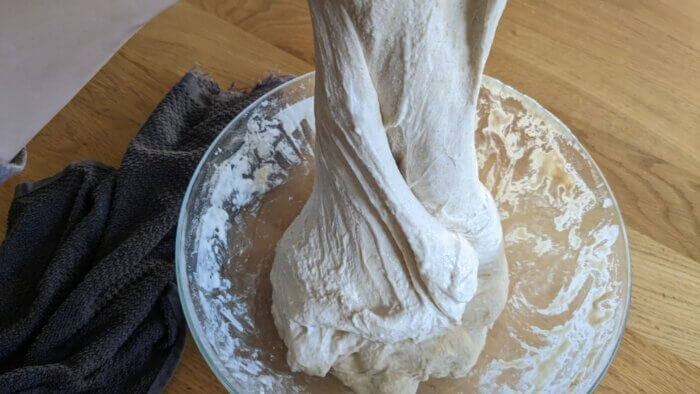
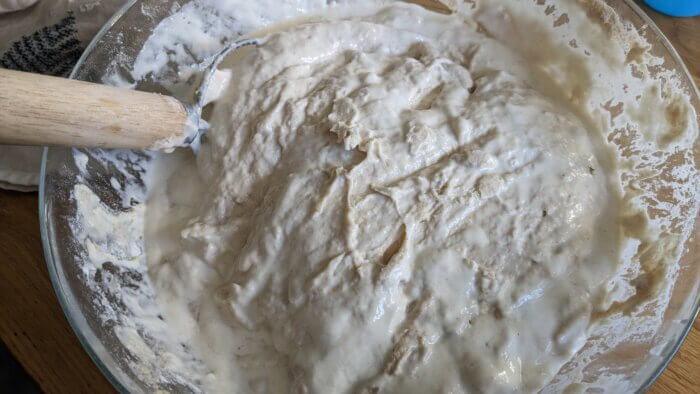
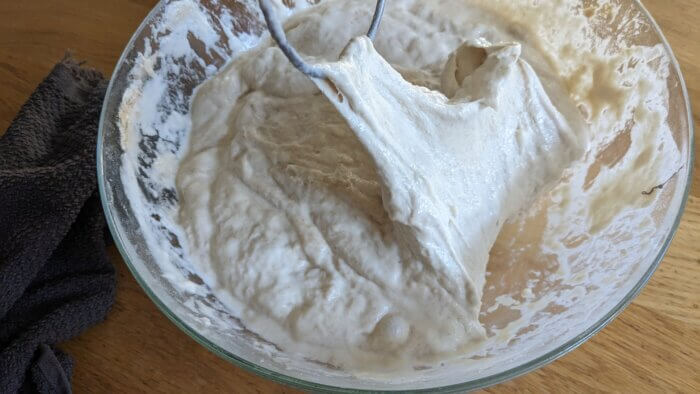
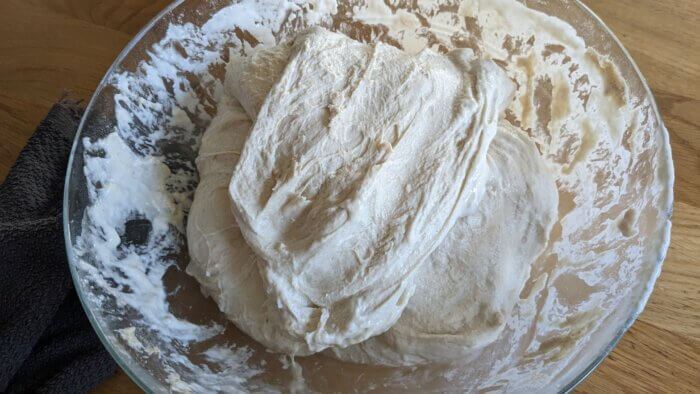
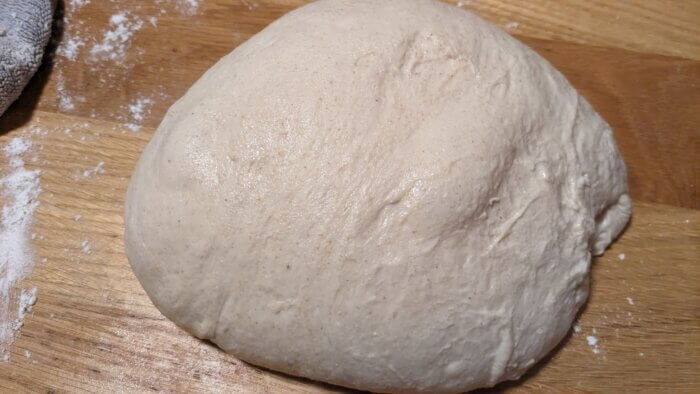
In the series of pictures above, you should be able to see at least a slight difference between each set of stretch and folds. However, when comparing a photo from the beginning and end, you can see a noticeable difference in the appearance of the dough. (See below)
Comparison from before #2 stretch and fold to during the #5 stretch and fold.
Bulk Rise:
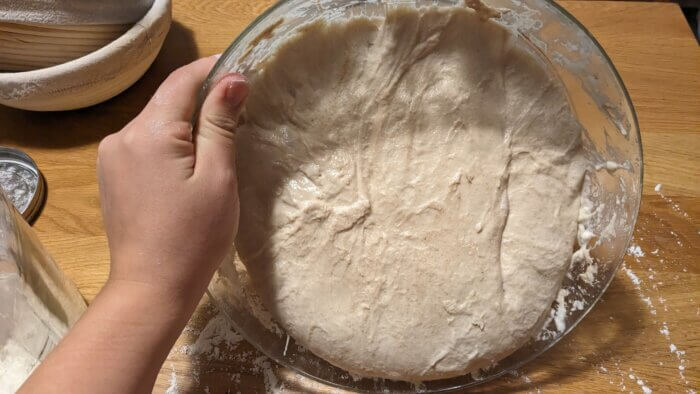
The next step is simple. It’s called a bulk rise and your goal is to have your bread dough double in size. I don’t always aim for a doubling, I want it to be at least 50% bigger than it was. The best way to measure this is to put the sourdough dough in a clear glass bowl. Mark where the top of it is with a wipe-off marker, rubber band, sticky note, or a piece of tape.
Then cover the bread with the damp towel and place in a warm spot for 4 to 8 hours. Being patient in this step is the most important for success in my opinion. For the most part, if my bread fails to rise or is very dense, it is because I did not let it bulk rise long enough. You will know that you have achieved the bulk rise when you have a greater than 50% growth. The dough should bewant to see it up to double its original size. You don’t want it to more than double, because then it’s over-proofed.

An over-proofed bread dough is a lot harder to manipulate into the shape of bread dough. It can quickly become a sticky sloppy mess that also doesn’t rise well in the oven. If you believe that you have over-proofed your dough, you can try to shape it and bake it anyway, or you can turn it into focaccia. (I’m hoping to work on a recipe for sourdough focaccia soon).
Consider temperature during your bulk rising phase. If the area that you are bulk rising in is below 65 to 70 degrees it will take significantly longer for your bread dough to double in size. If you are bulk-rising your bread dough in a warmer area above 70 degrees, you will want to check on it after 3 hours. Check every 30 minutes afterward if it’s not done. This means that your bread dough can take drastically different amounts of time to bulk rise depending on what’s going on in your house and what time of year it is. My kitchen does not have heat, so in the winter, it will take close to 8 hours to bulk rise. That is unless I’m cooking, and then because my oven is on, my bread dough will rise in closer to 4 hours.
All of this to say, the first couple of times that you make an Artisan sourdough loaf, you should watch the bread dough closely. When you are confident in the results and are used to the factors that so strongly affect the bread such as temperature, then you can be more relaxed about the process.
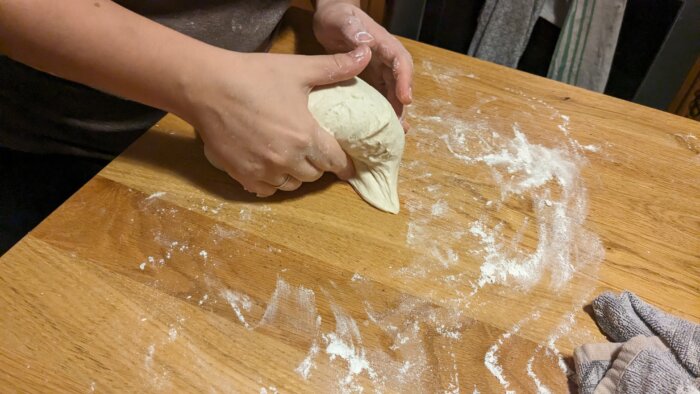
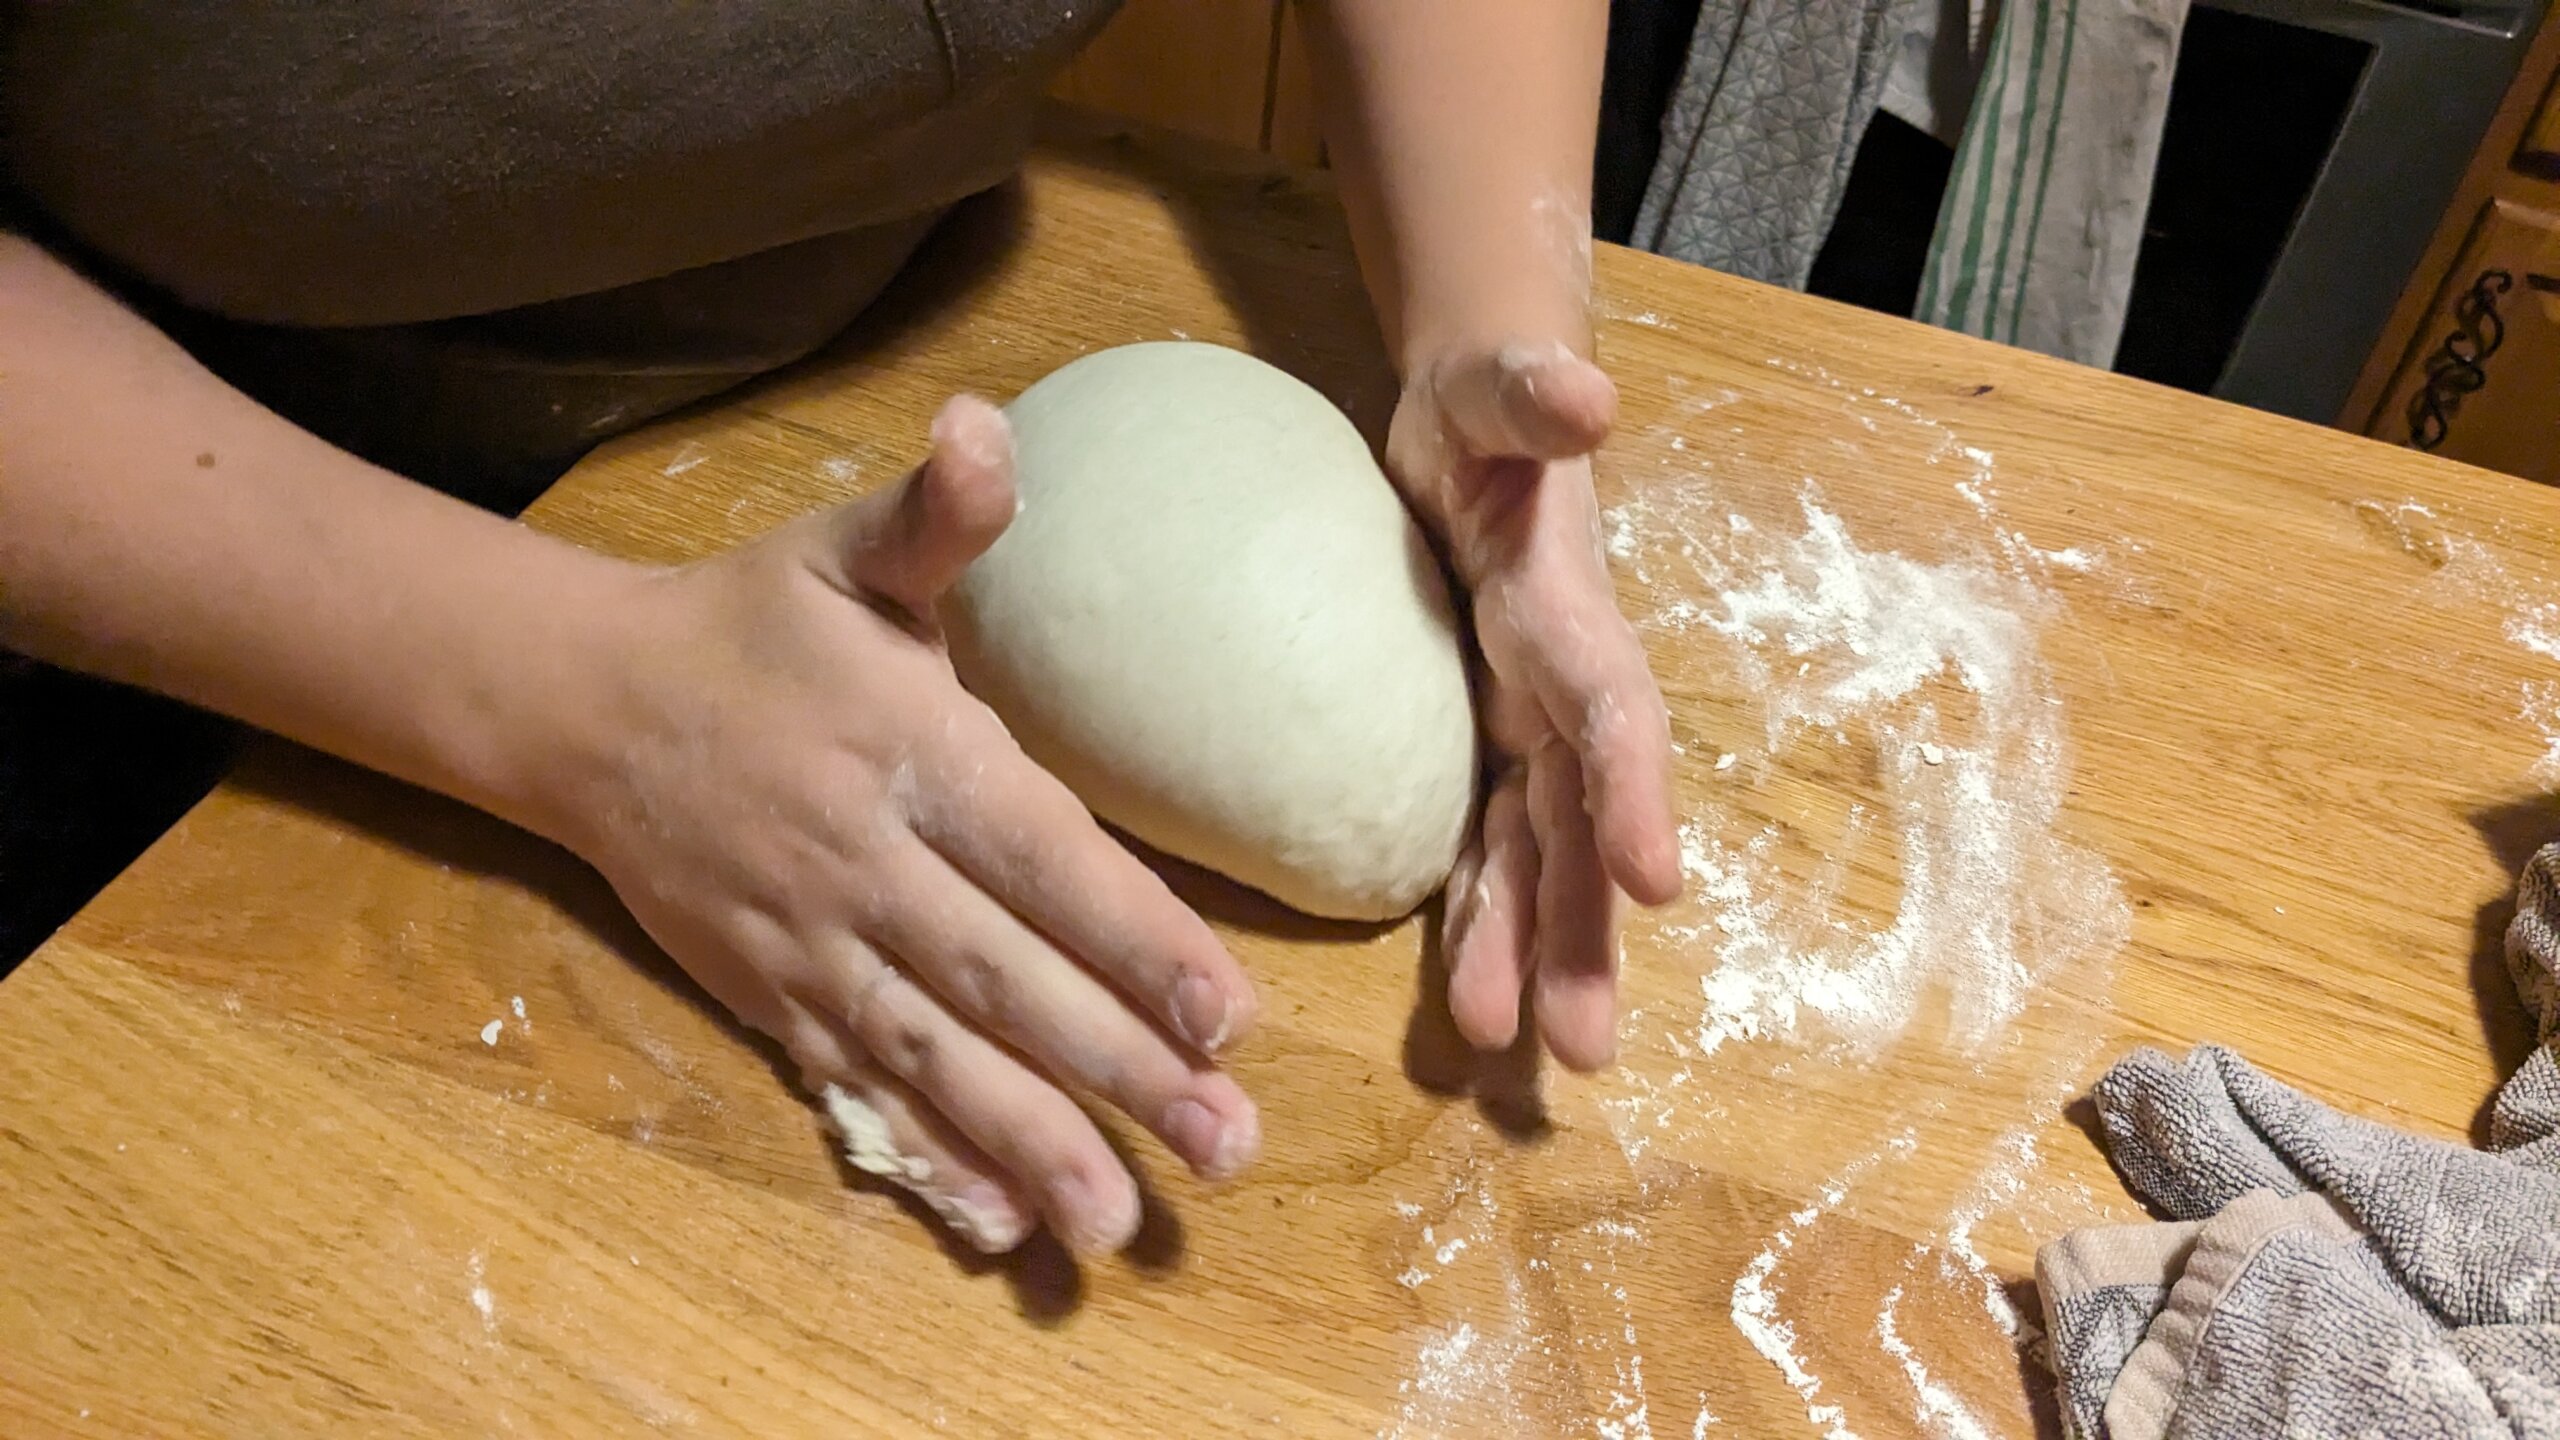
Shaping the bread:
After your dough has gone through the bulk rise, the next step is shaping. Once again, this can feel intimidating or frustrating with failure. With practice though, it will become second nature.
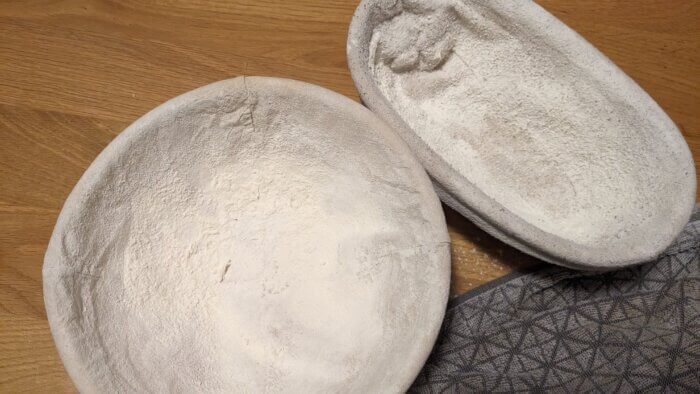
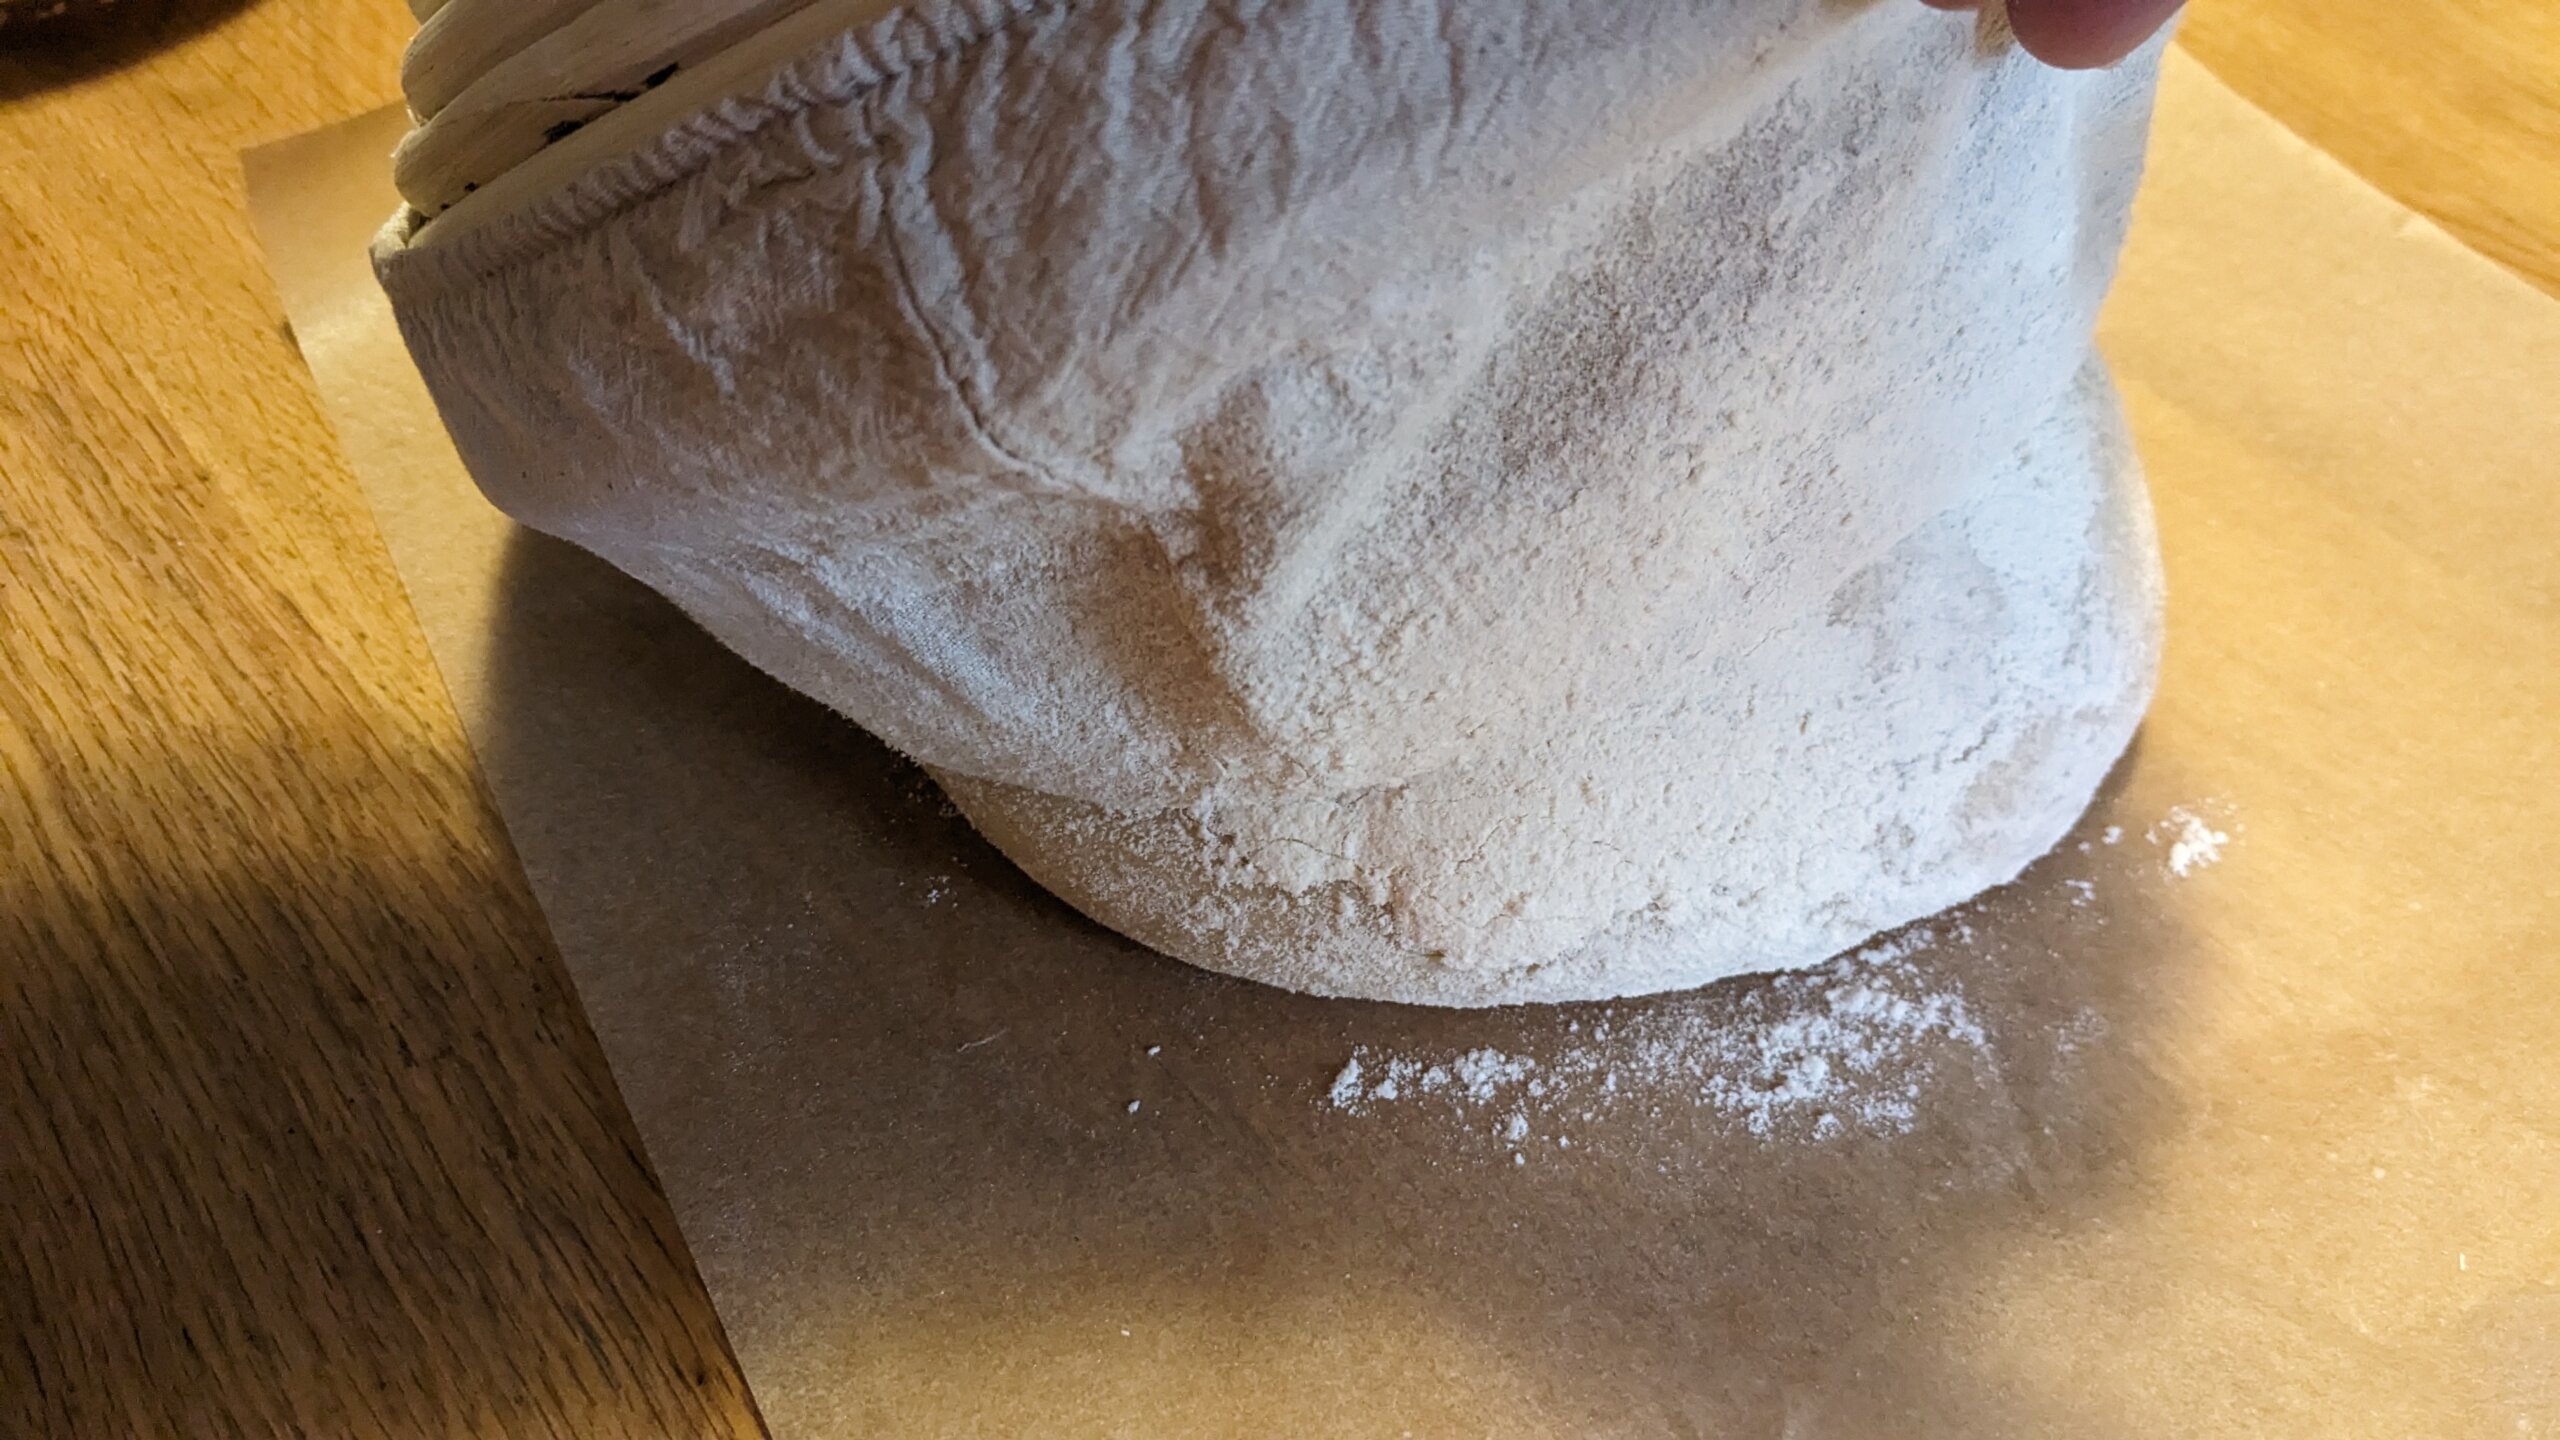
First, make sure that you have two bannetons that have been dusted with flour. You can also use two bowls that are lined with thin tea towels that have been sprinkled with flour.
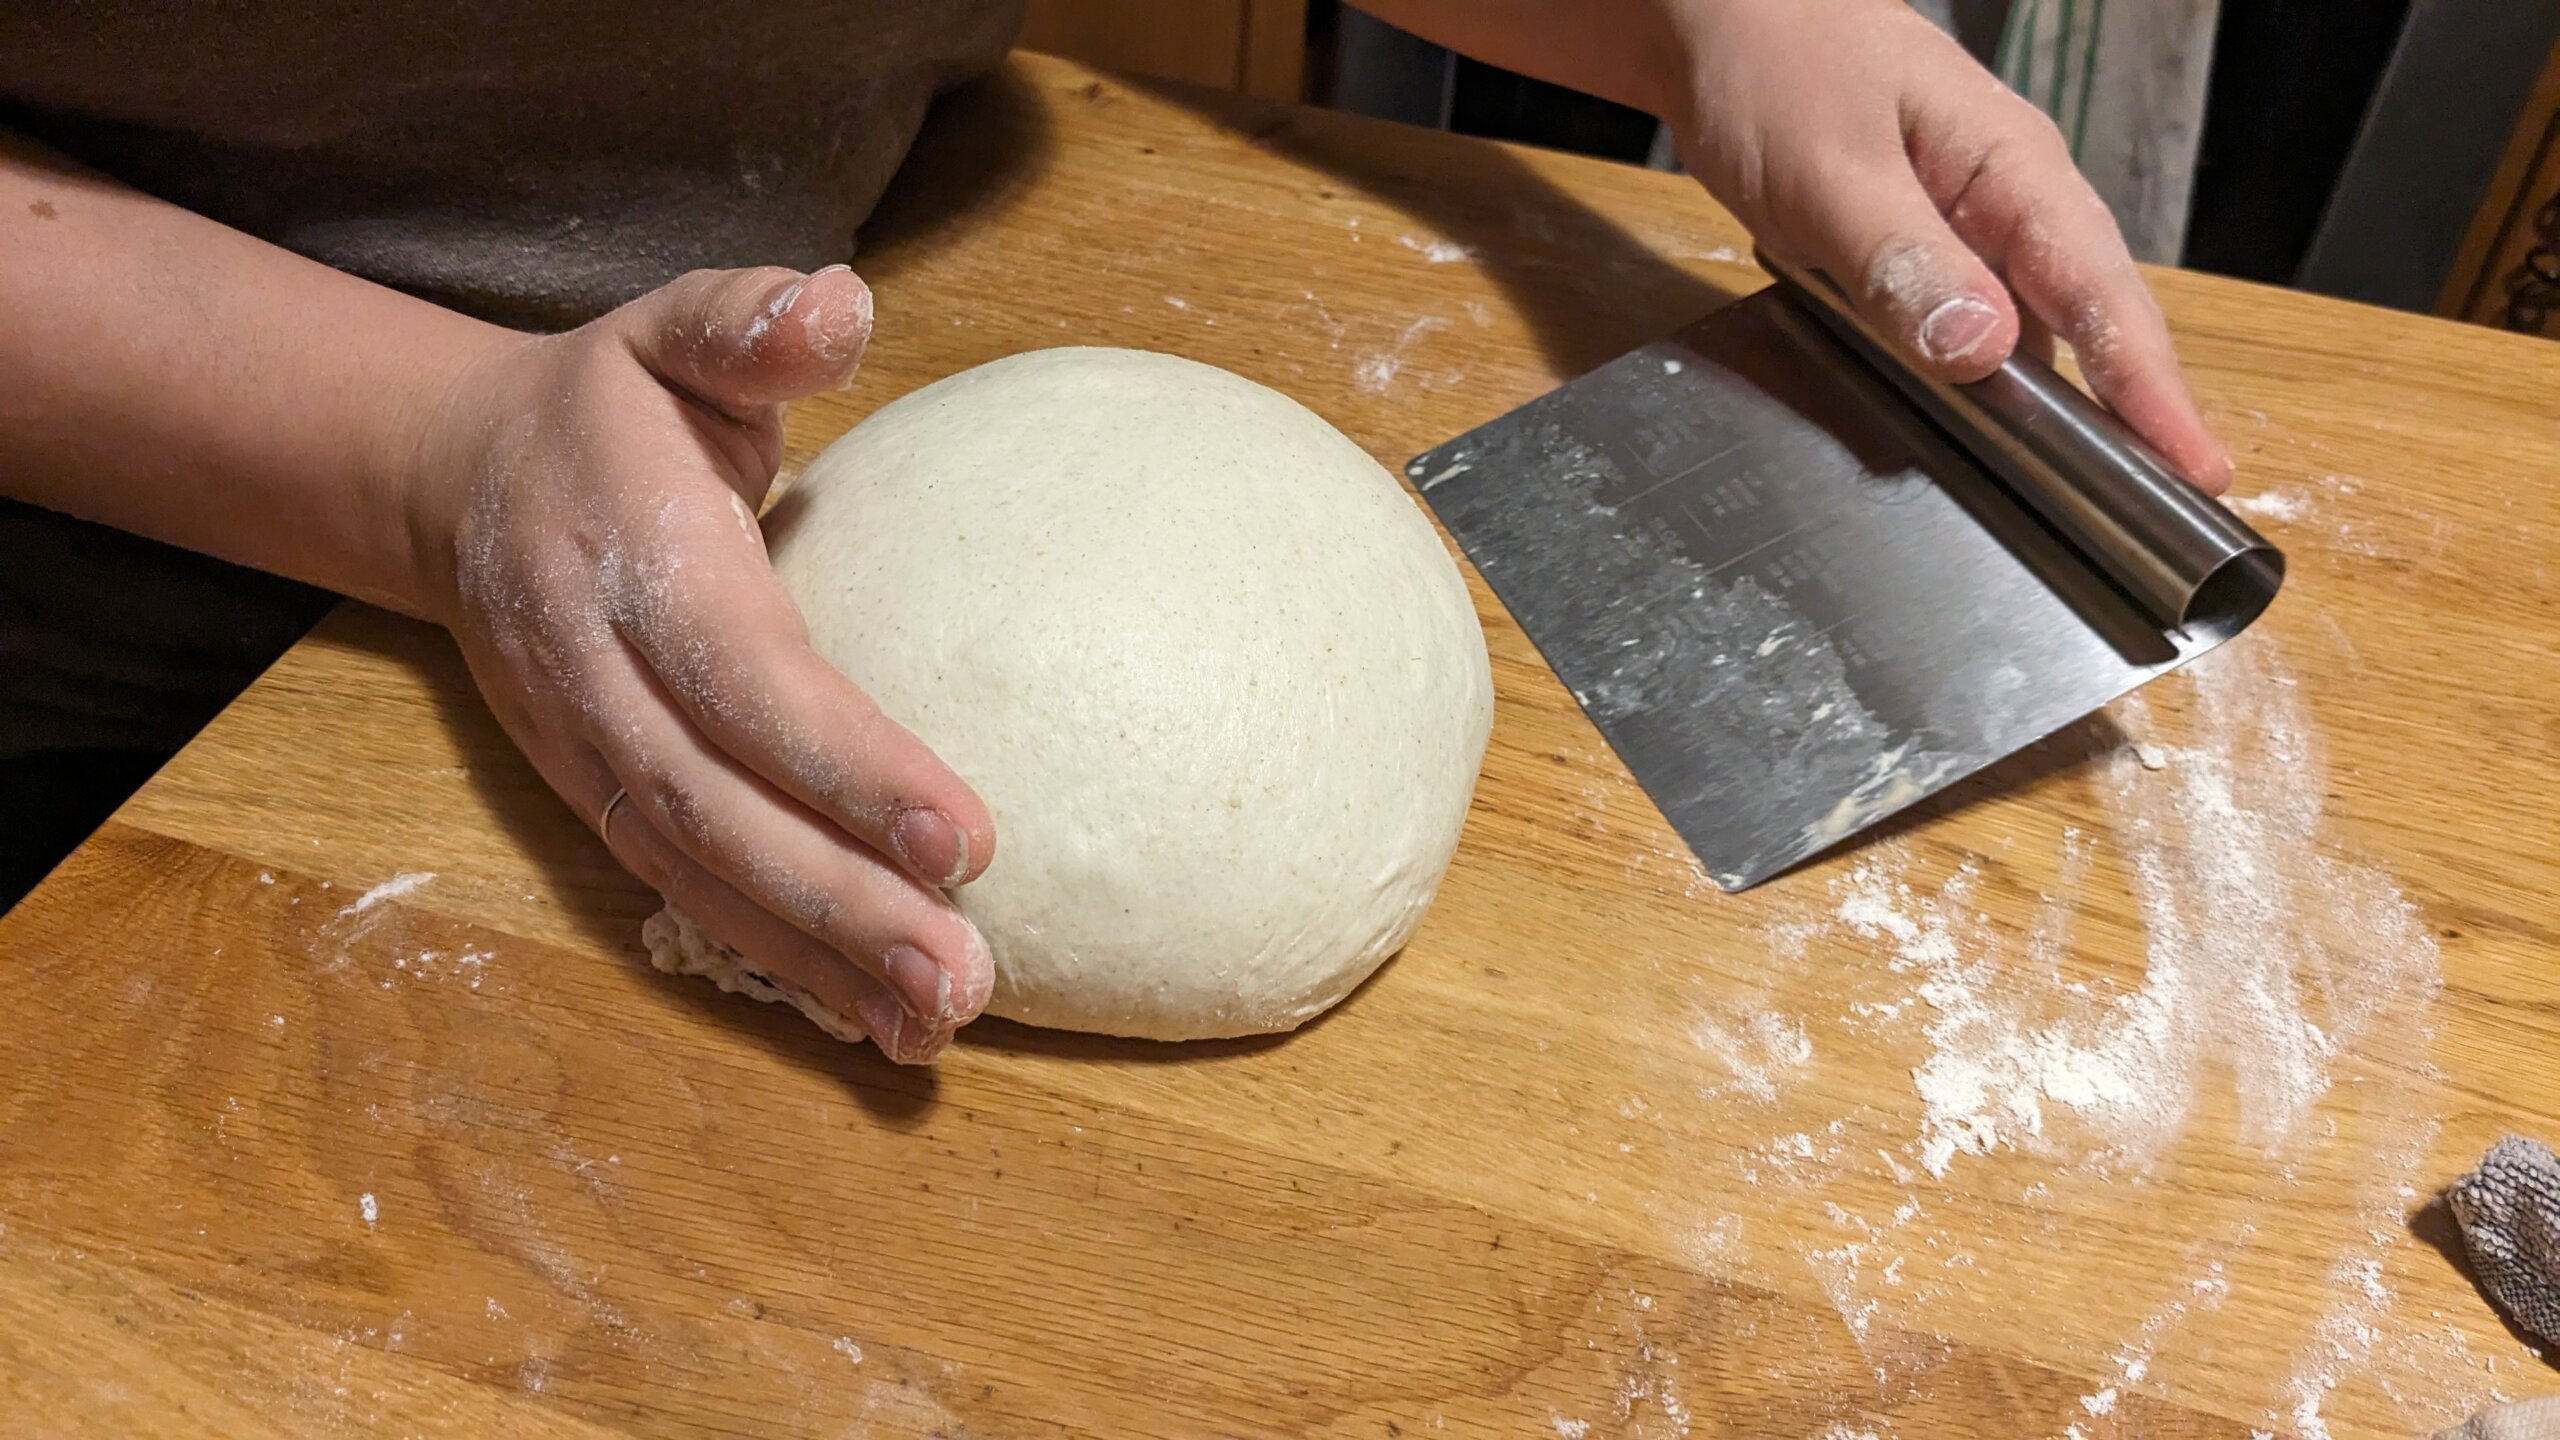
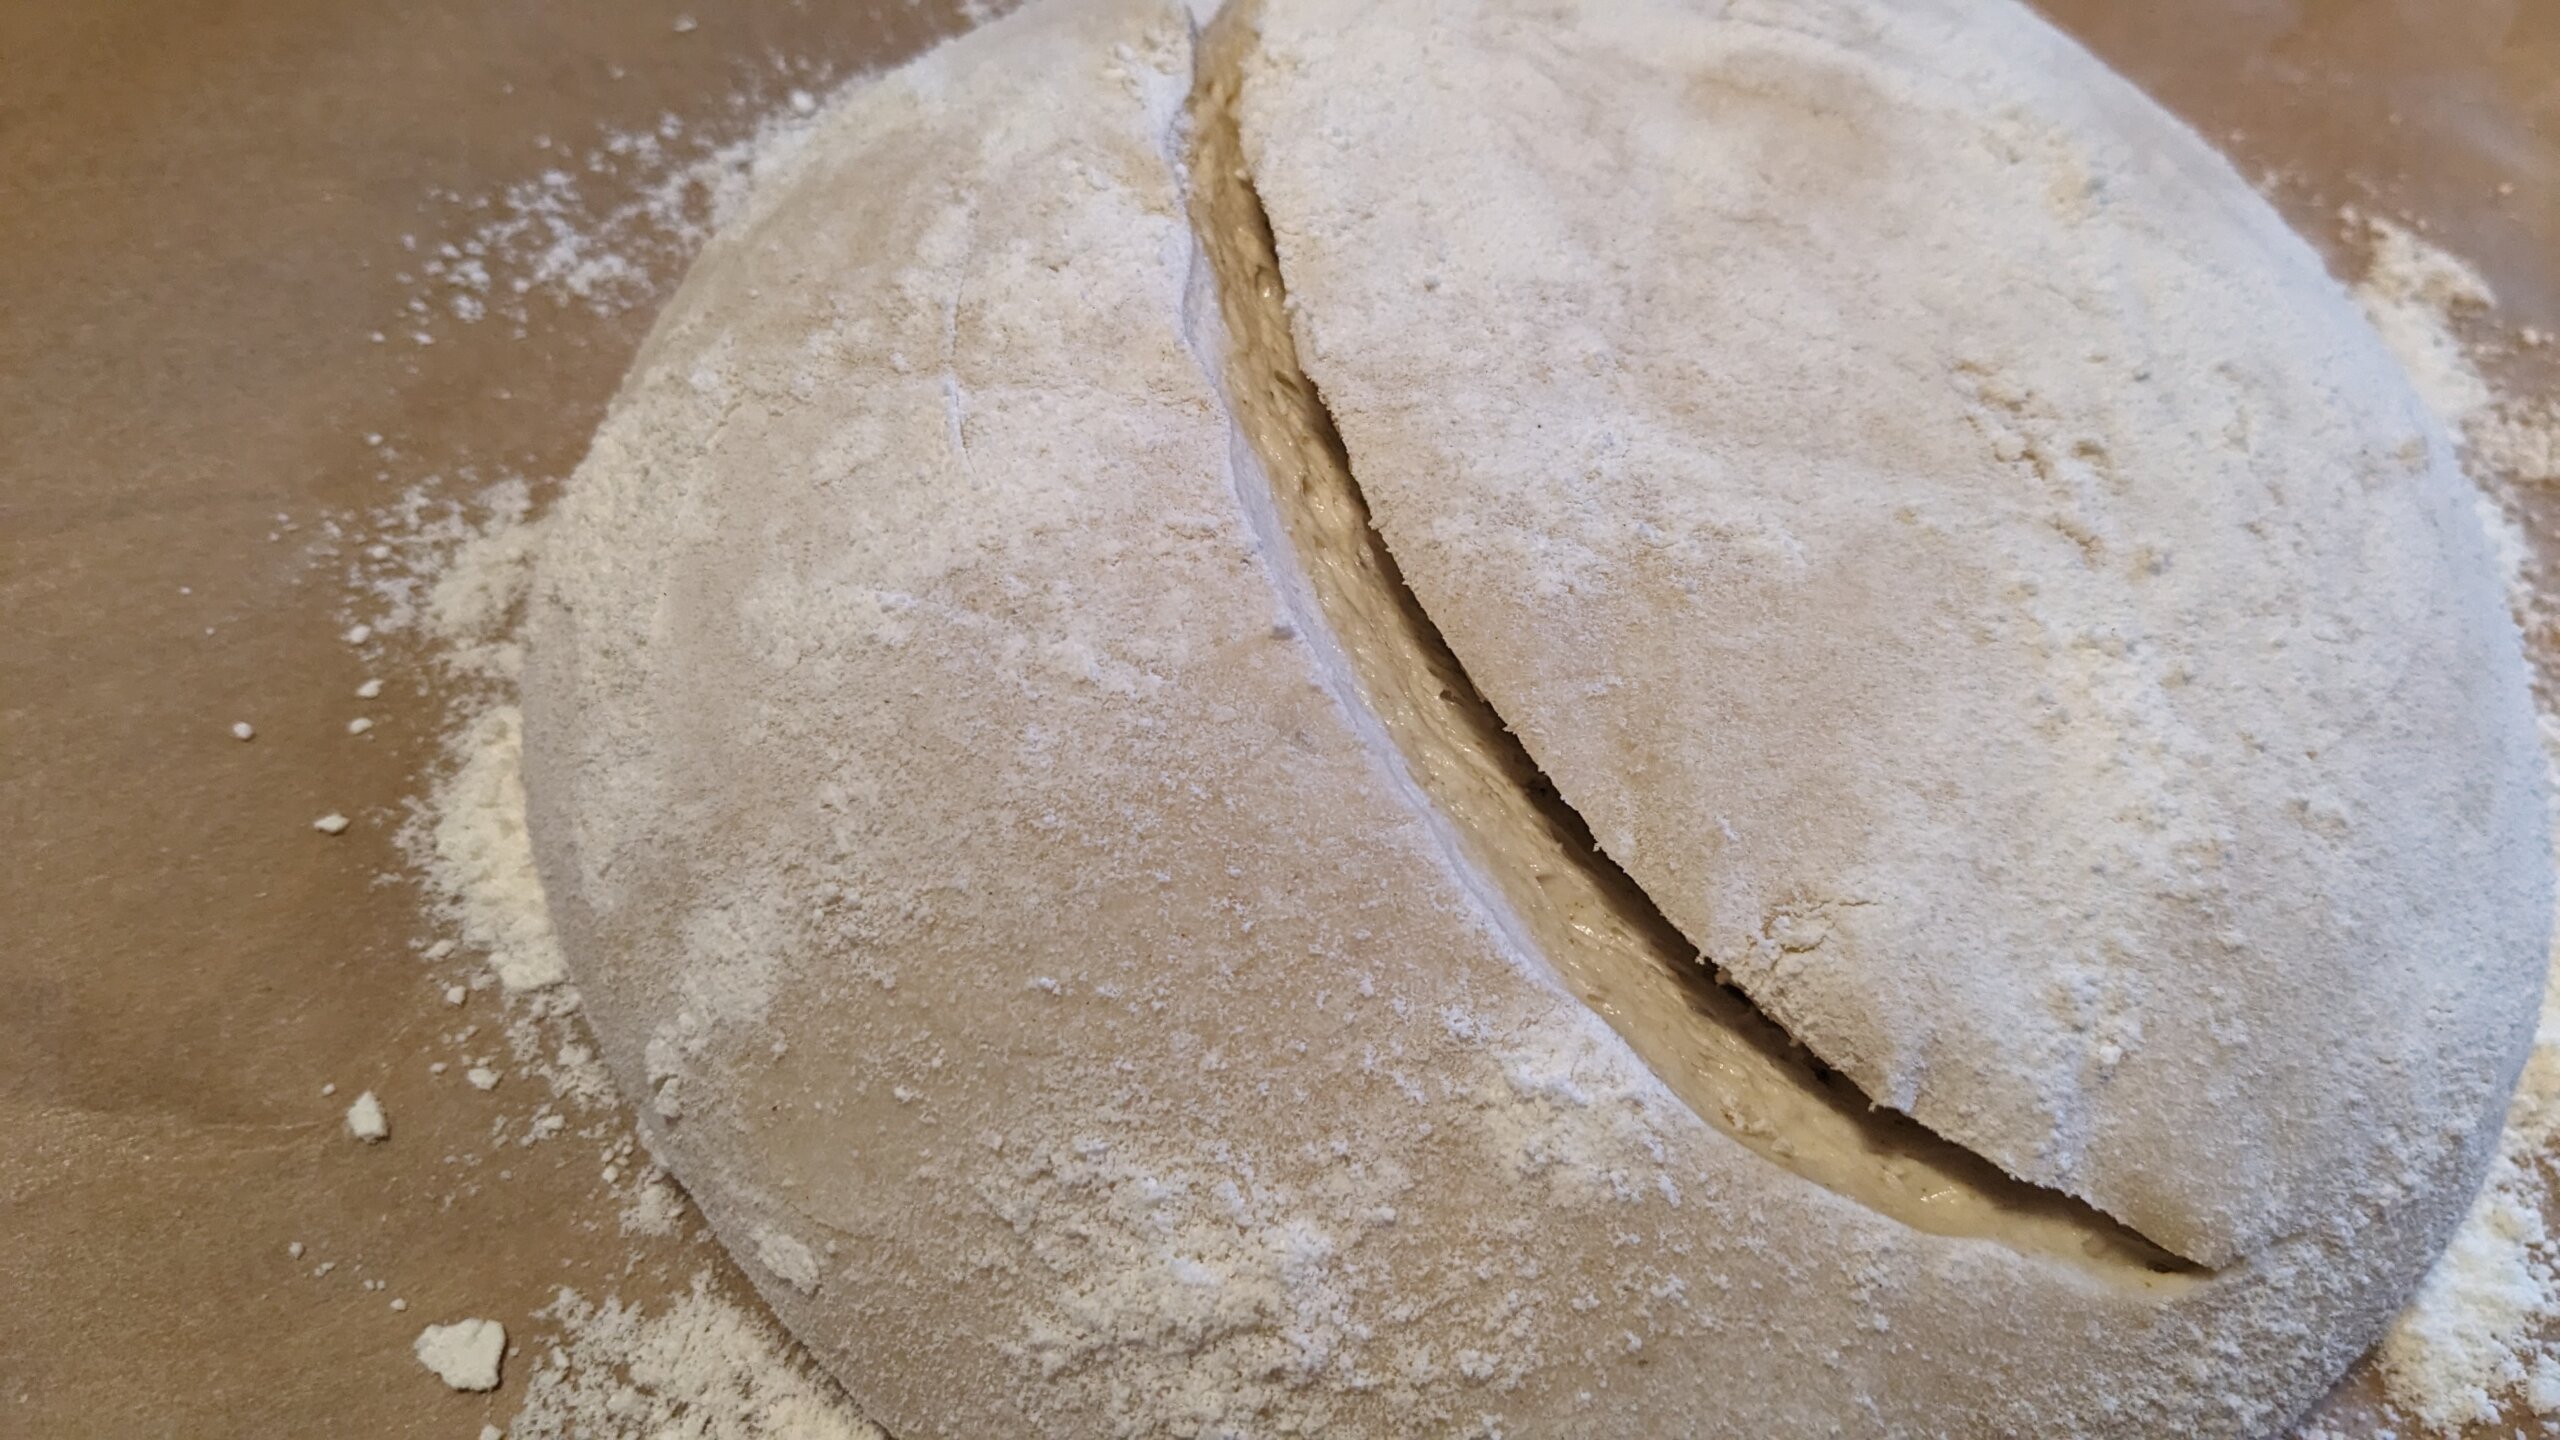
Next, dust your work surface with flour. Using a spatula or your hand, gently pull the bread dough out of the bowl onto the work surface. Using a bench scraper, a knife, or your hands, separate the dough into two sections as evenly as you can.
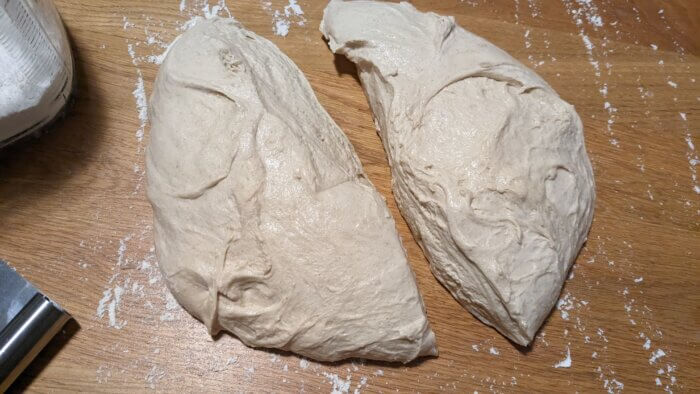
From here just gently tuck it on itself and let it rest covered for another 10 to 15 minutes.
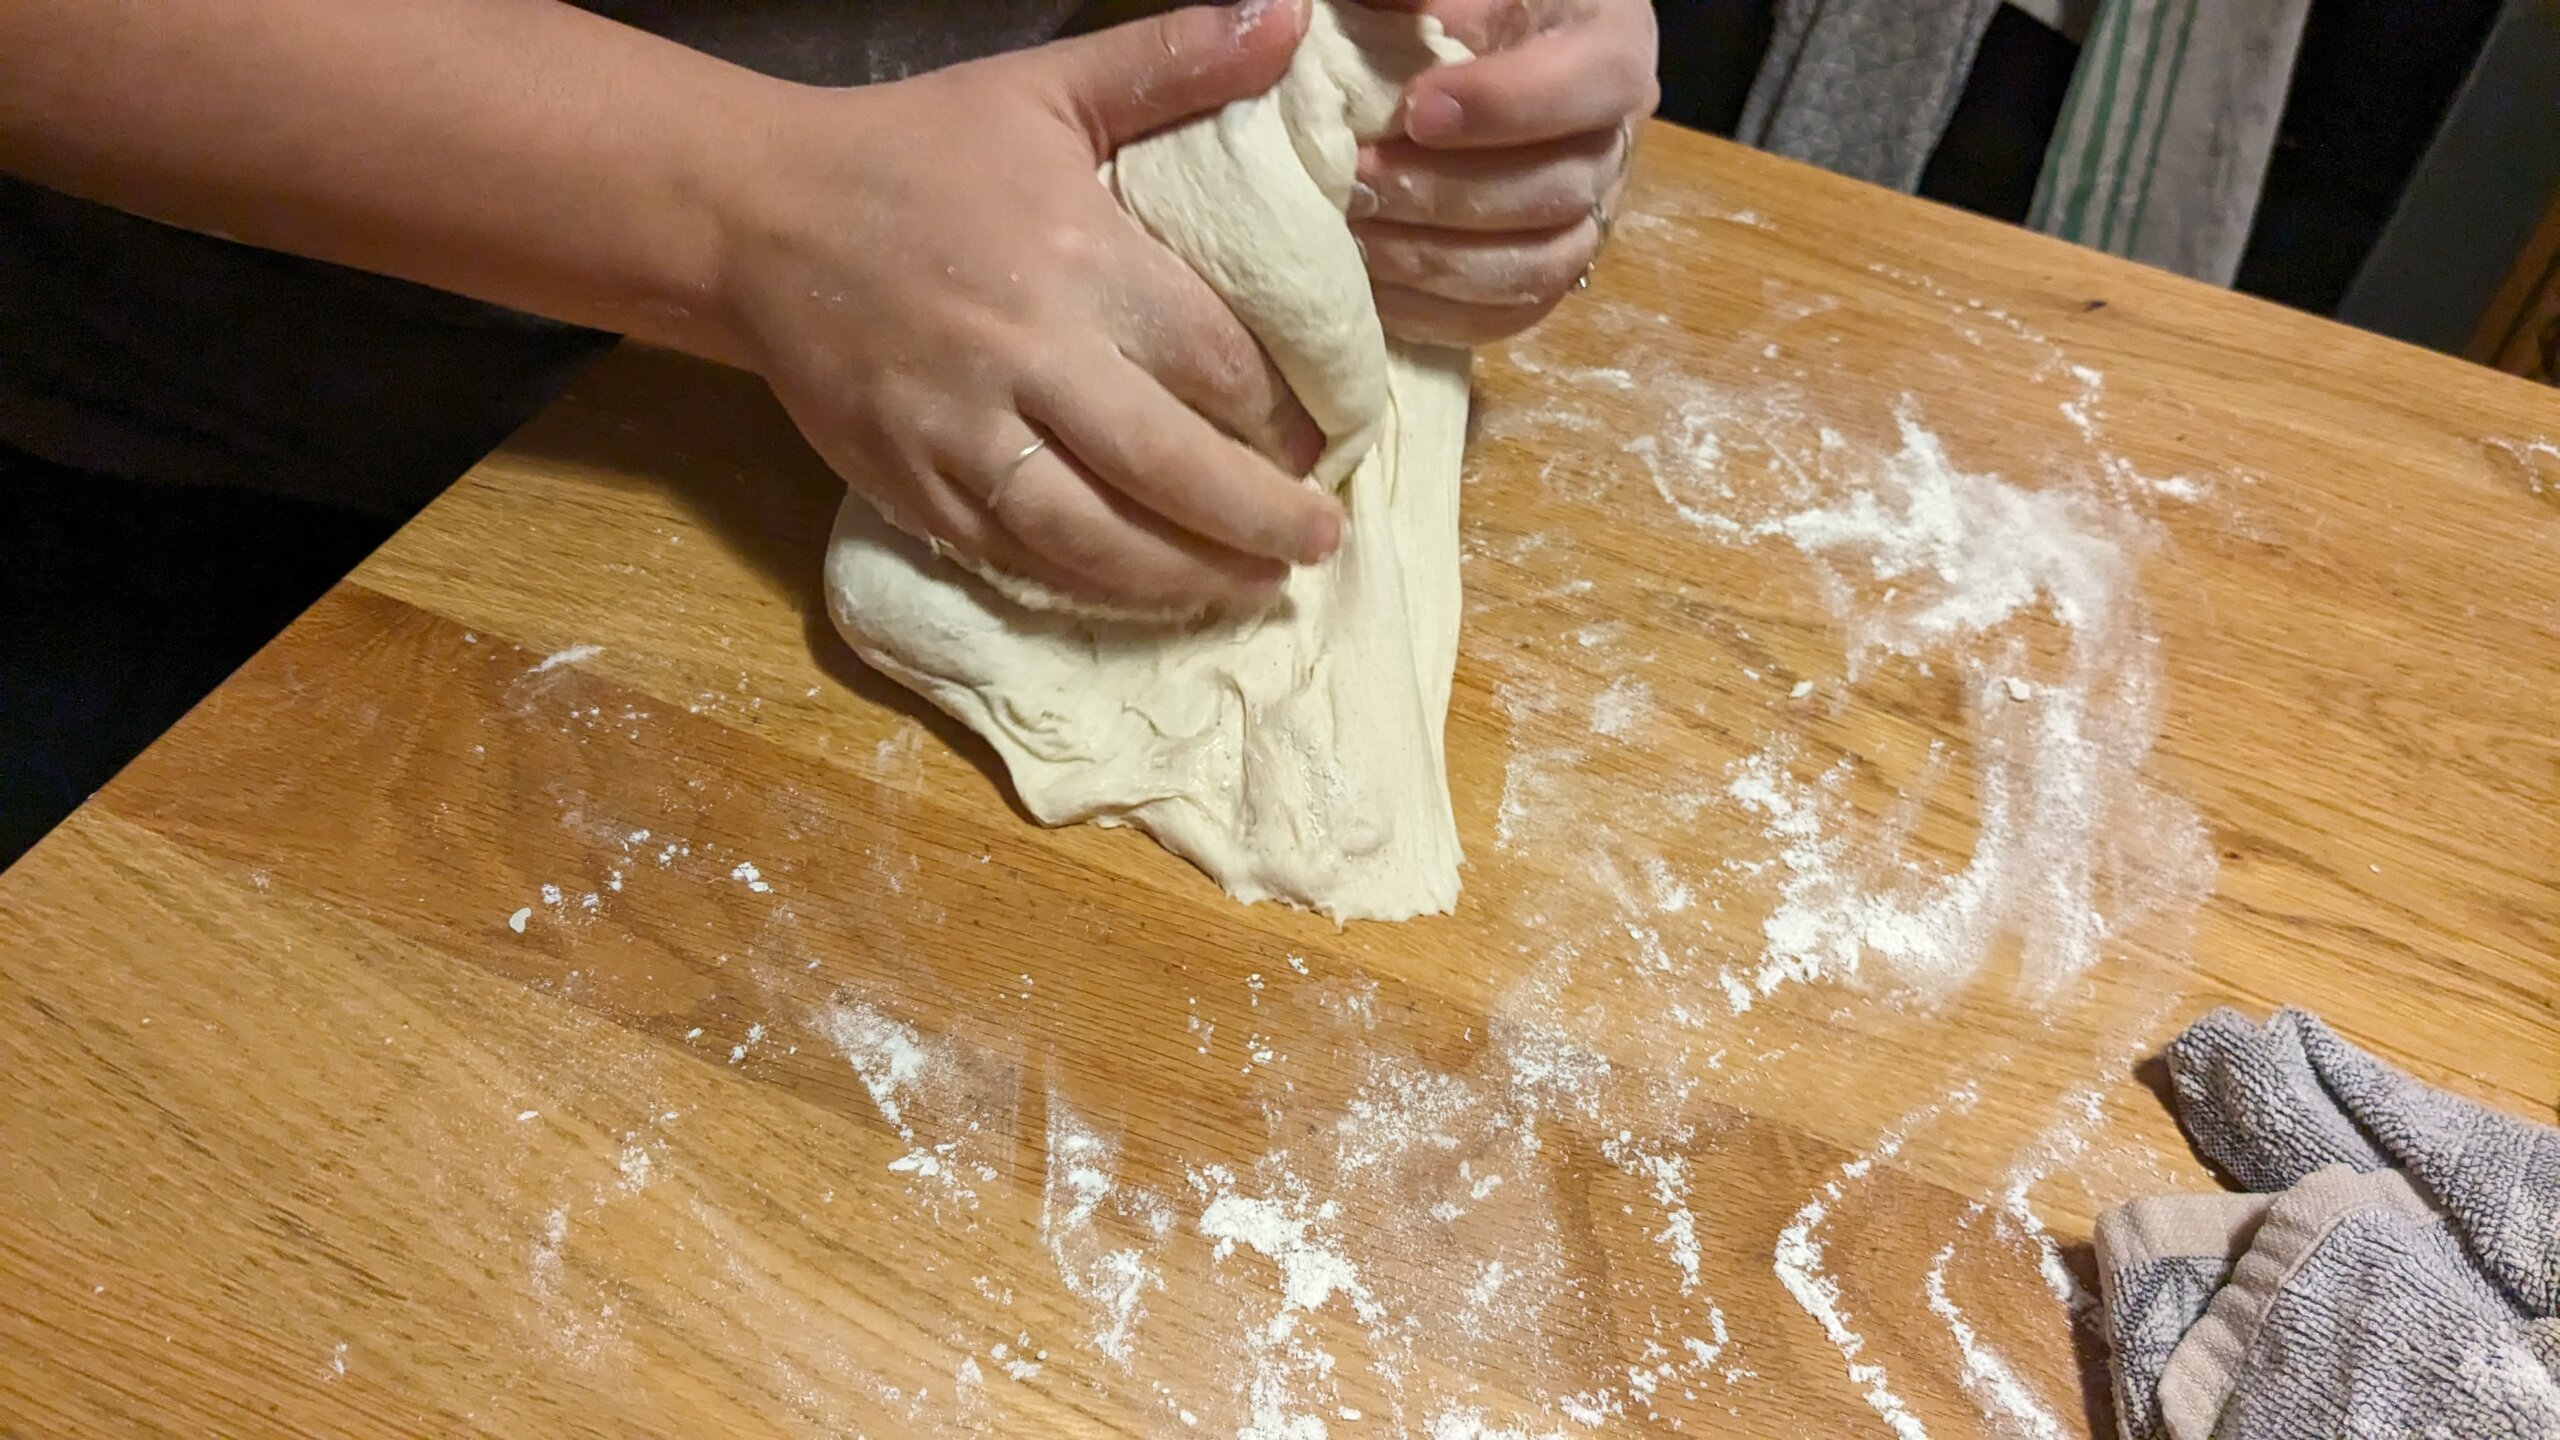
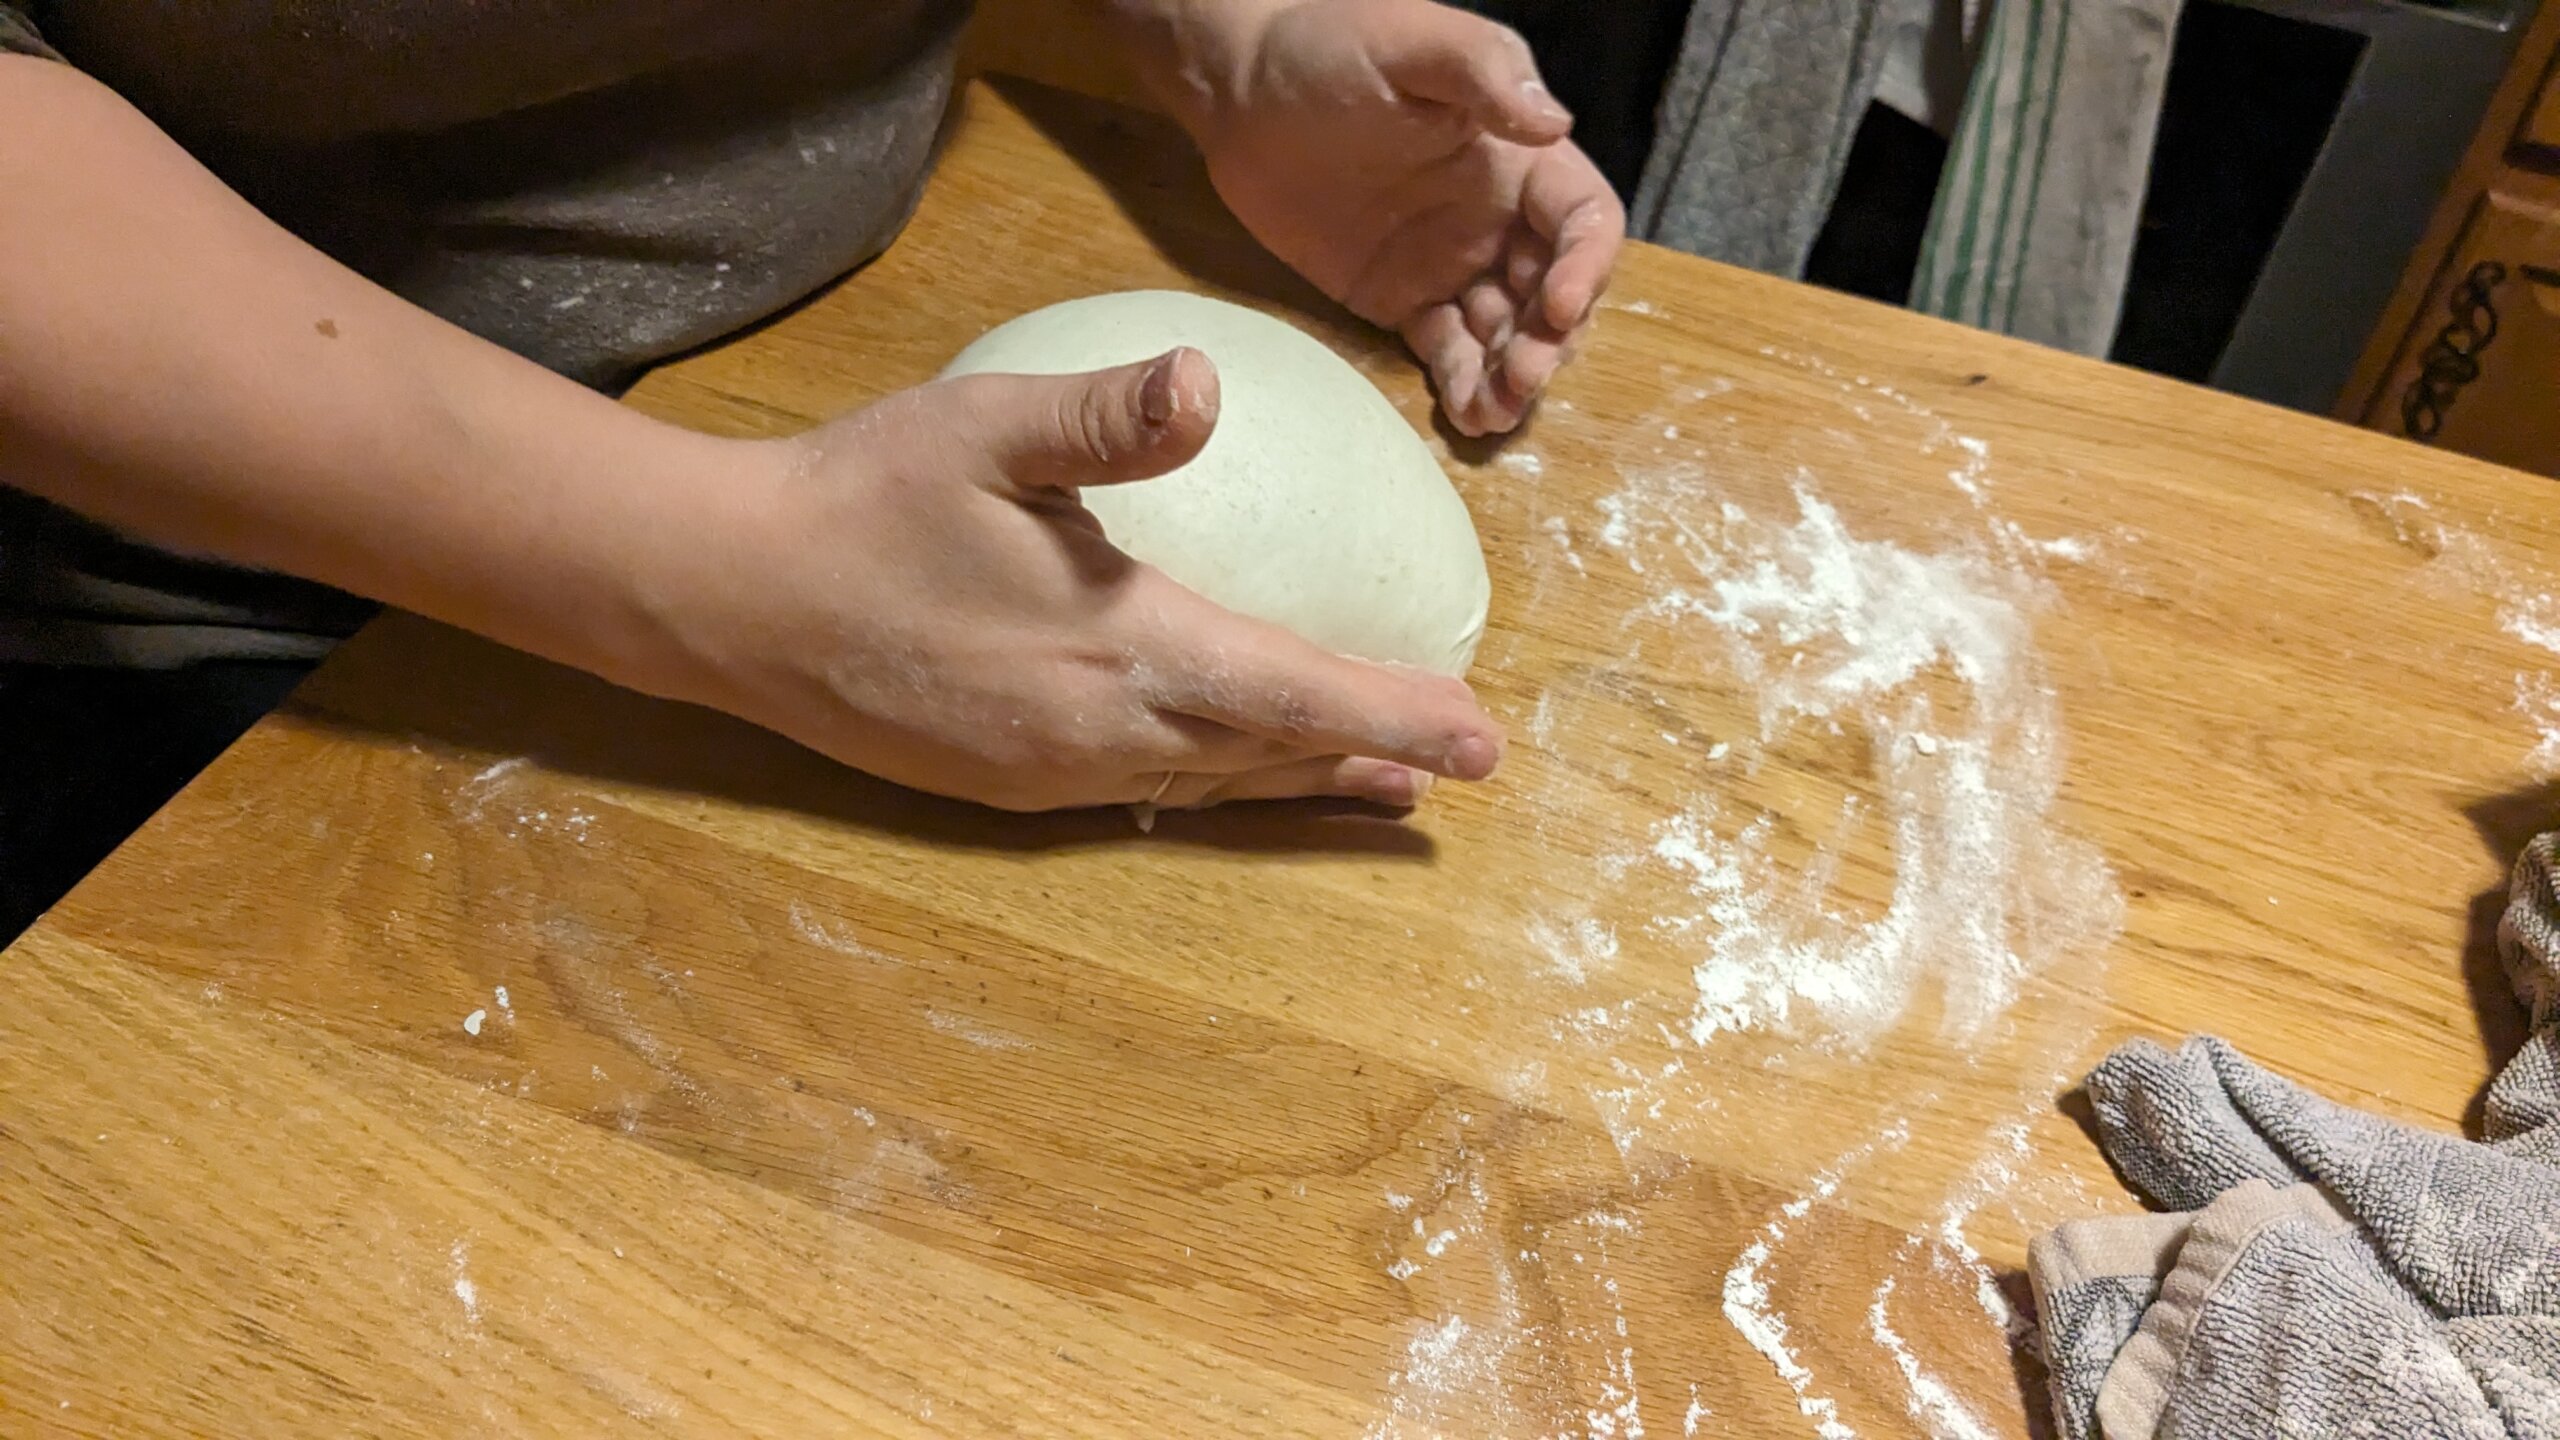
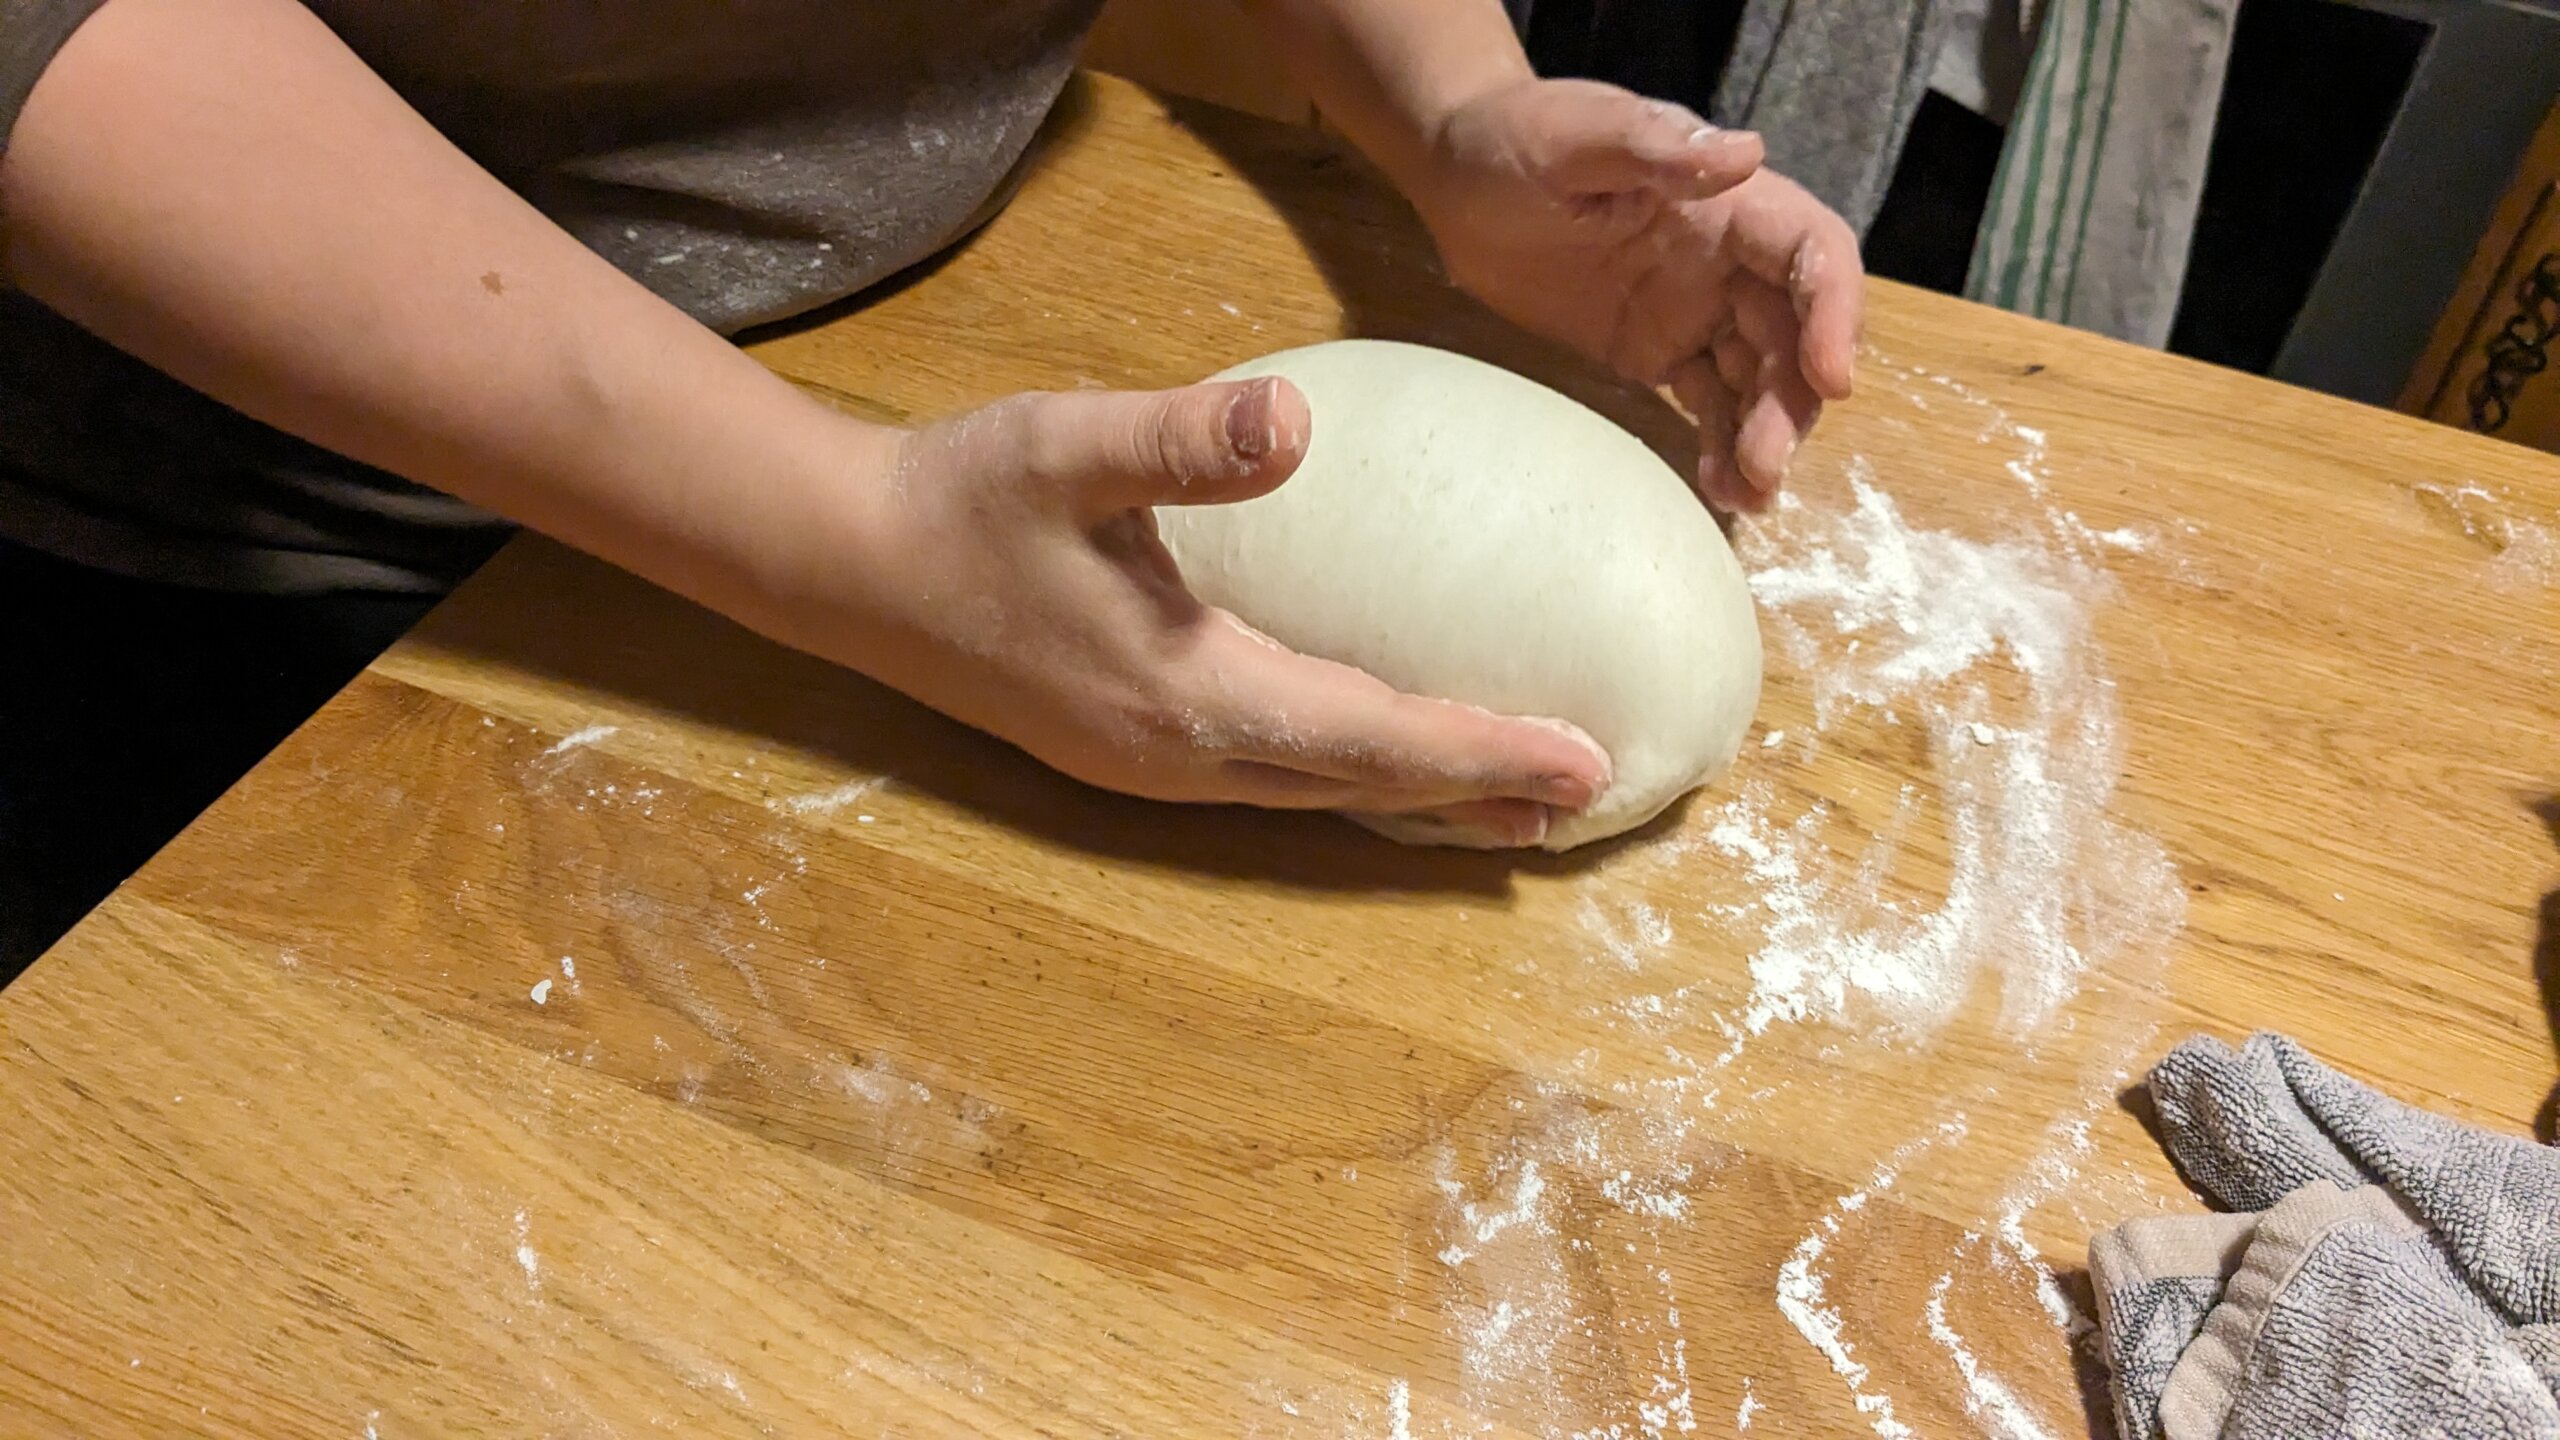
Next, you’re going to uncover one at a time to shape it into a round loaf. You can either wet your hands or use a light coating of flour on your hands to make forming easier. Hopefully, these pictures help you to understand how I do this.
The goal is to create tension by pushing it and pulling it so it becomes tight on the top. I’m left-handed so if you want to follow these written instructions, just swap out the hands that you use. I will take the dough ball and push it forward with my left hand, and using my right hand on top, I will pull it back to me. I’ll turn it a little bit and then again, push it forward with my left hand and using my right hand I’ll pull it back which should make the tight top and get the round shape. I’ll do this about 5 to 10 times. you don’t want the dough to start getting sticky from being overworked.
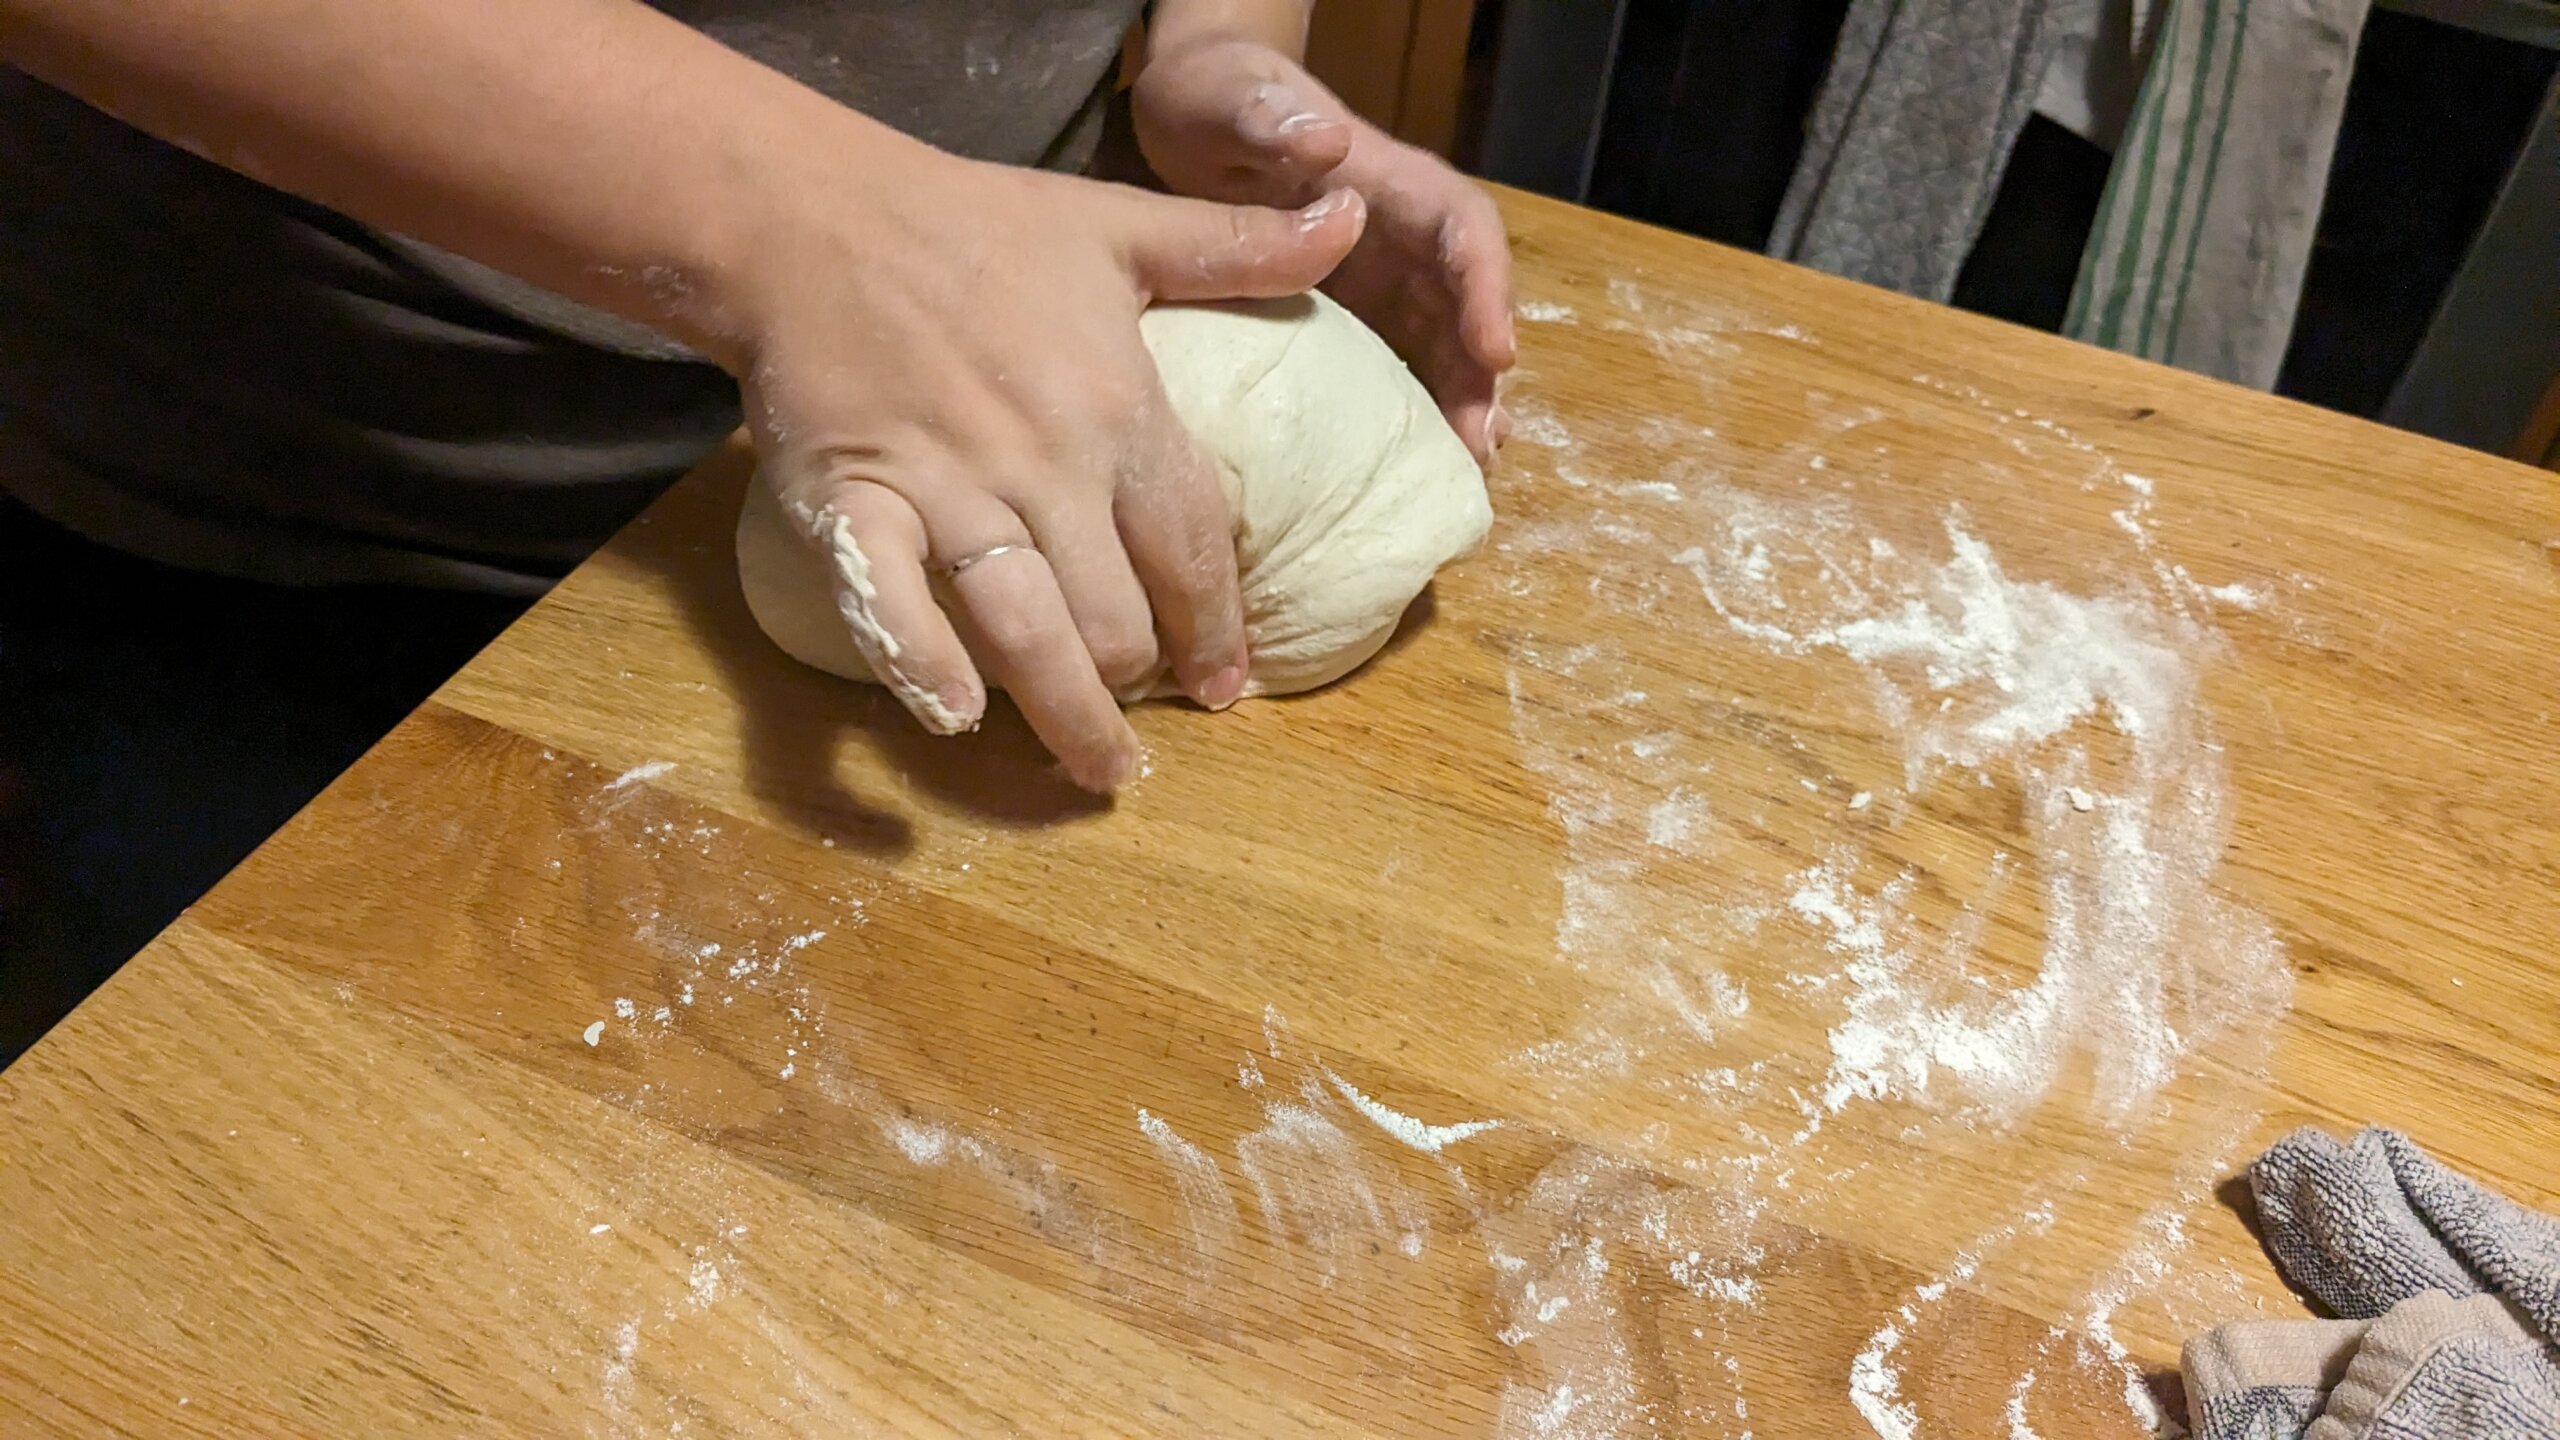
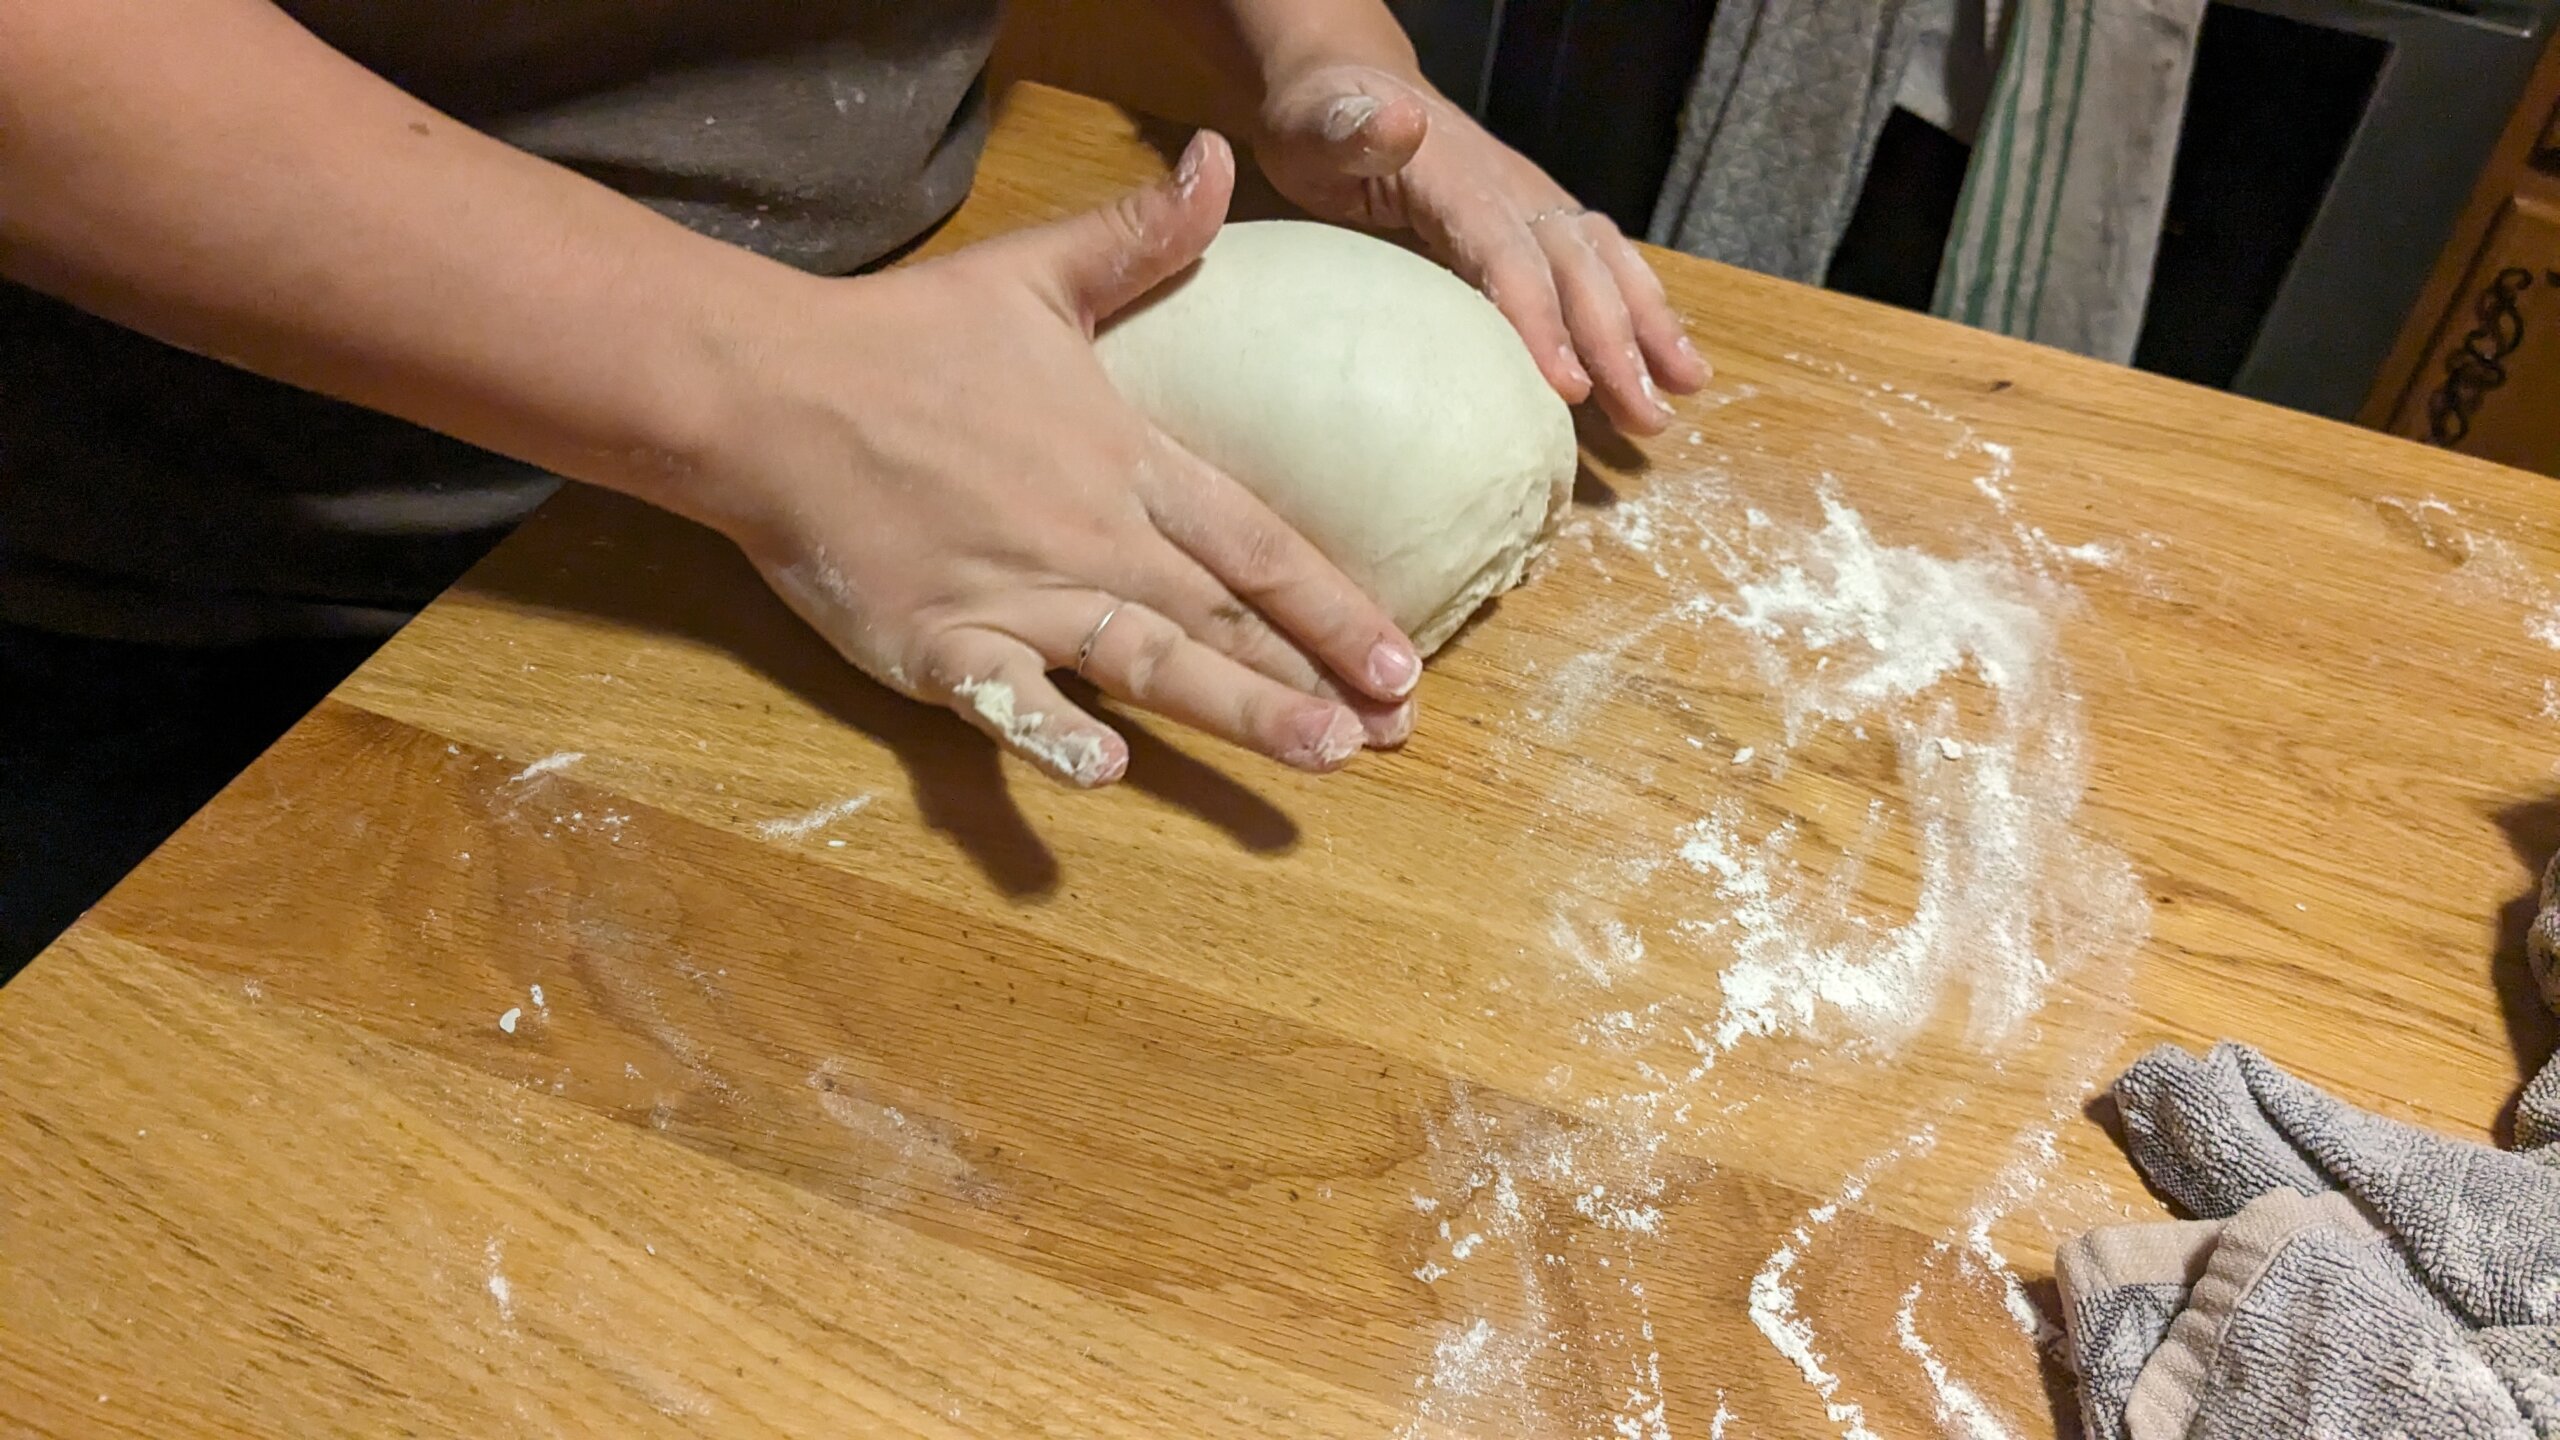
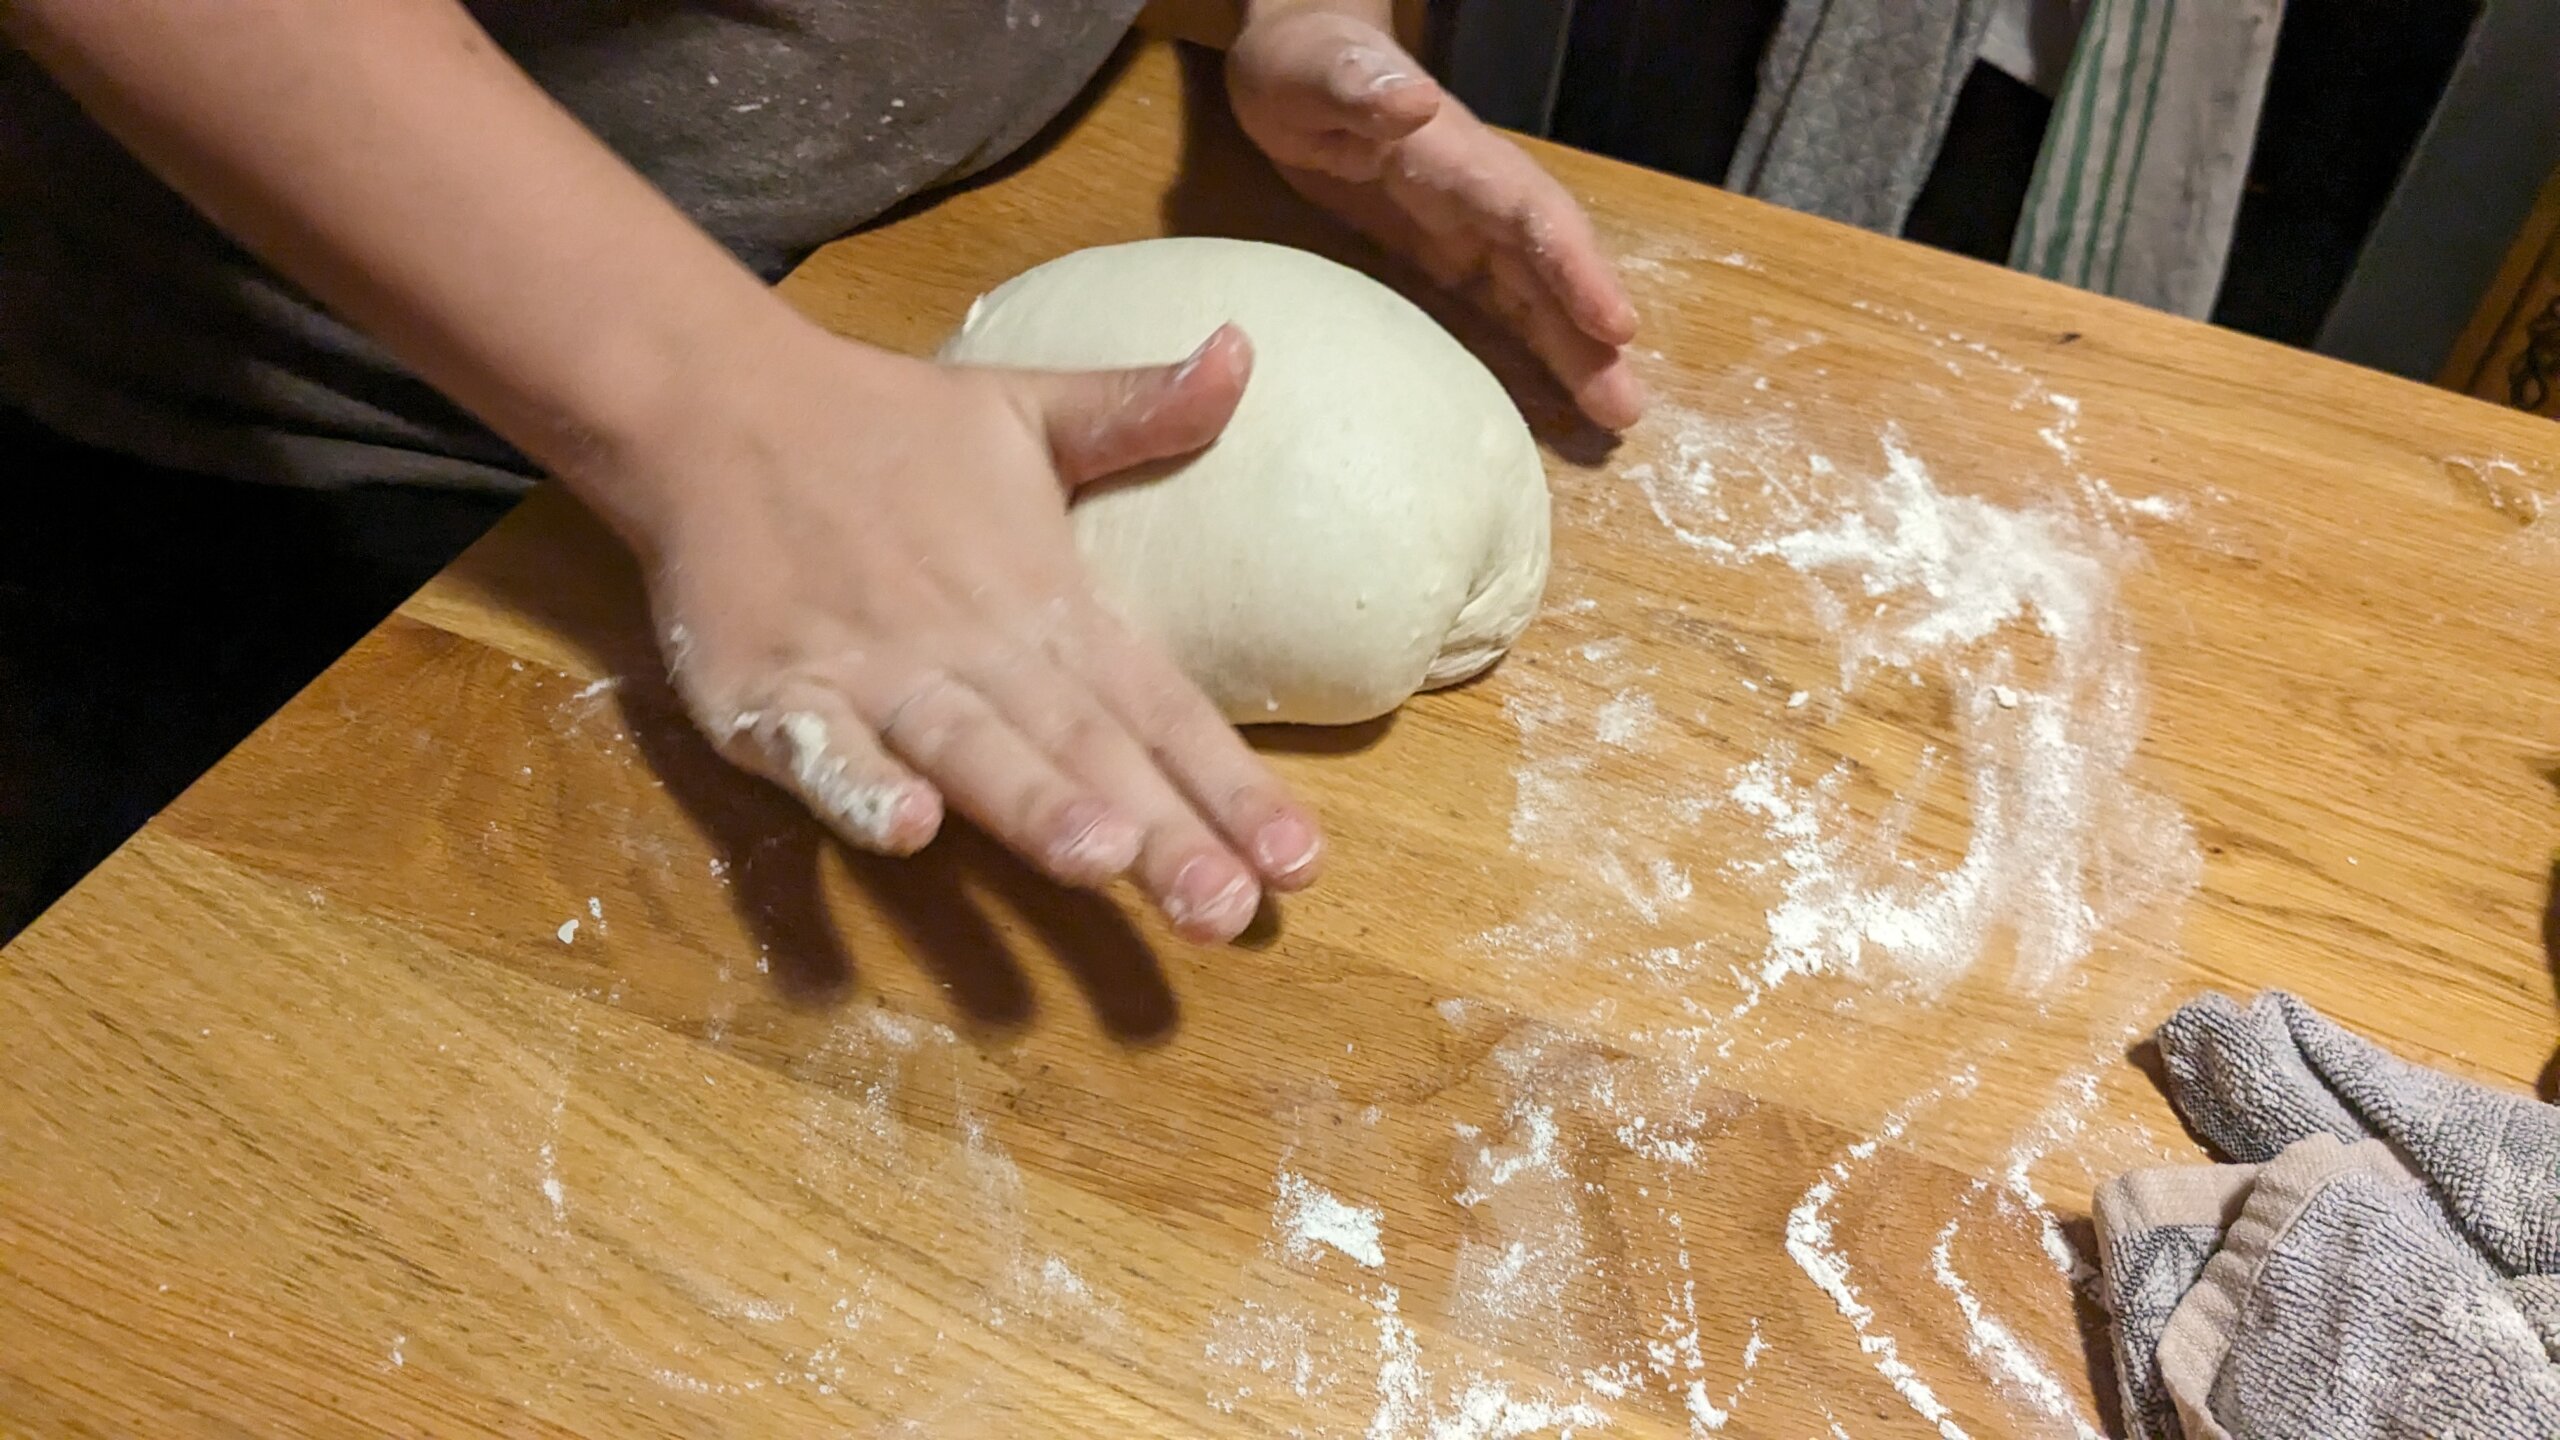
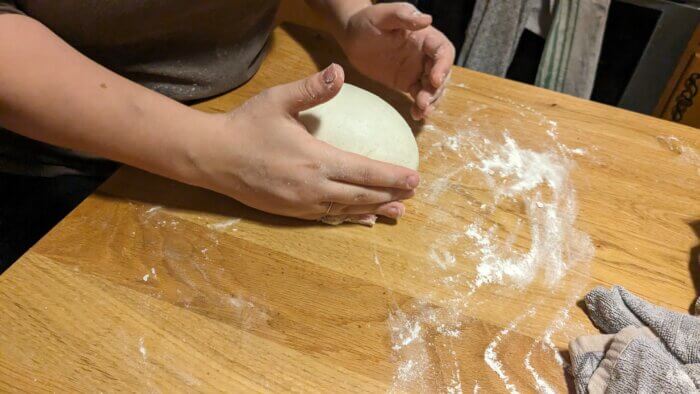
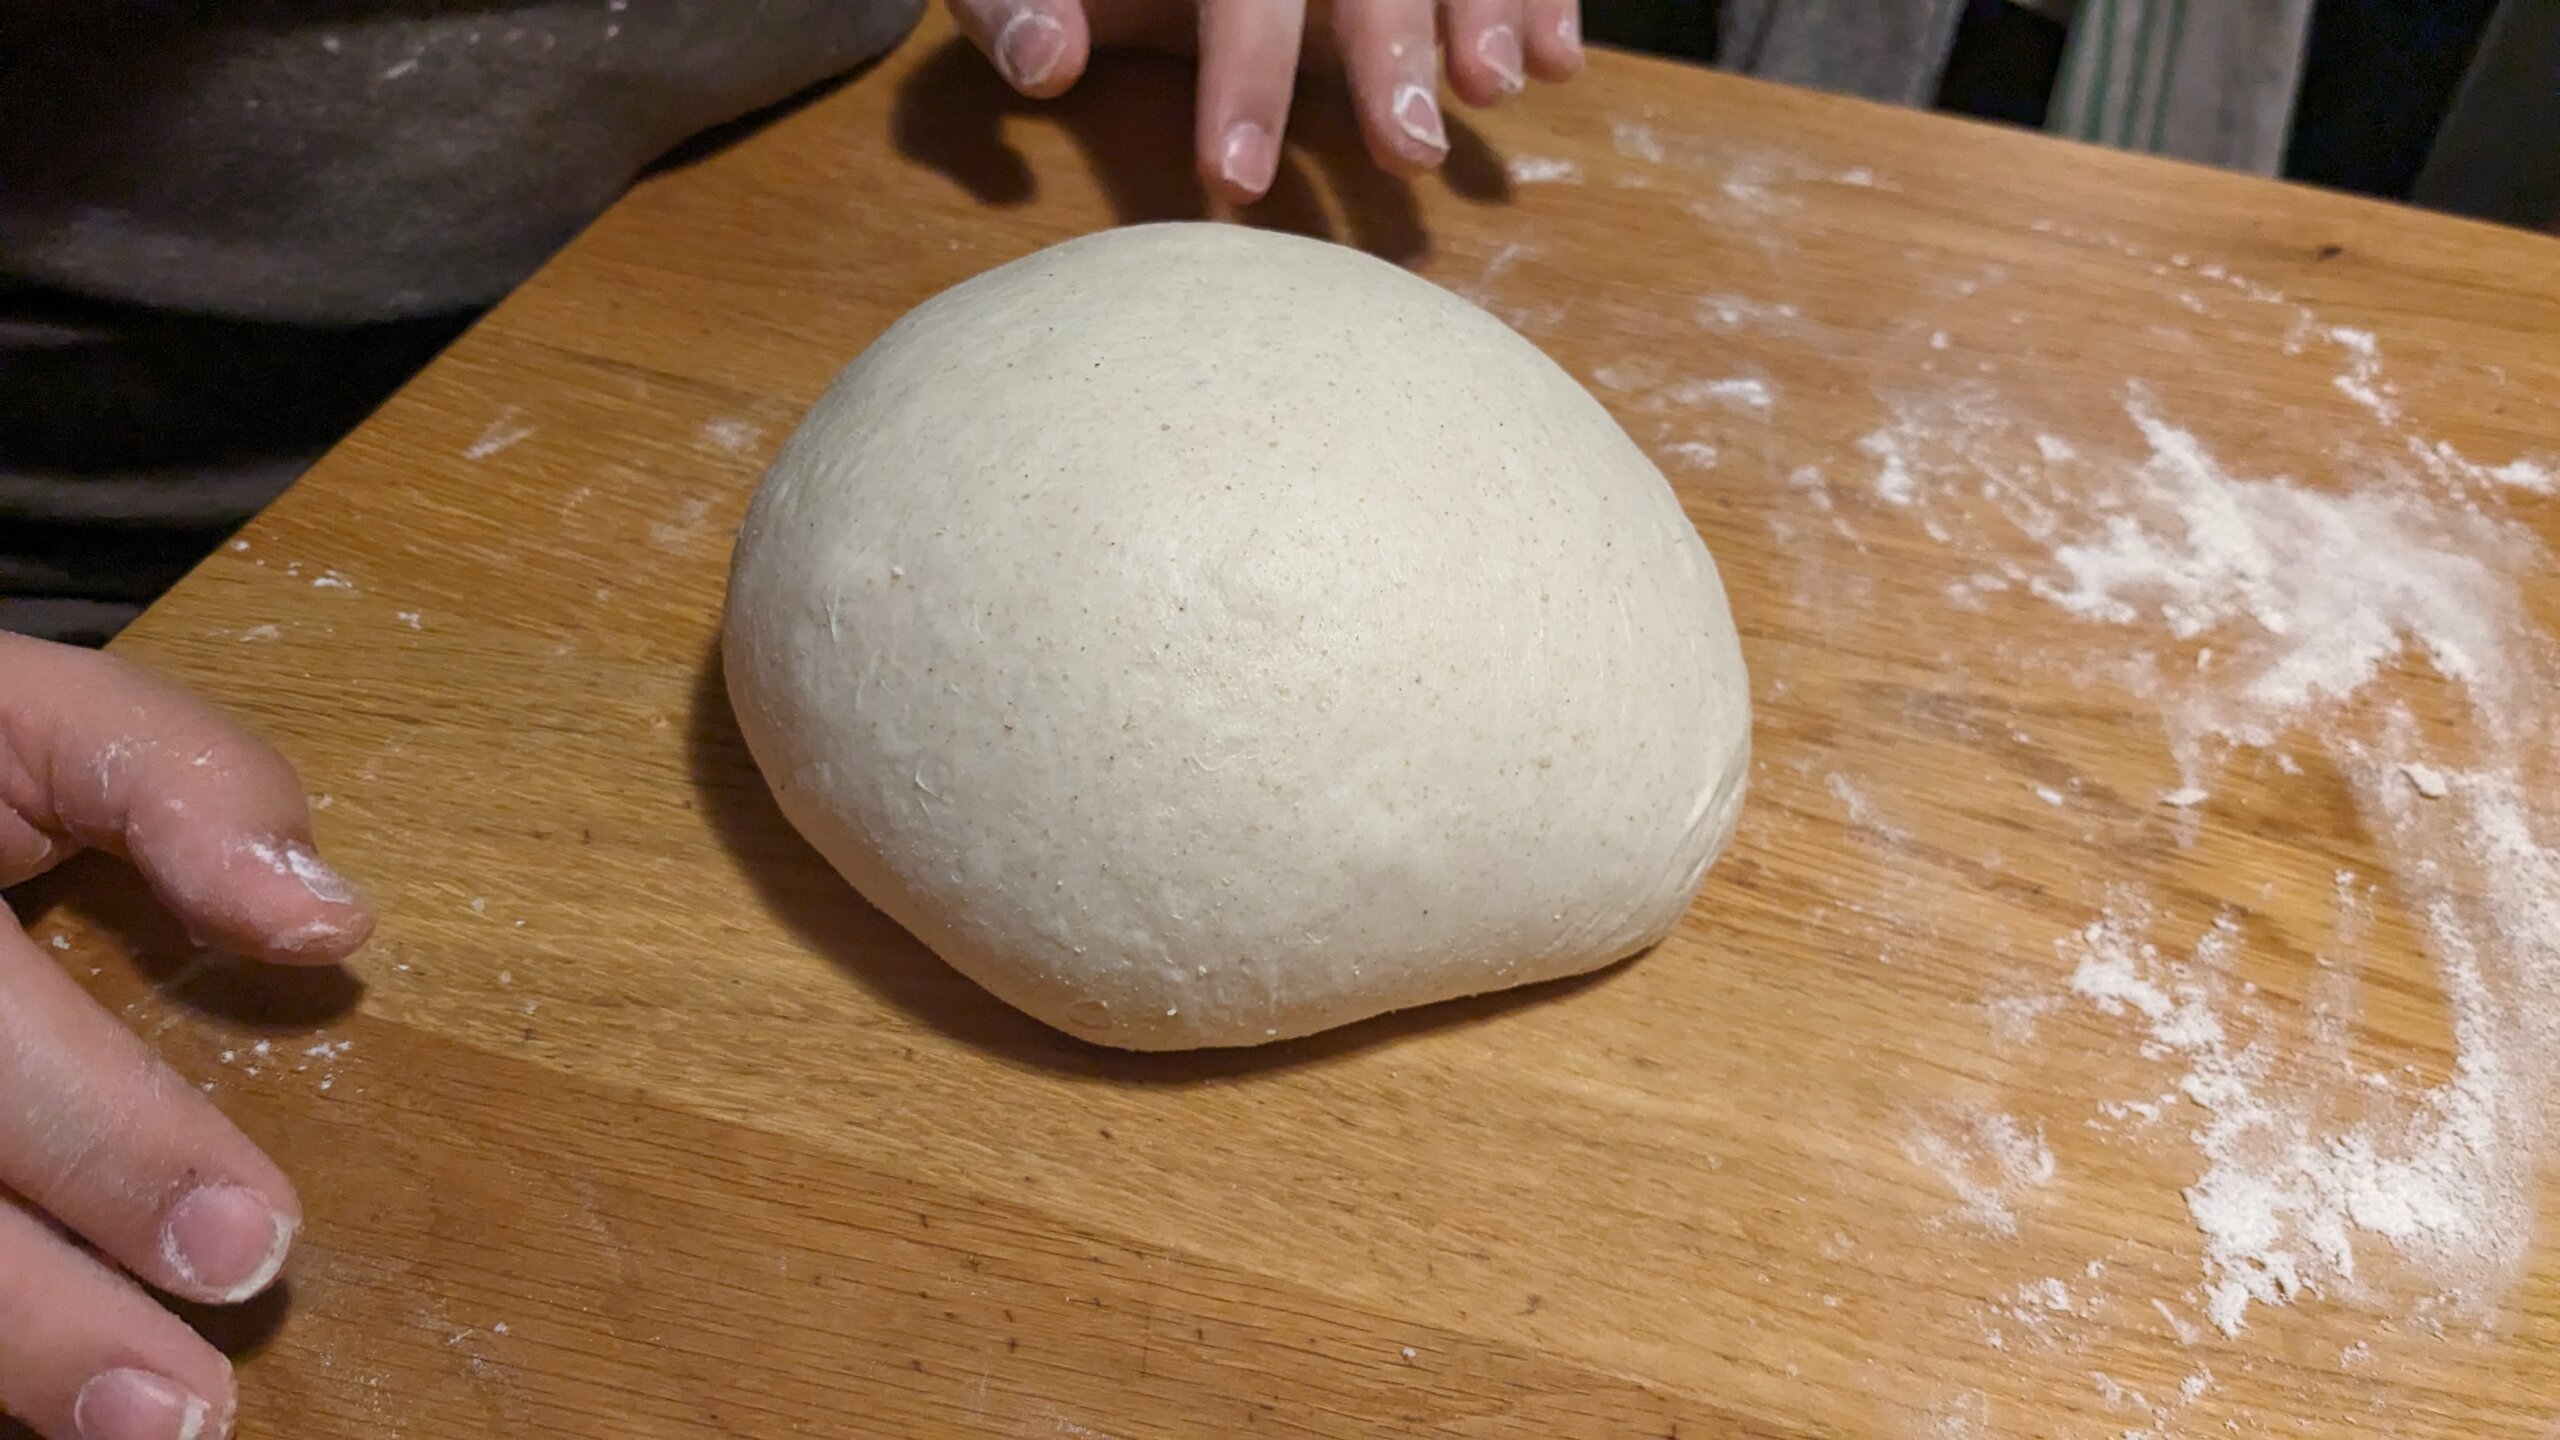
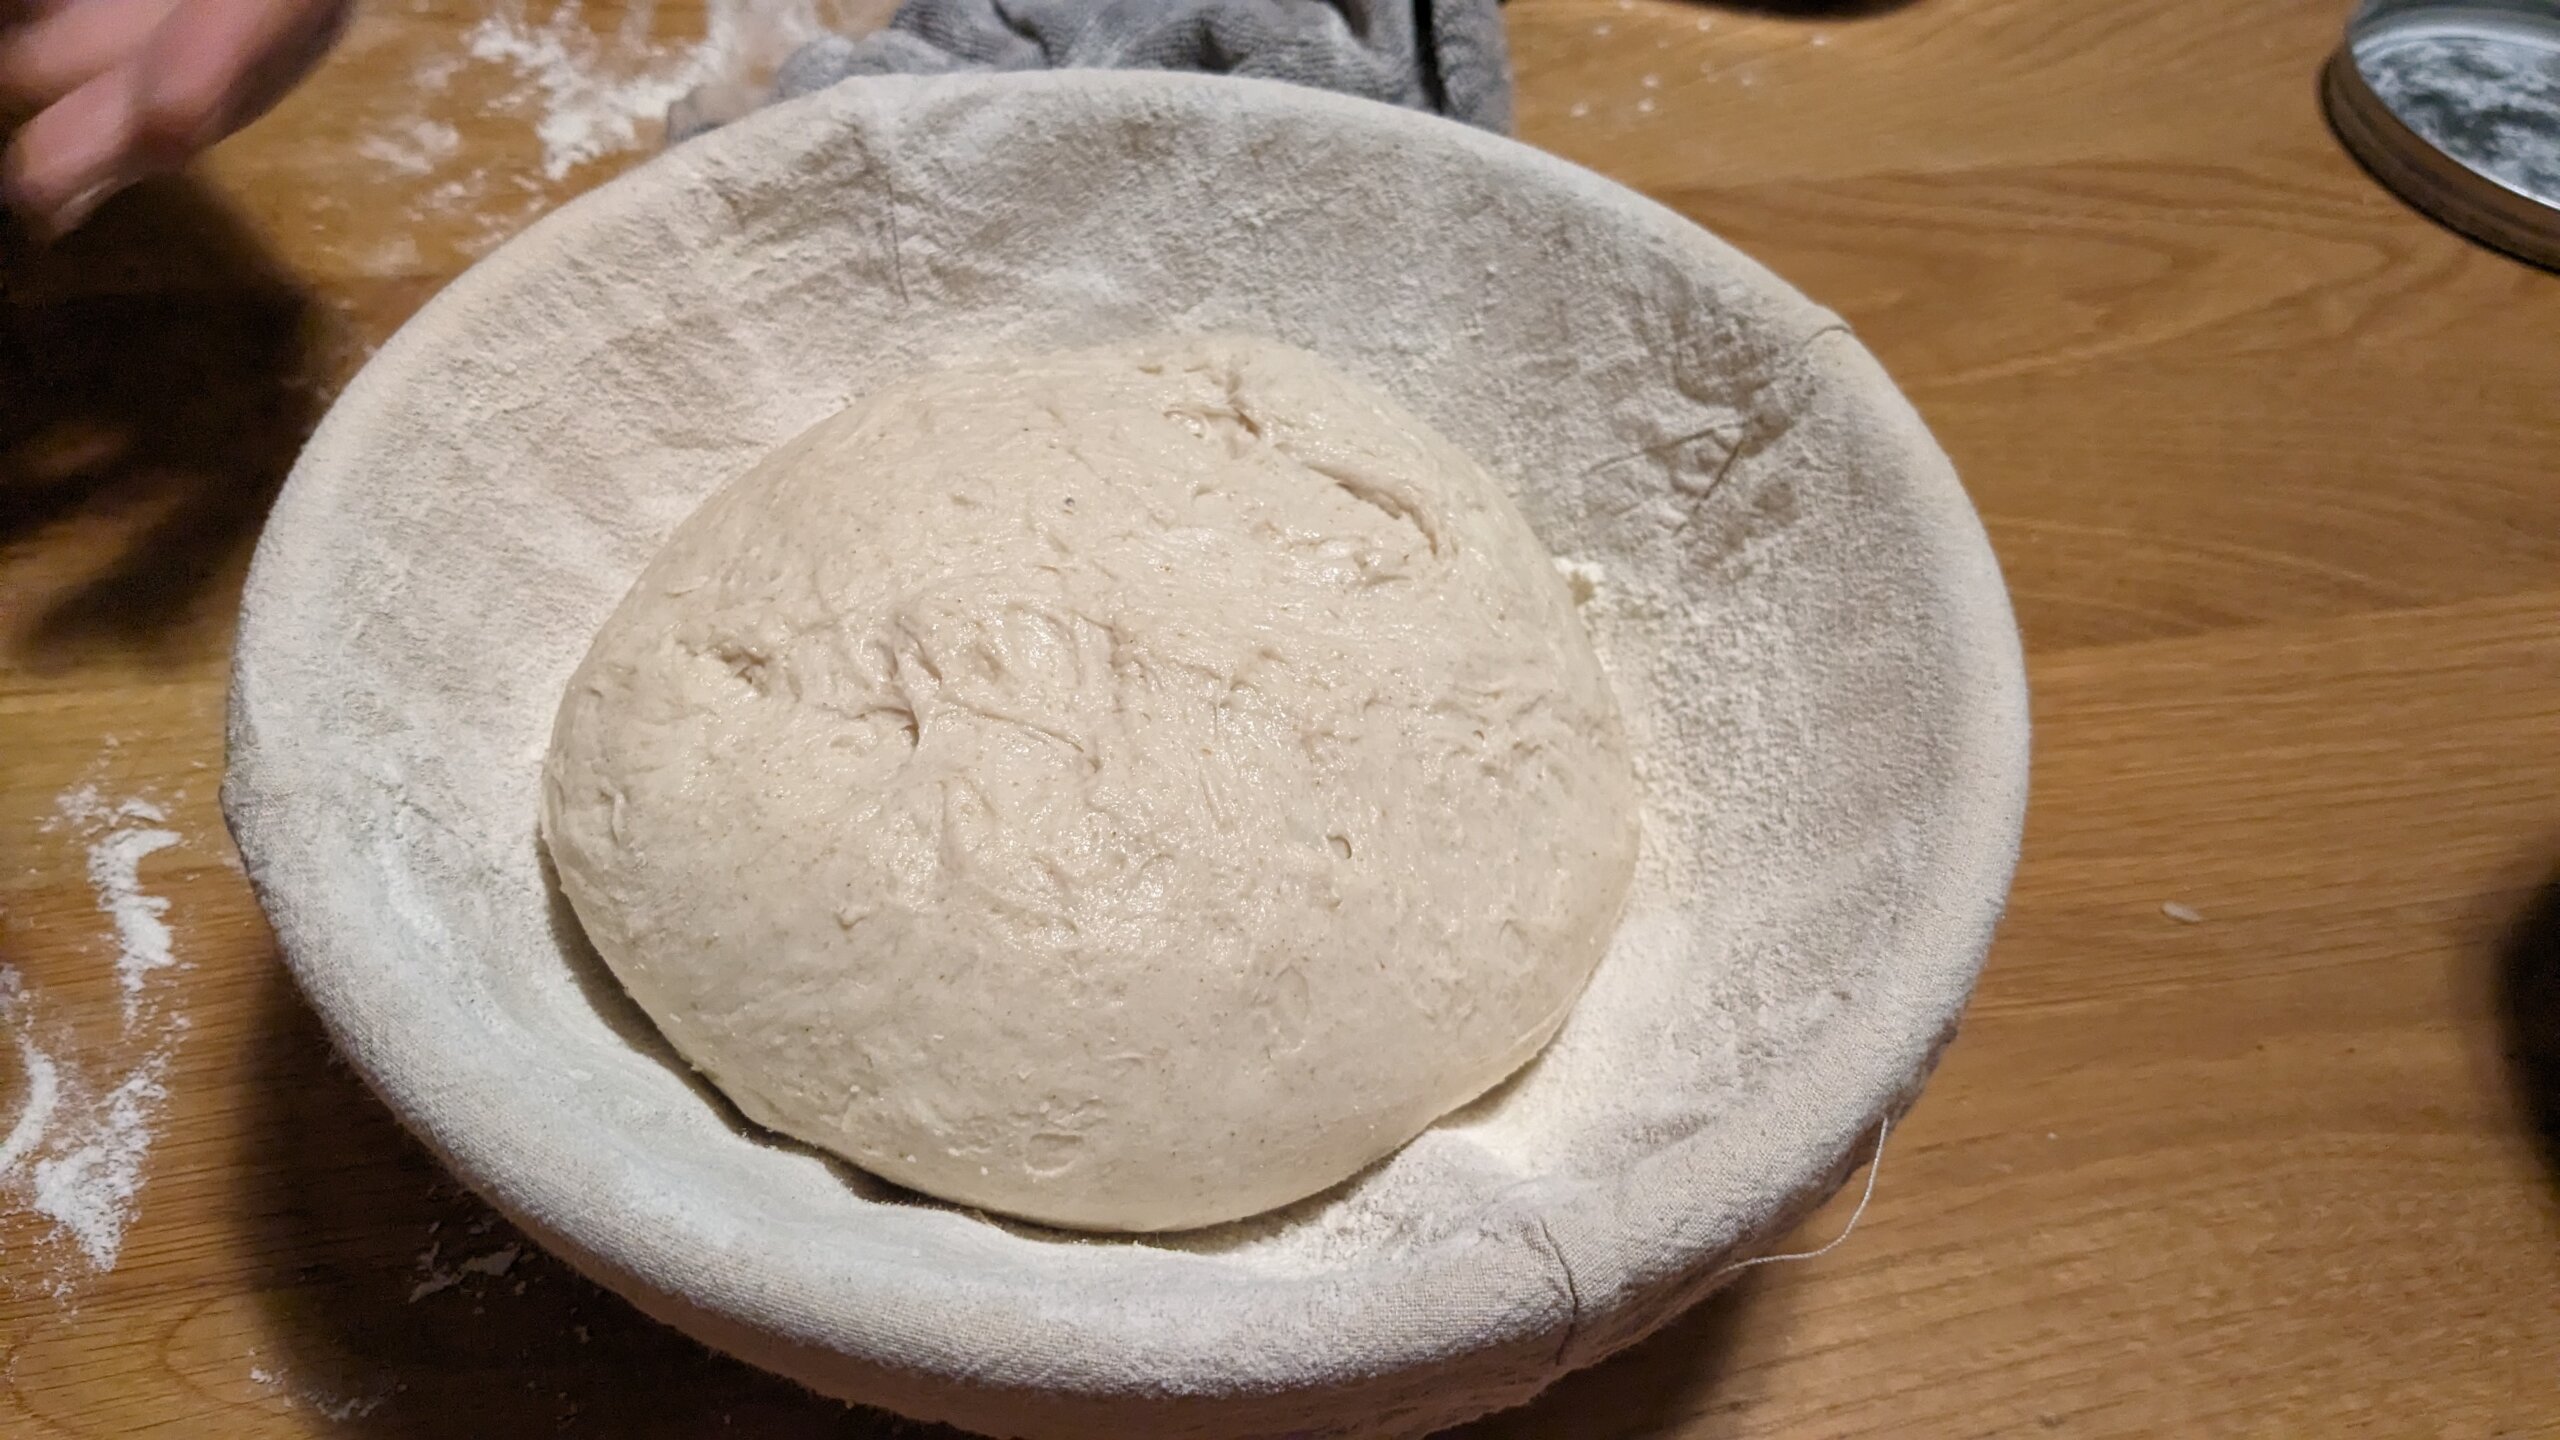
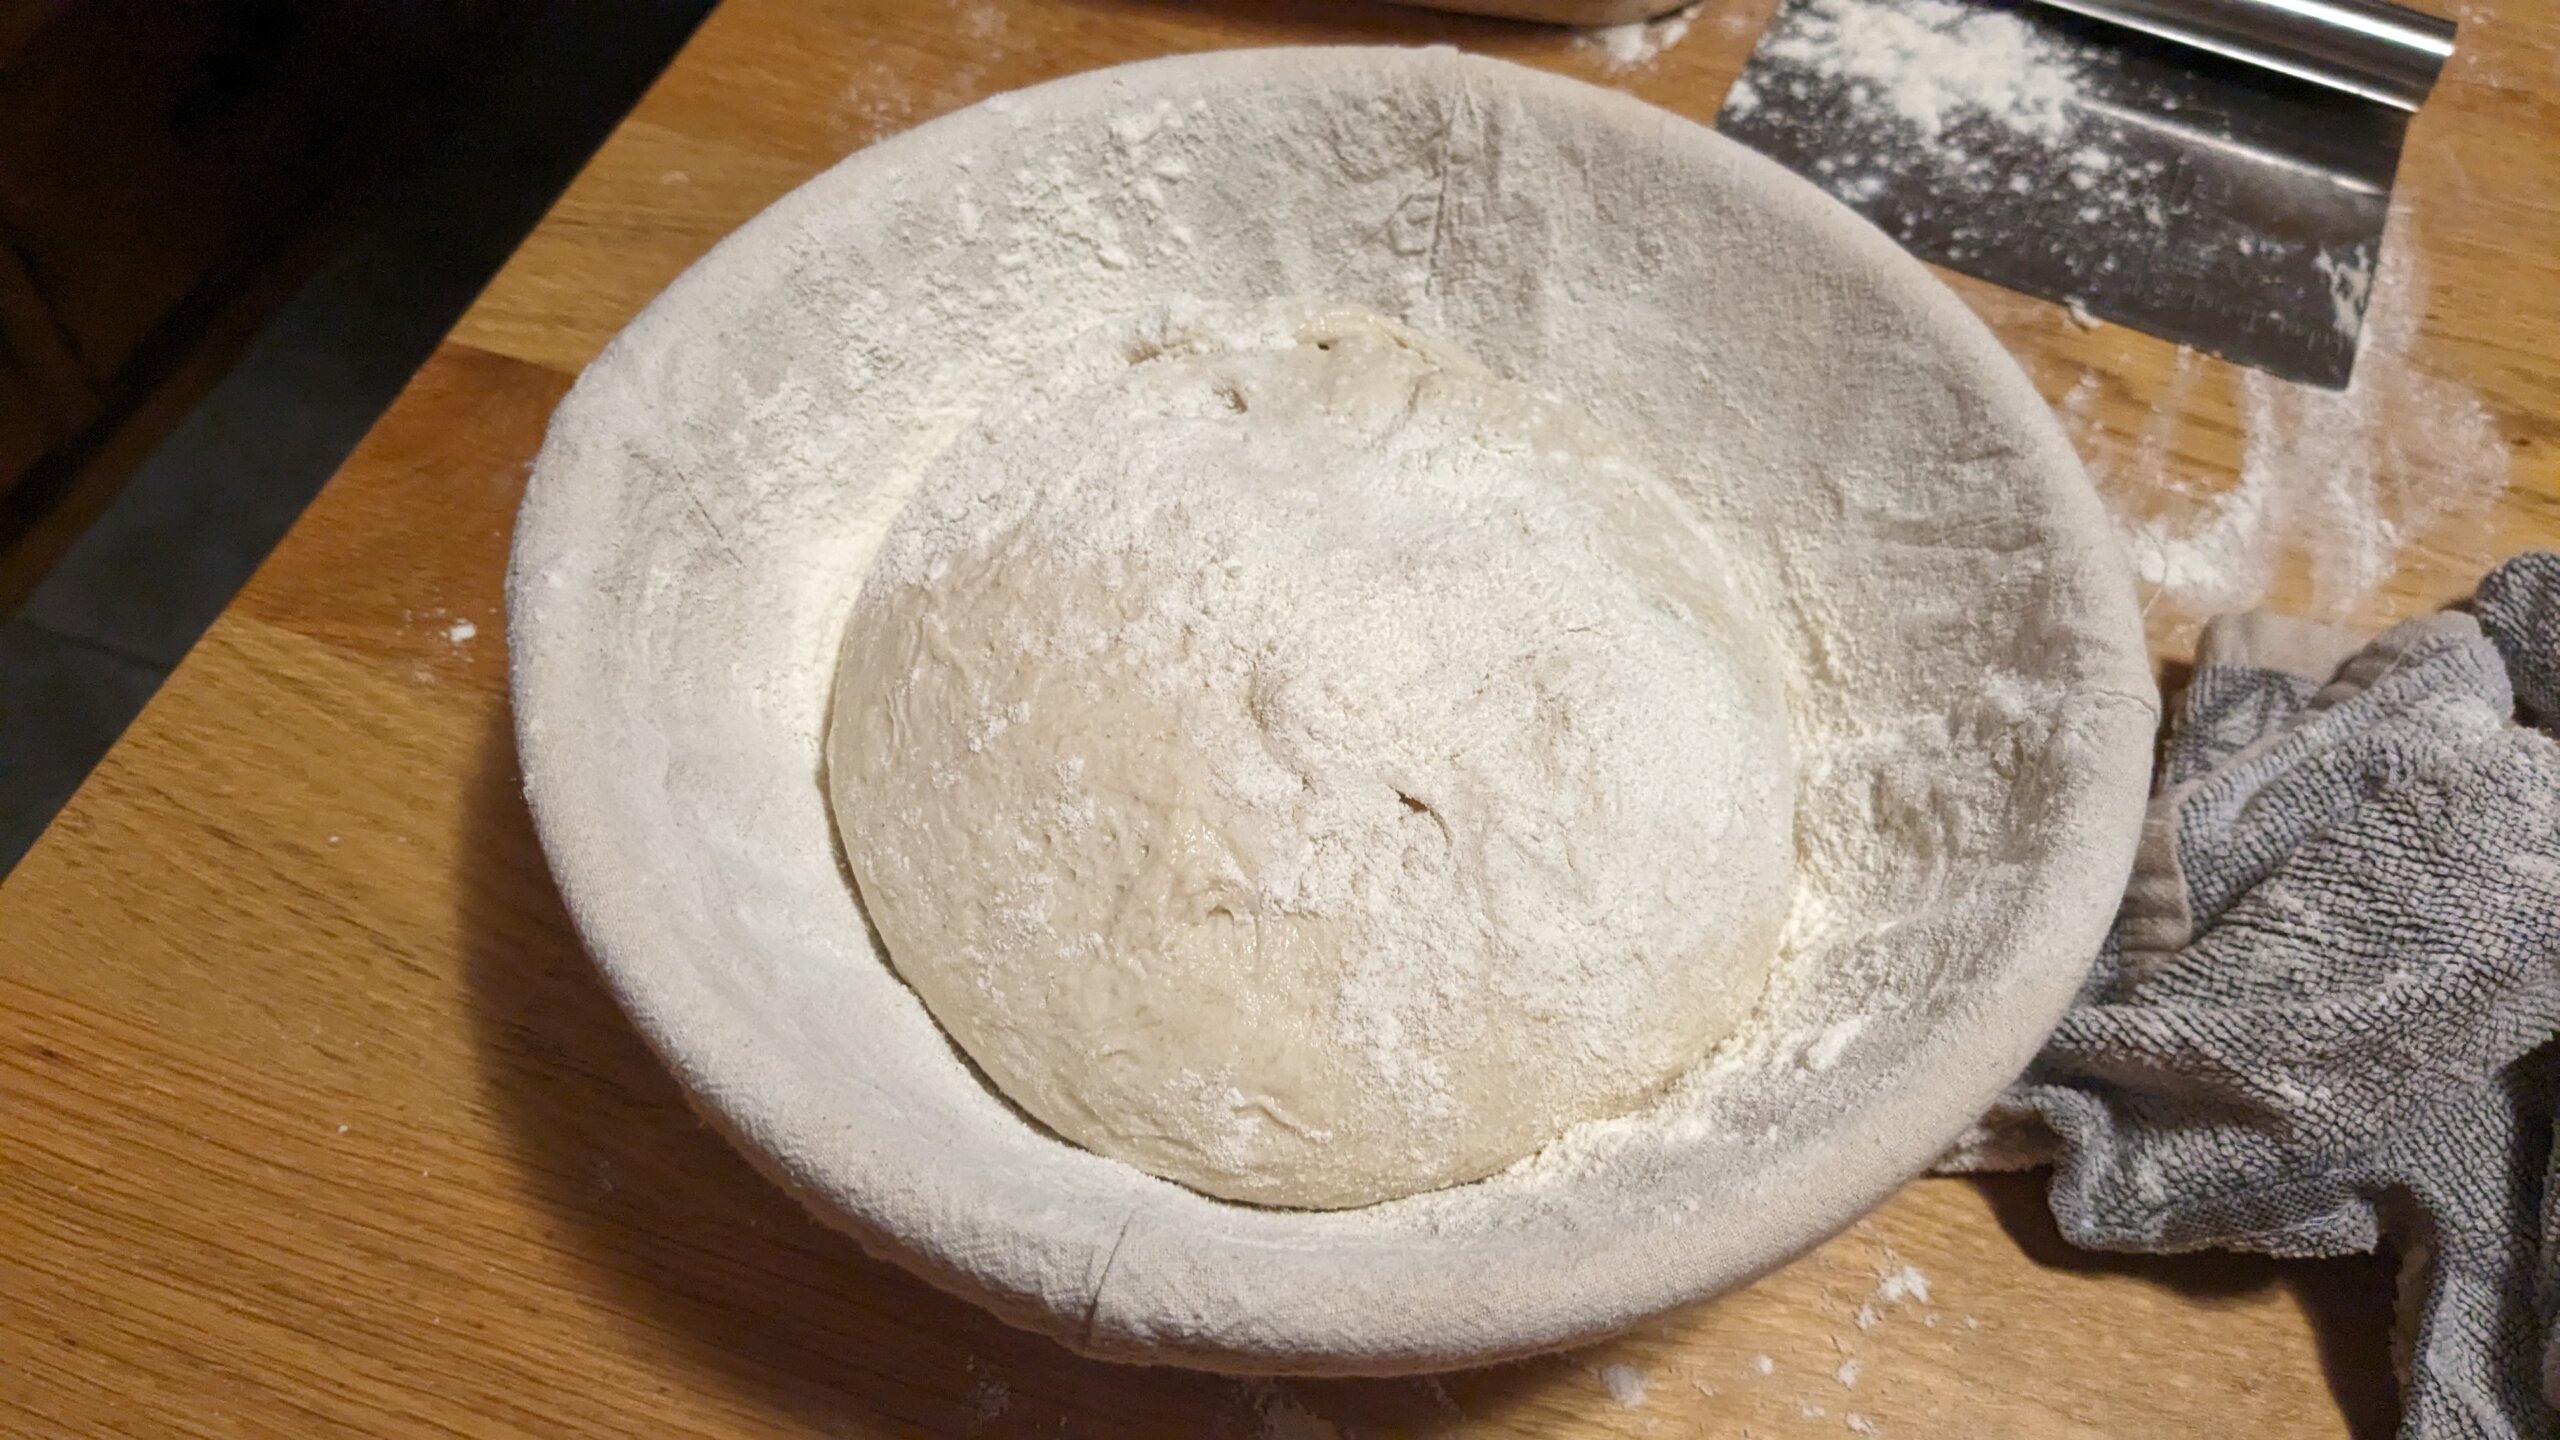
Once the top has a slight shine to it and looks tight (because you’ve built tension), you’re going to need your bench scraper or spatula. Push your tool under the loaf and flip it into the dusted banneton or bowl. I found this confusing at first, but what this means is the part that you worked hard to make tight and beautiful goes down into the fabric. The bottom is a little bit more sloppy and loose, but that’s okay. You’ll then lightly dust flour over the dough and along the sides of it in between the fabric to make sure that it doesn’t stick. Repeat this with the second loaf.
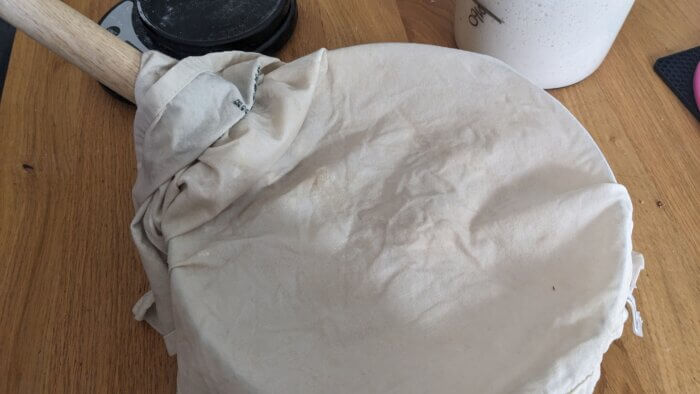
Finally, these banettons or bowls need to be covered with either a wet dish towel. If you do not want to use a dish towel, you can tie them in a plastic bag. Then place the bannetons flat in the refrigerator for at least 12 hours. If you don’t put them on a flat surface, the dough will follow gravity and you will end up with a slightly uneven loaf.
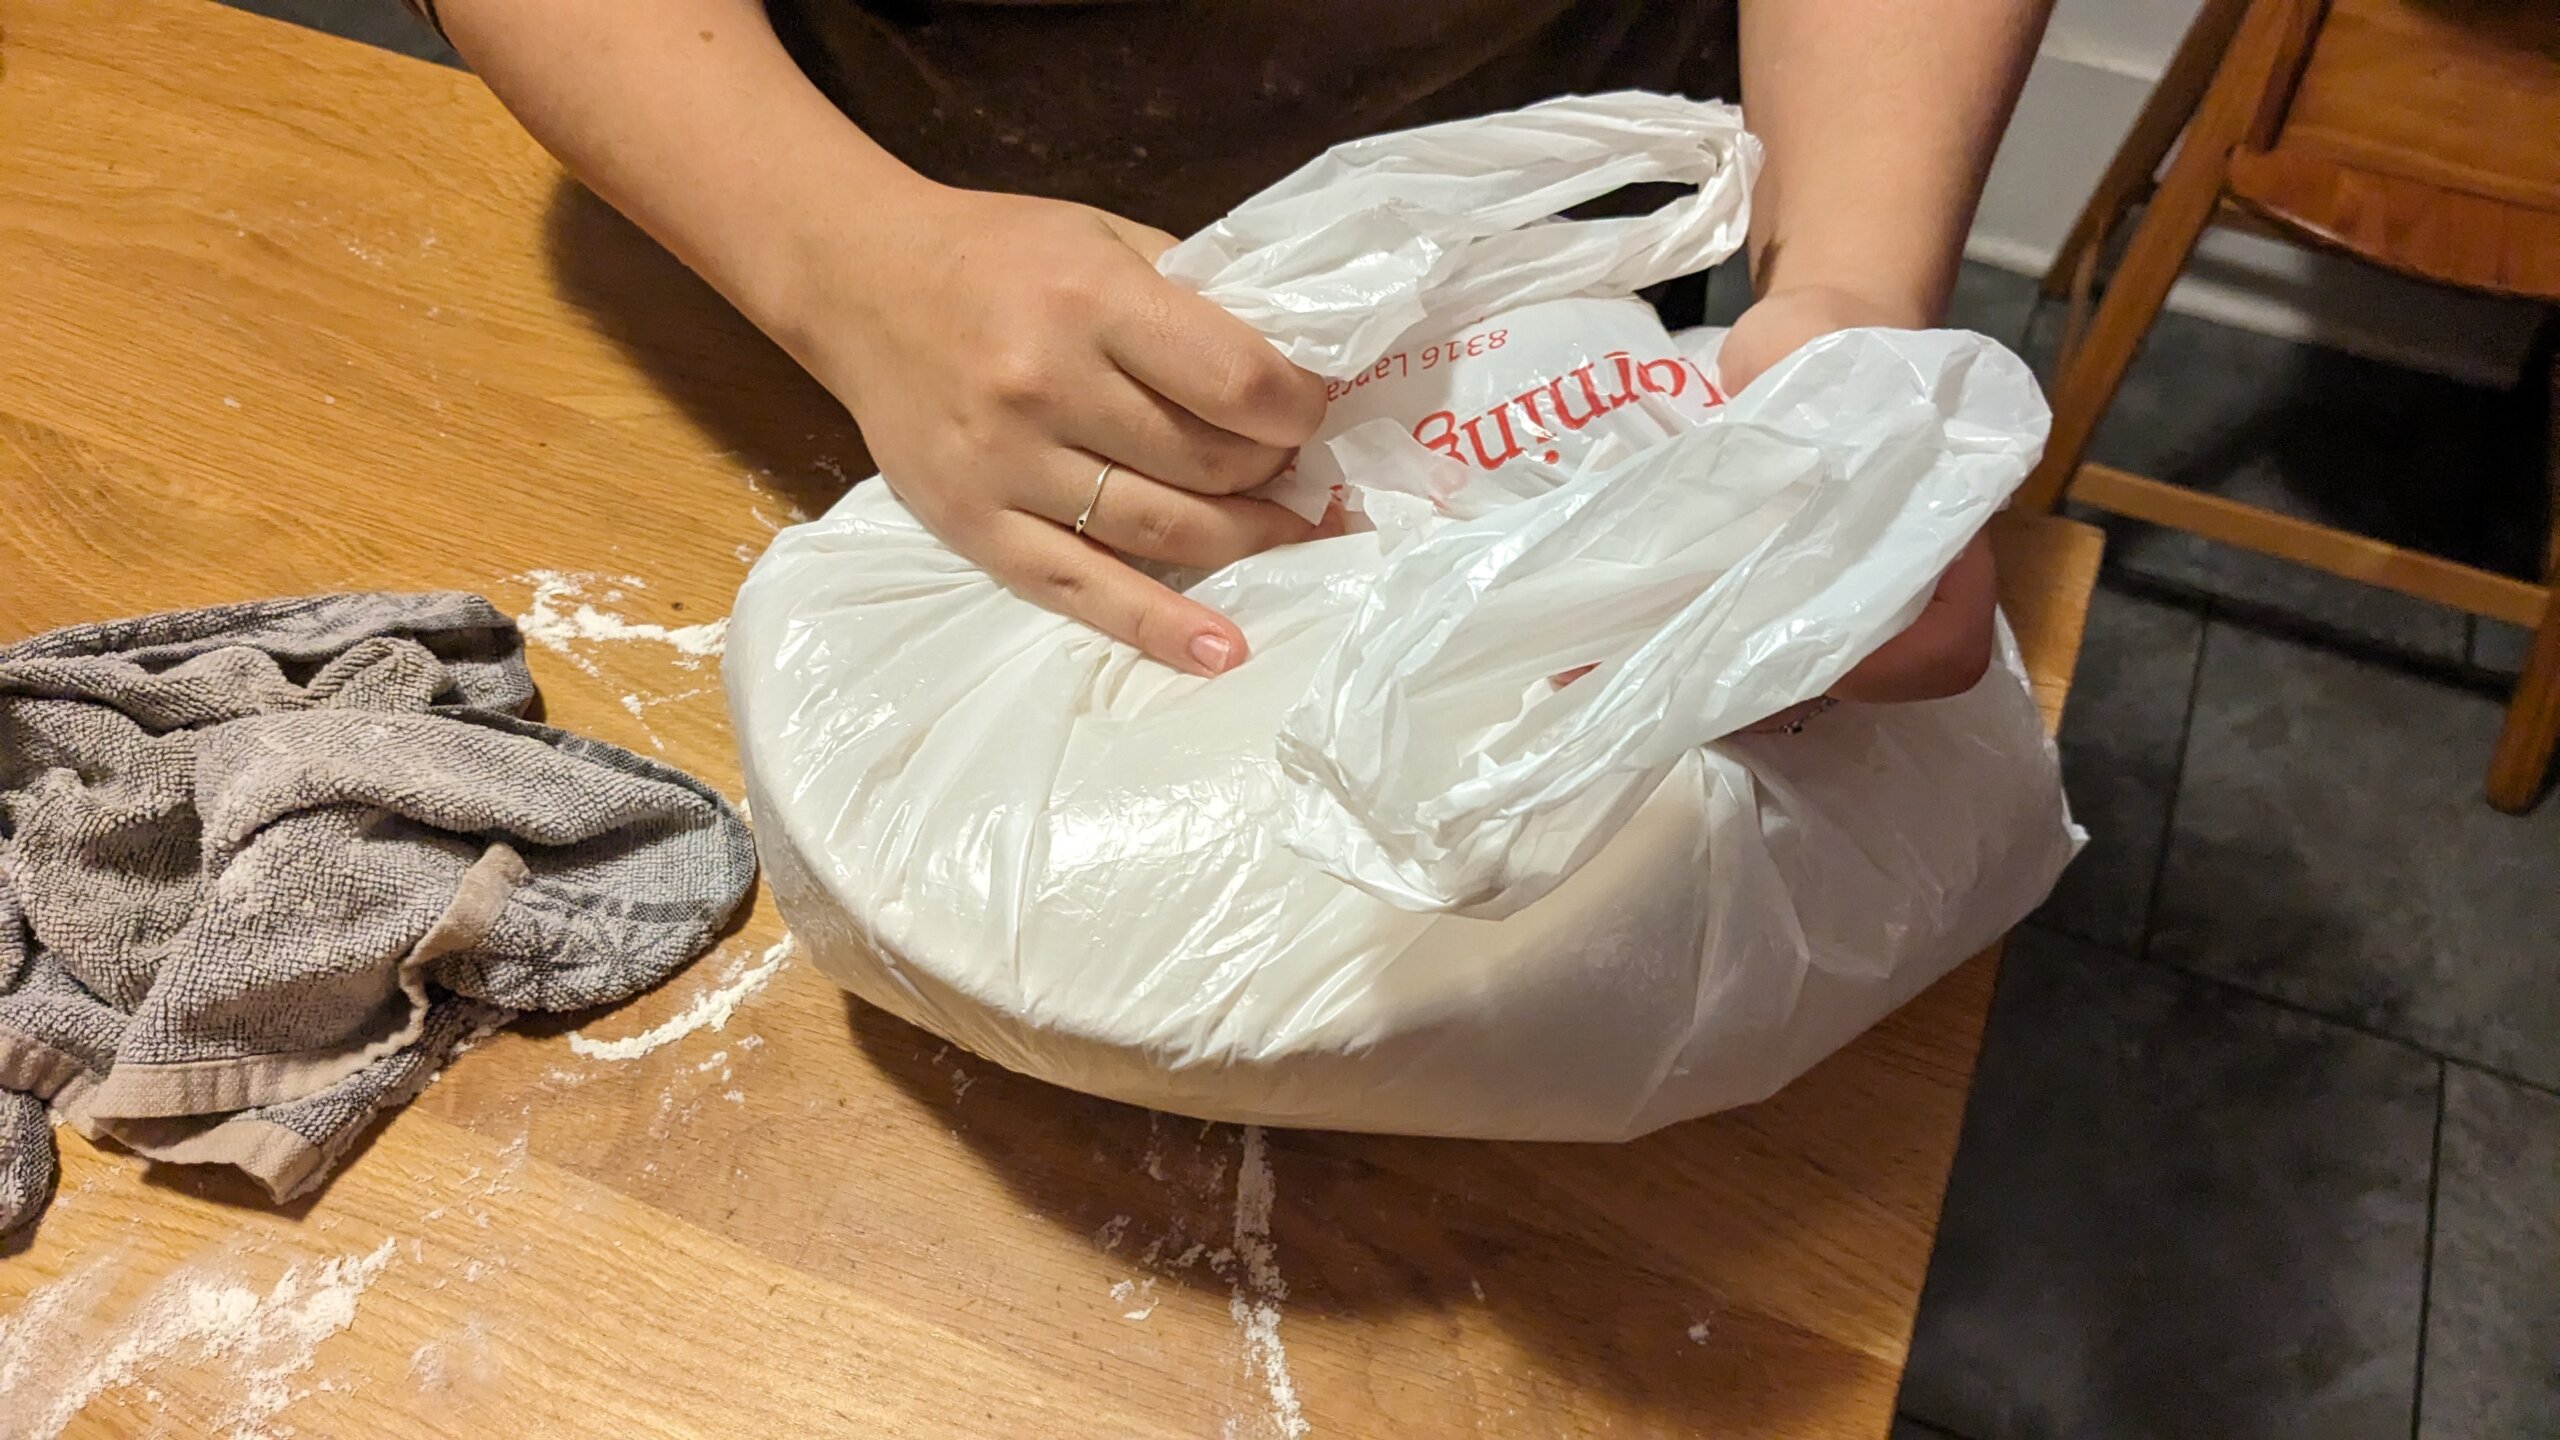
I have left the sourdough bannetons in the fridge for 5 days some weeks. The longer that they are in the fridge the more of a sour taste your bread might have. I love that this is an option because it means that you can prep for the week ahead with bread in the fridge.
Baking:
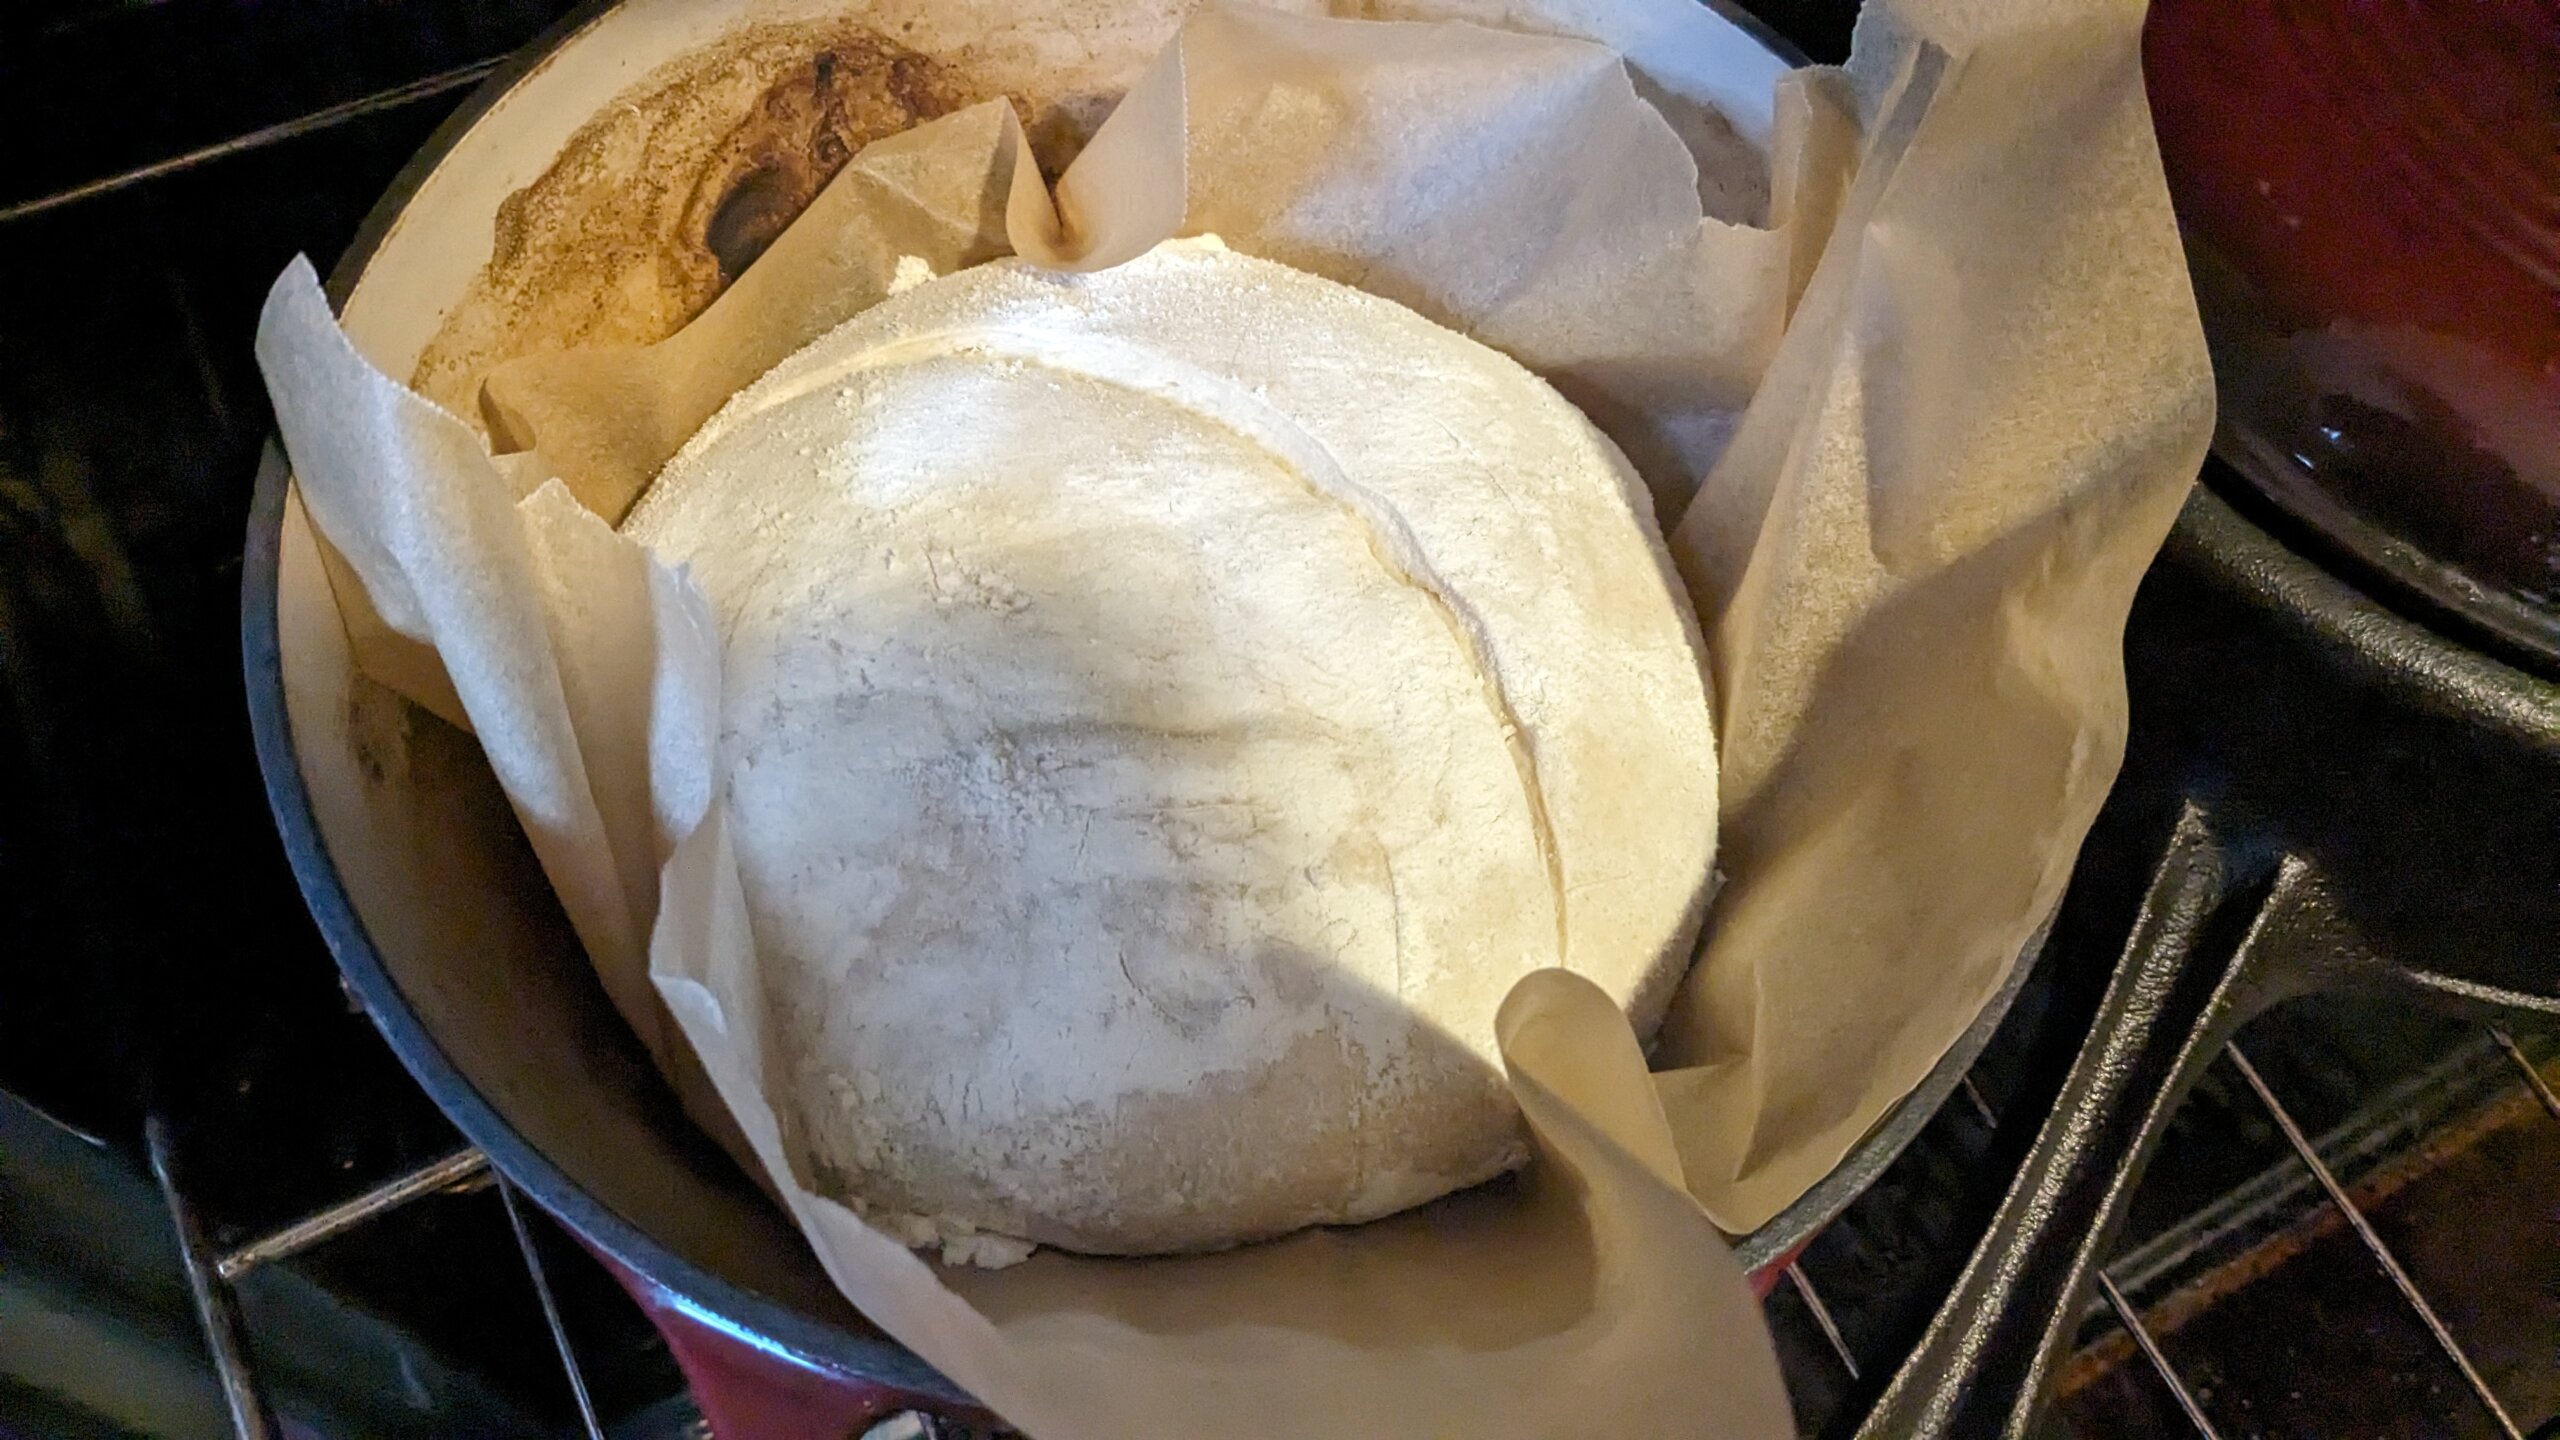
Finally, it’s baking time! Preheat your oven to 500° with the Dutch oven inside, lid off. I bake from a hot Dutch oven, but you will find plenty of groups that recommend a cold start in the Dutch oven. Others will tell you to keep your Dutch oven preheating for at least an hour before baking. I don’t do that and have had plenty of success.
Once the oven preheats to 500°, I pull one banneton out of the fridge. Cut a square of parchment paper that is a little bit bigger than the loaf of bread. Flip the banneton onto the parchment paper and gently peel the dough away from the fabric.
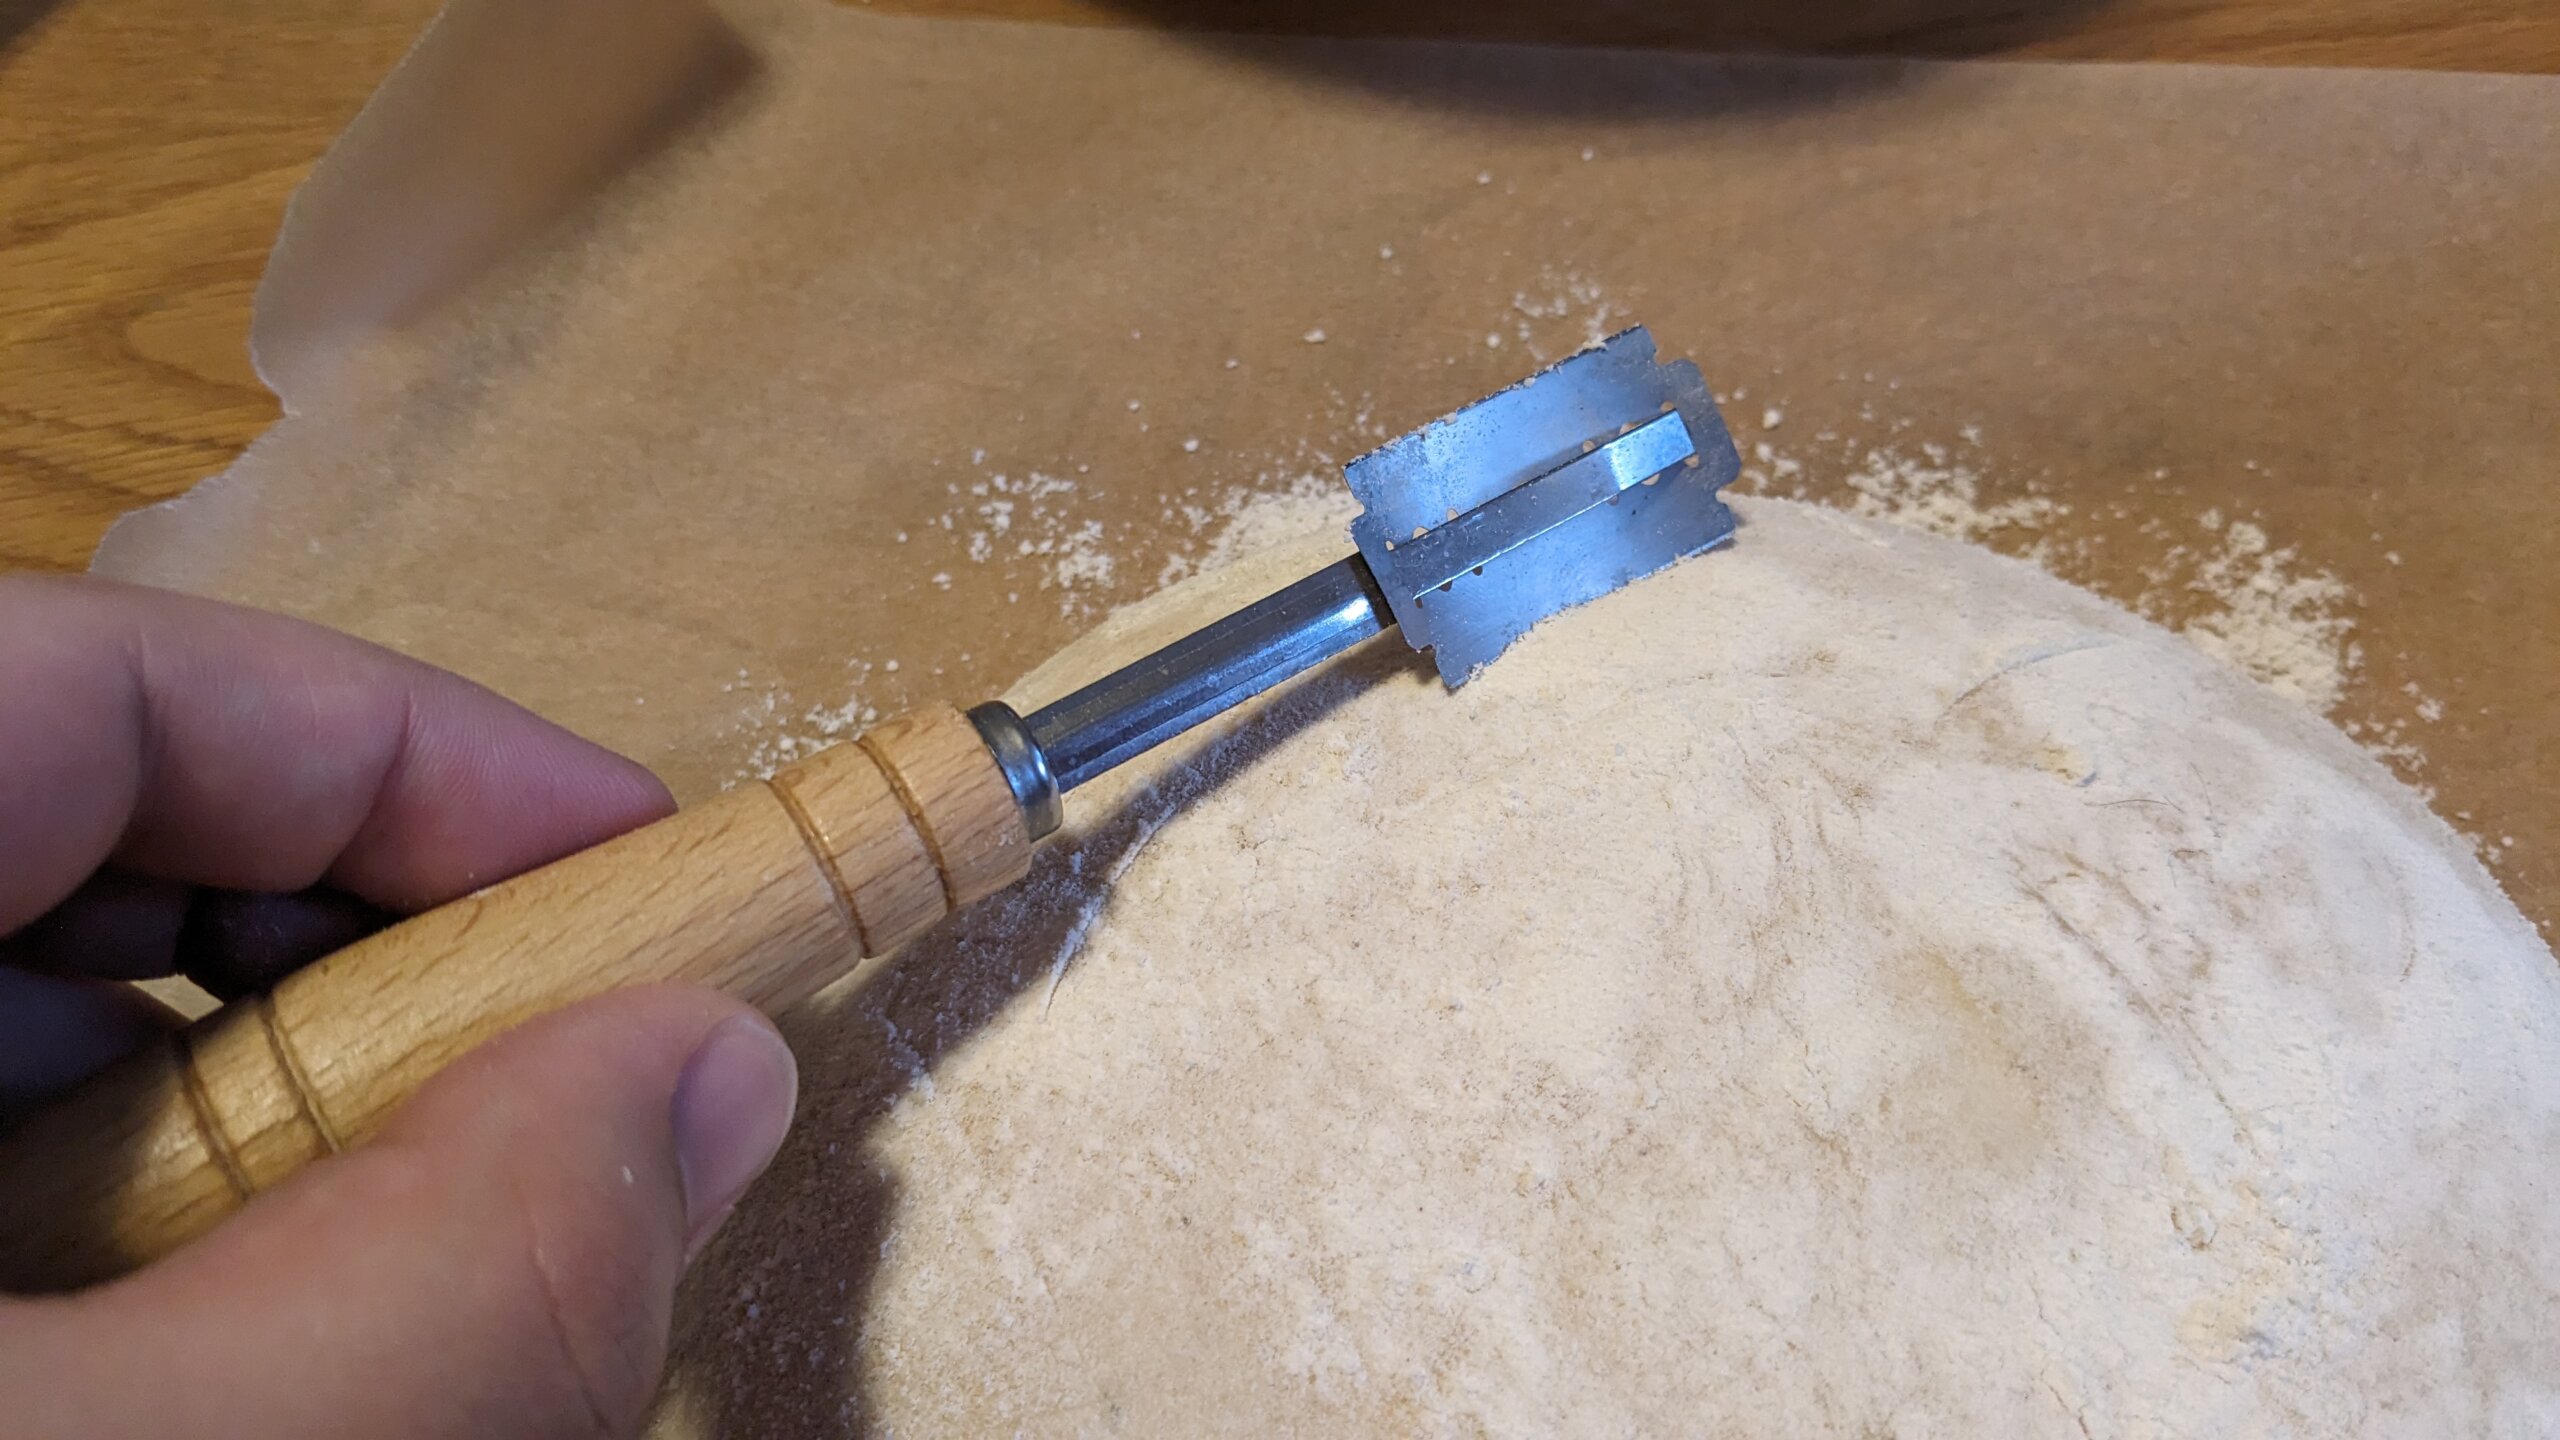
I dust away any excess flour with my hand or a pastry brush. Then, using a razor, cut a slit down the center of the bread. This is easy to become frustrated or overwhelmed with because most social media is flooded with beautiful images of intricately scored bread. I’ve been doing this for two and a half years and have only just started to get my designs to look good. For now, I highly recommend just trying to master scoring it well. To score the bread, slice it with a sharp razor or knife where the blade is at a 45° angle.
Place the bread (on the parchment paper) in the oven and cover the Dutch oven with the lid. Two things here:
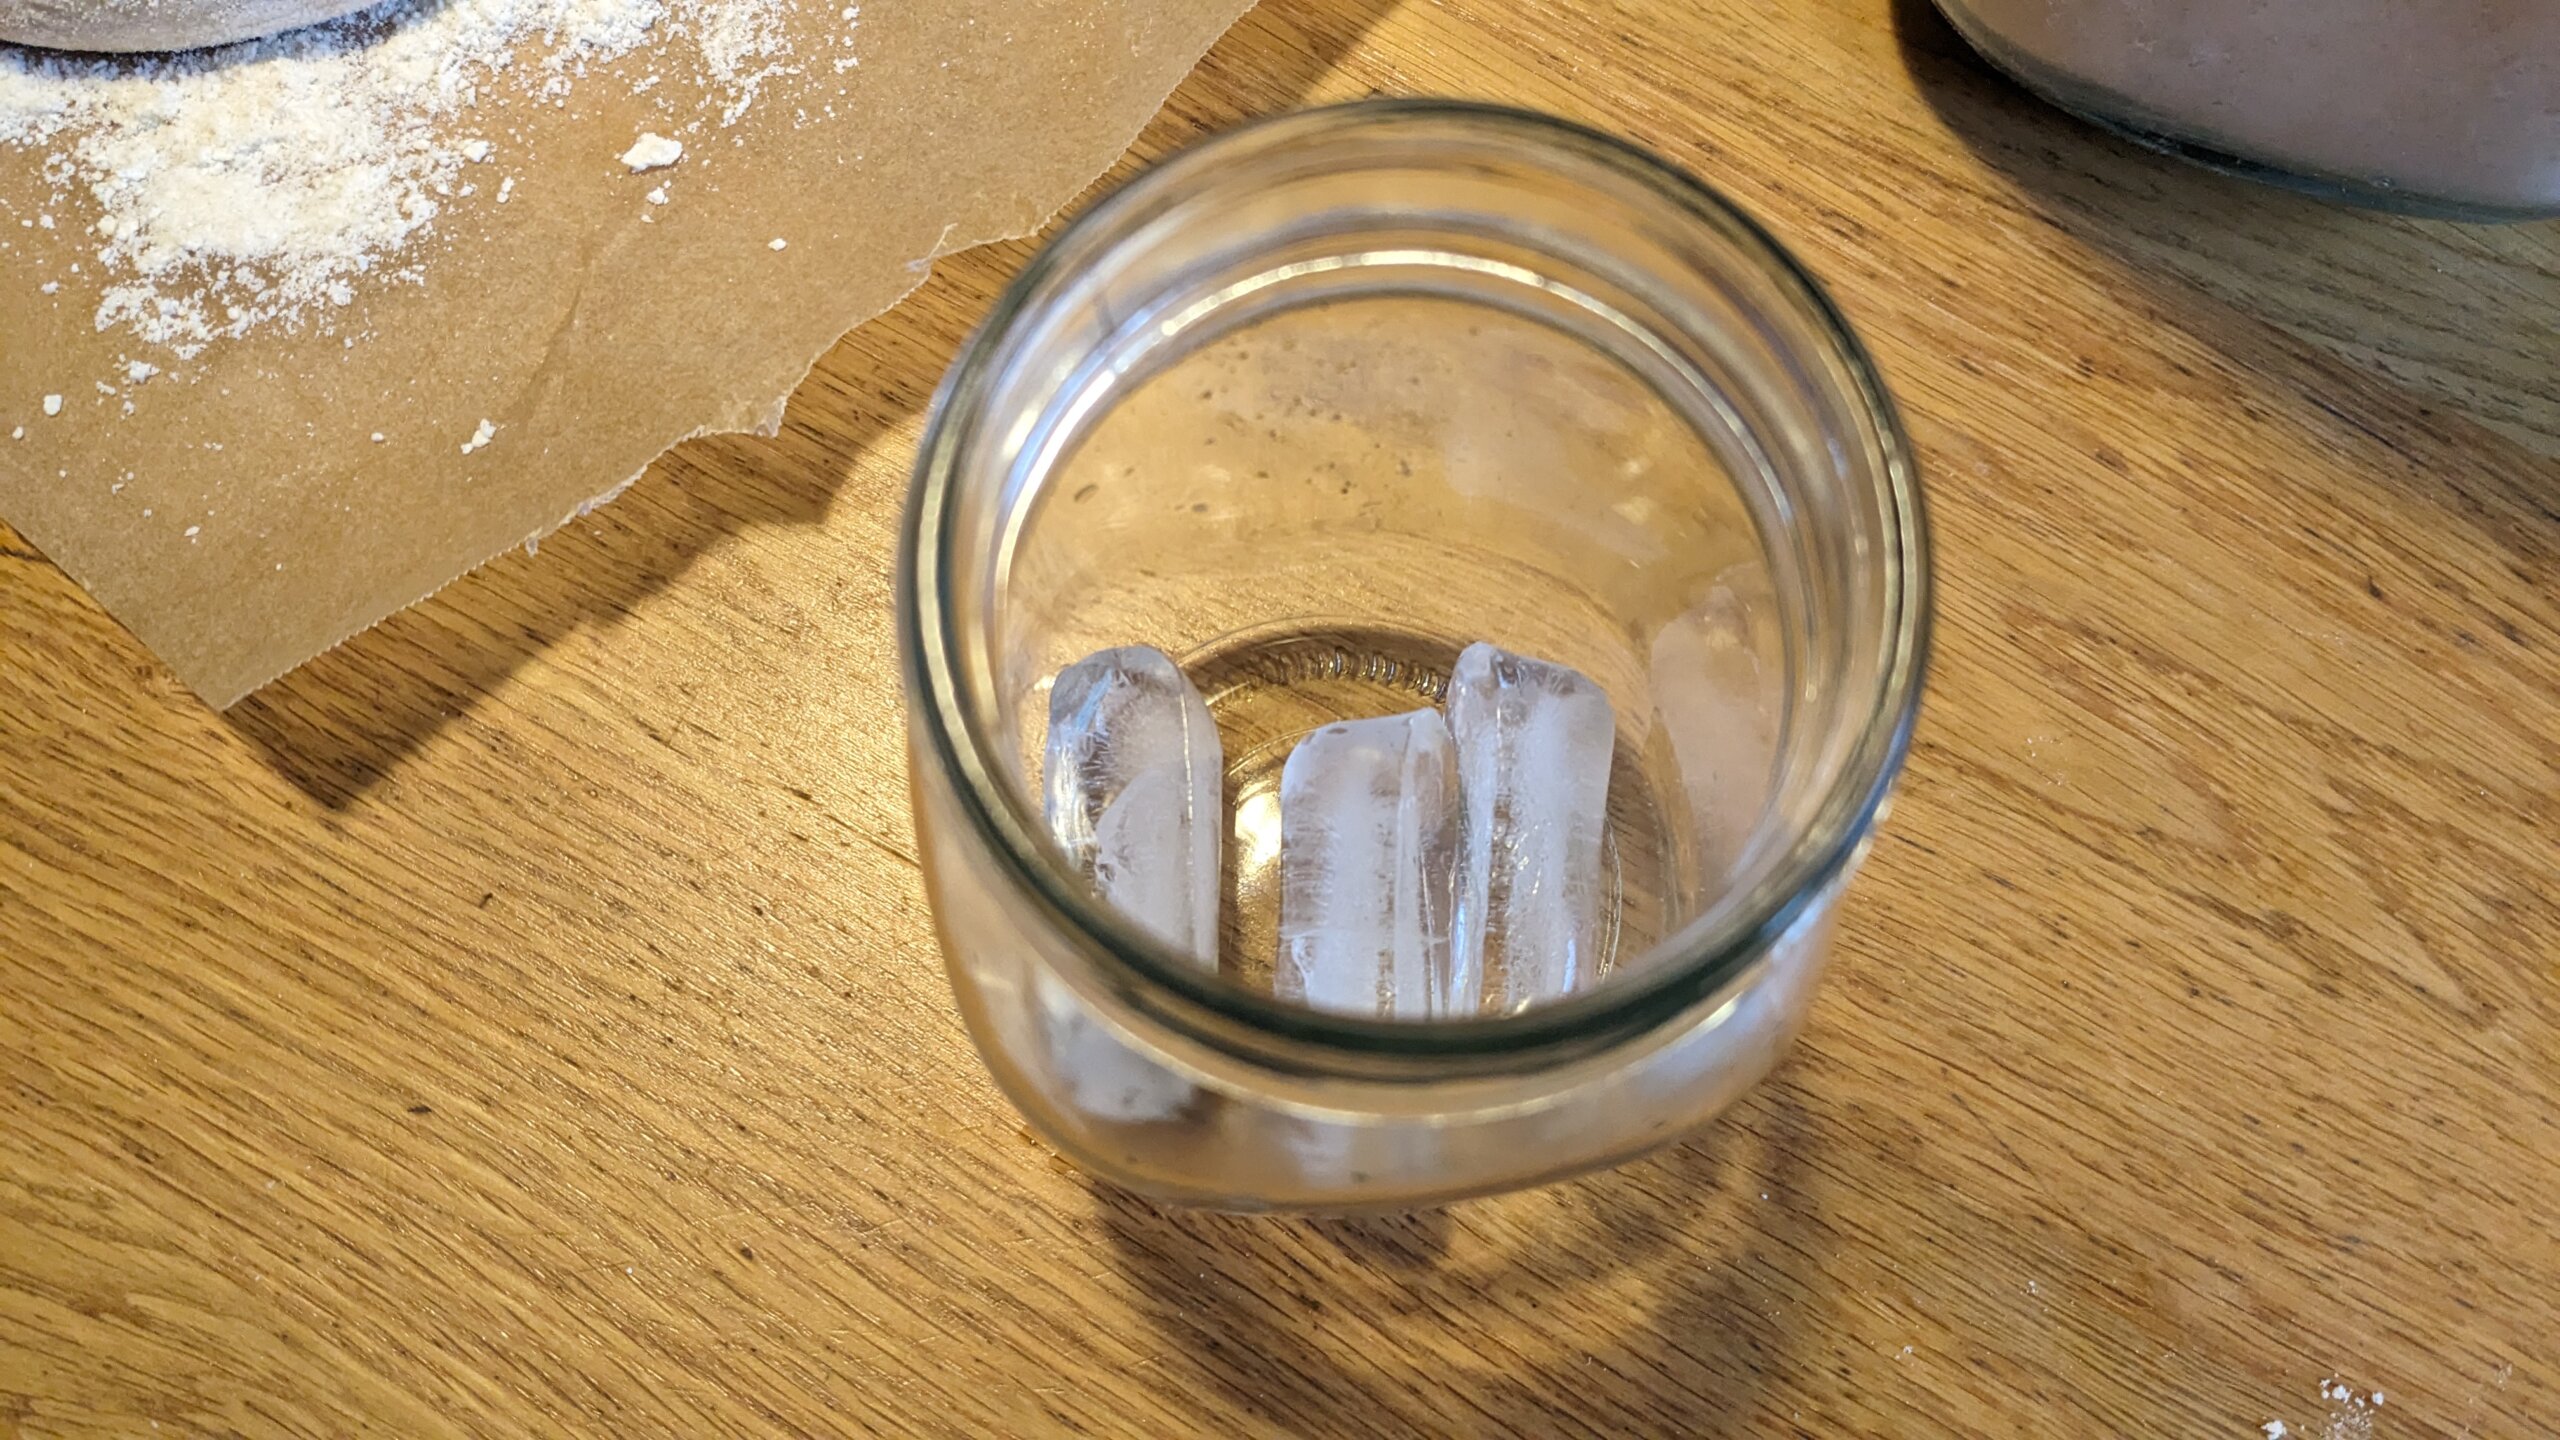
I would recommend having a hot pad handy or wearing an oven mitt so that you can do this quickly. You don’t want minimum heat to escape from the oven. Also, if you struggle with getting your bread to rise or are nervous that it won’t, you can throw two or three ice cubes in the Dutch oven underneath the parchment paper before putting the lid on. This allows additional steam which helps the bread to rise. If you are going to do this, have the ice ready before you open up the oven.
Set a timer for 25 minutes and do not open the oven until that timer goes off. You need the steam built up in the oven and the Dutch oven for your bread to rise. When the timer goes off, take off the lid. Leave the lid in the oven if you are going to be making the second loaf of bread right away.
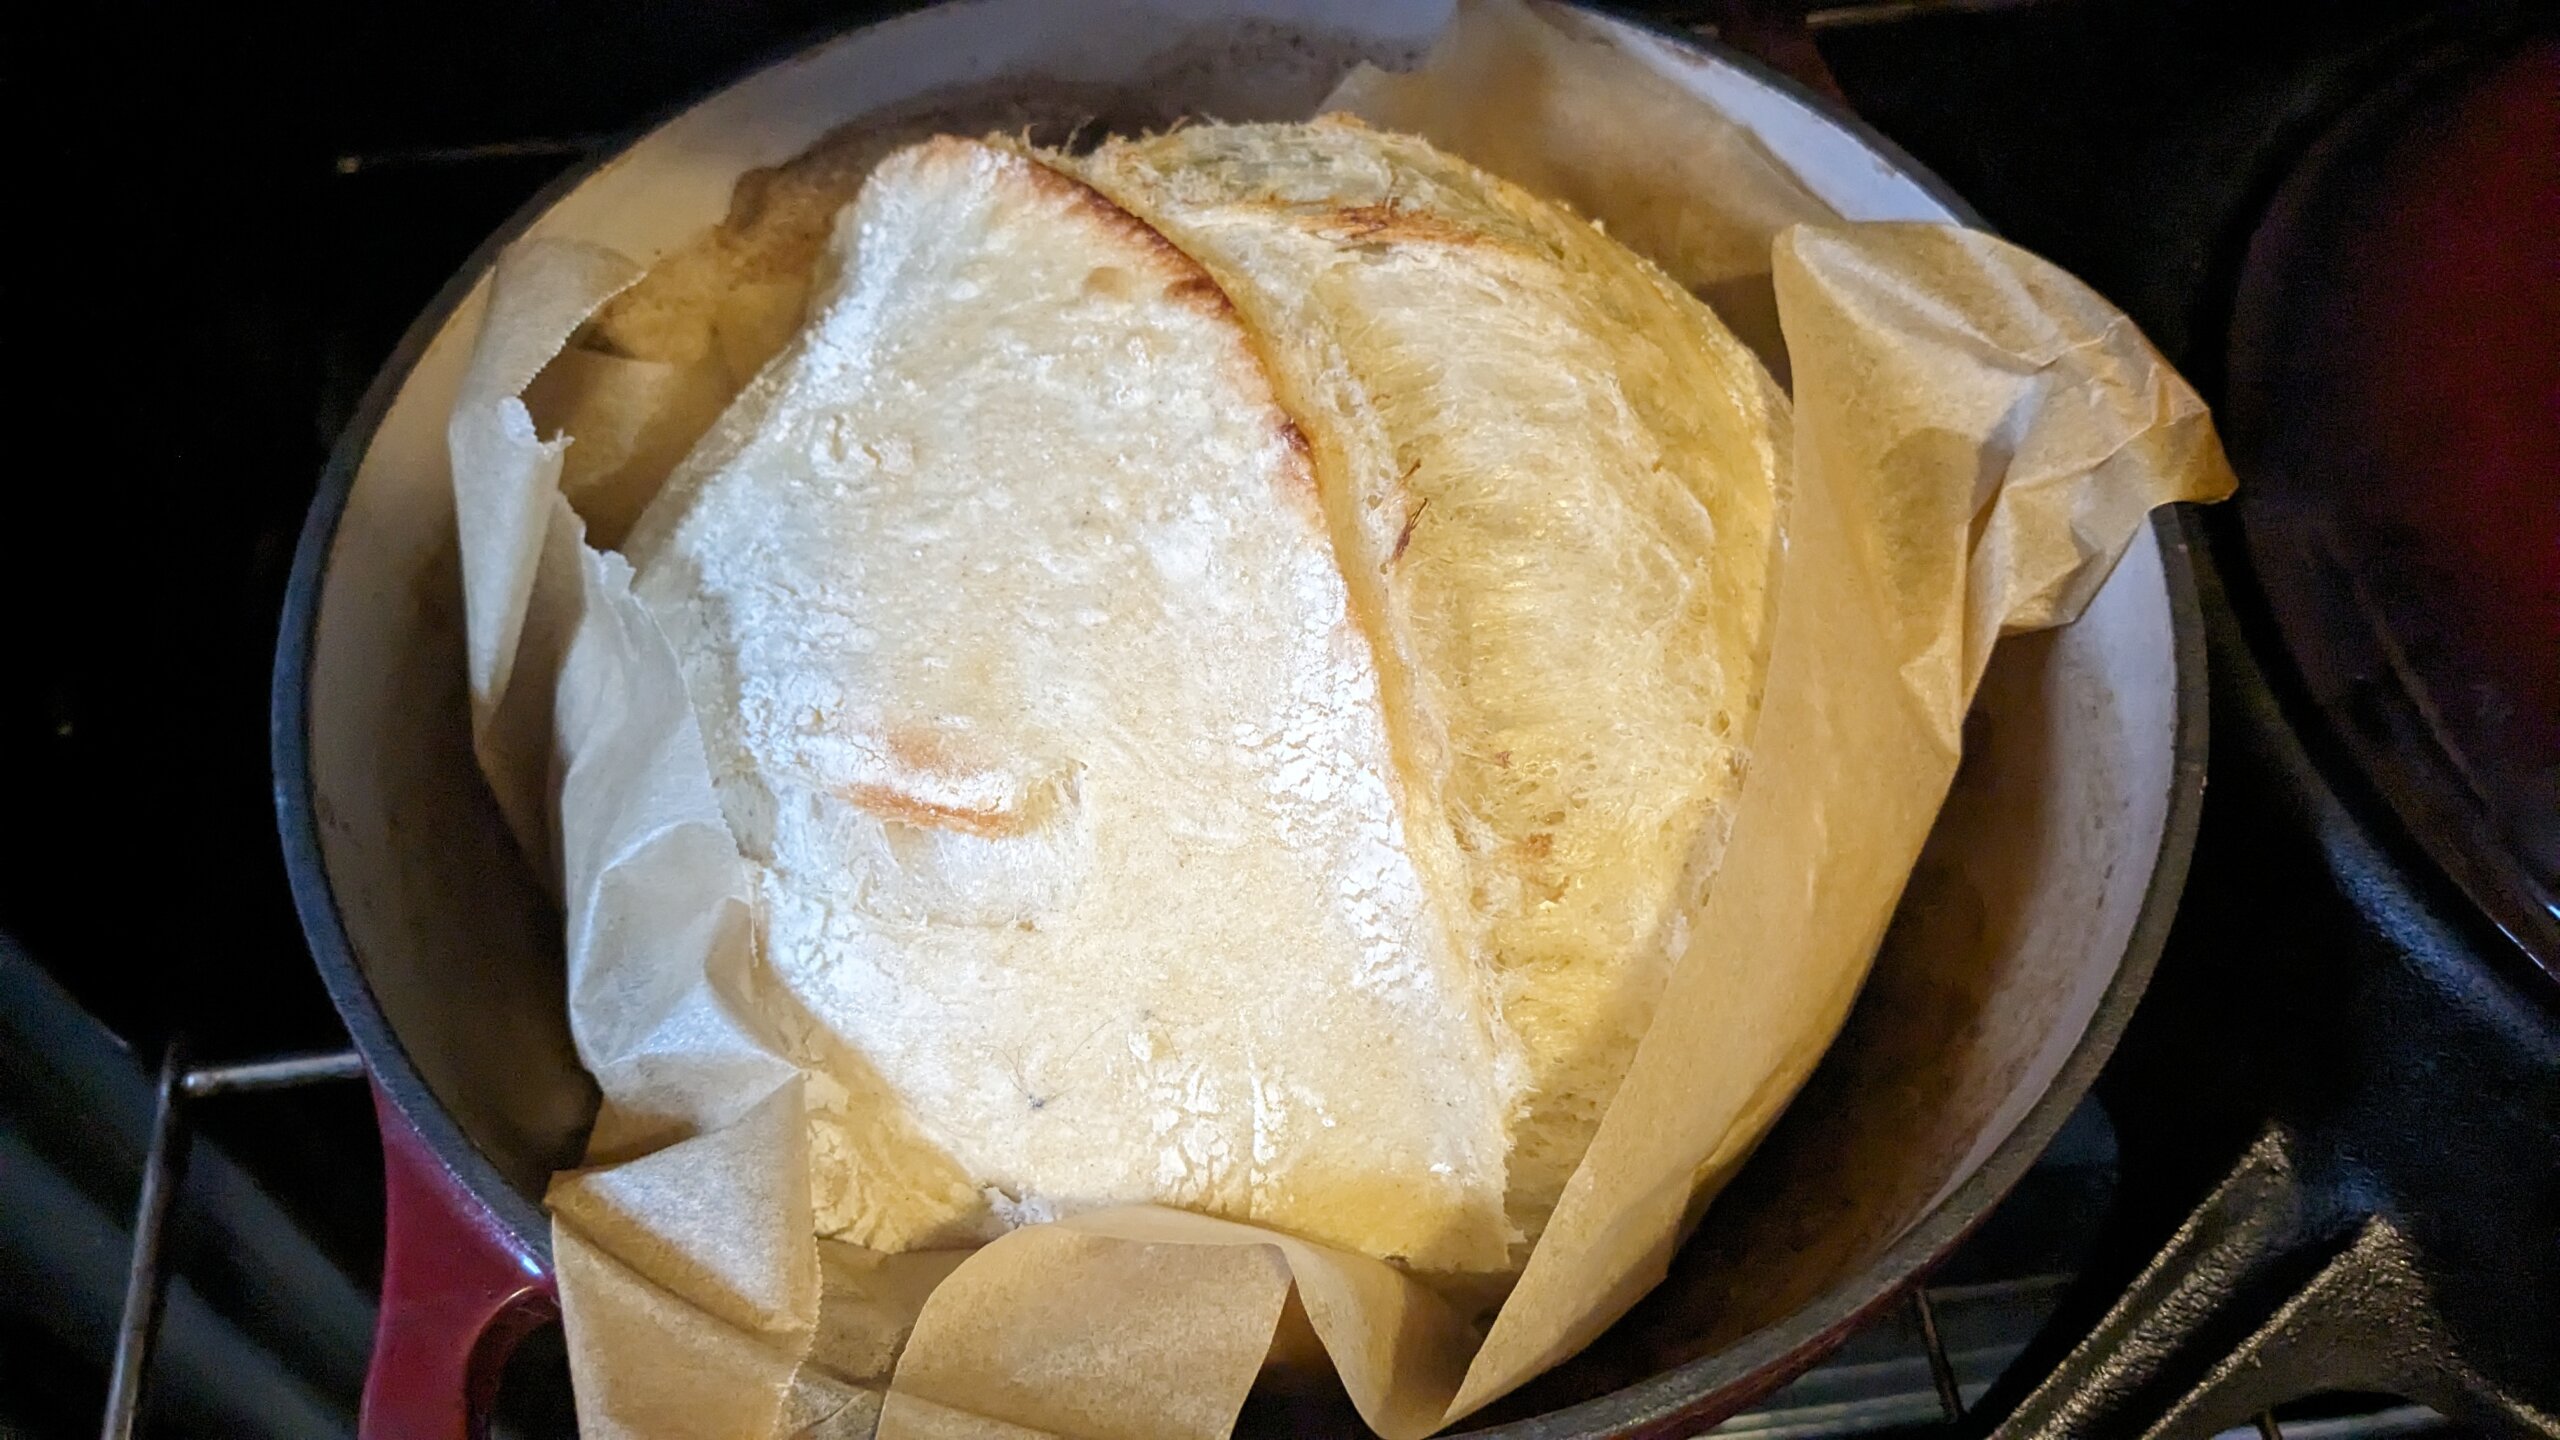
Now set a 20-minute timer. This gives your bread time to get that beautiful golden color and a nice crust. If you like a thicker crust, leave it in for a total of 25 or 30 minutes after removing the lid.
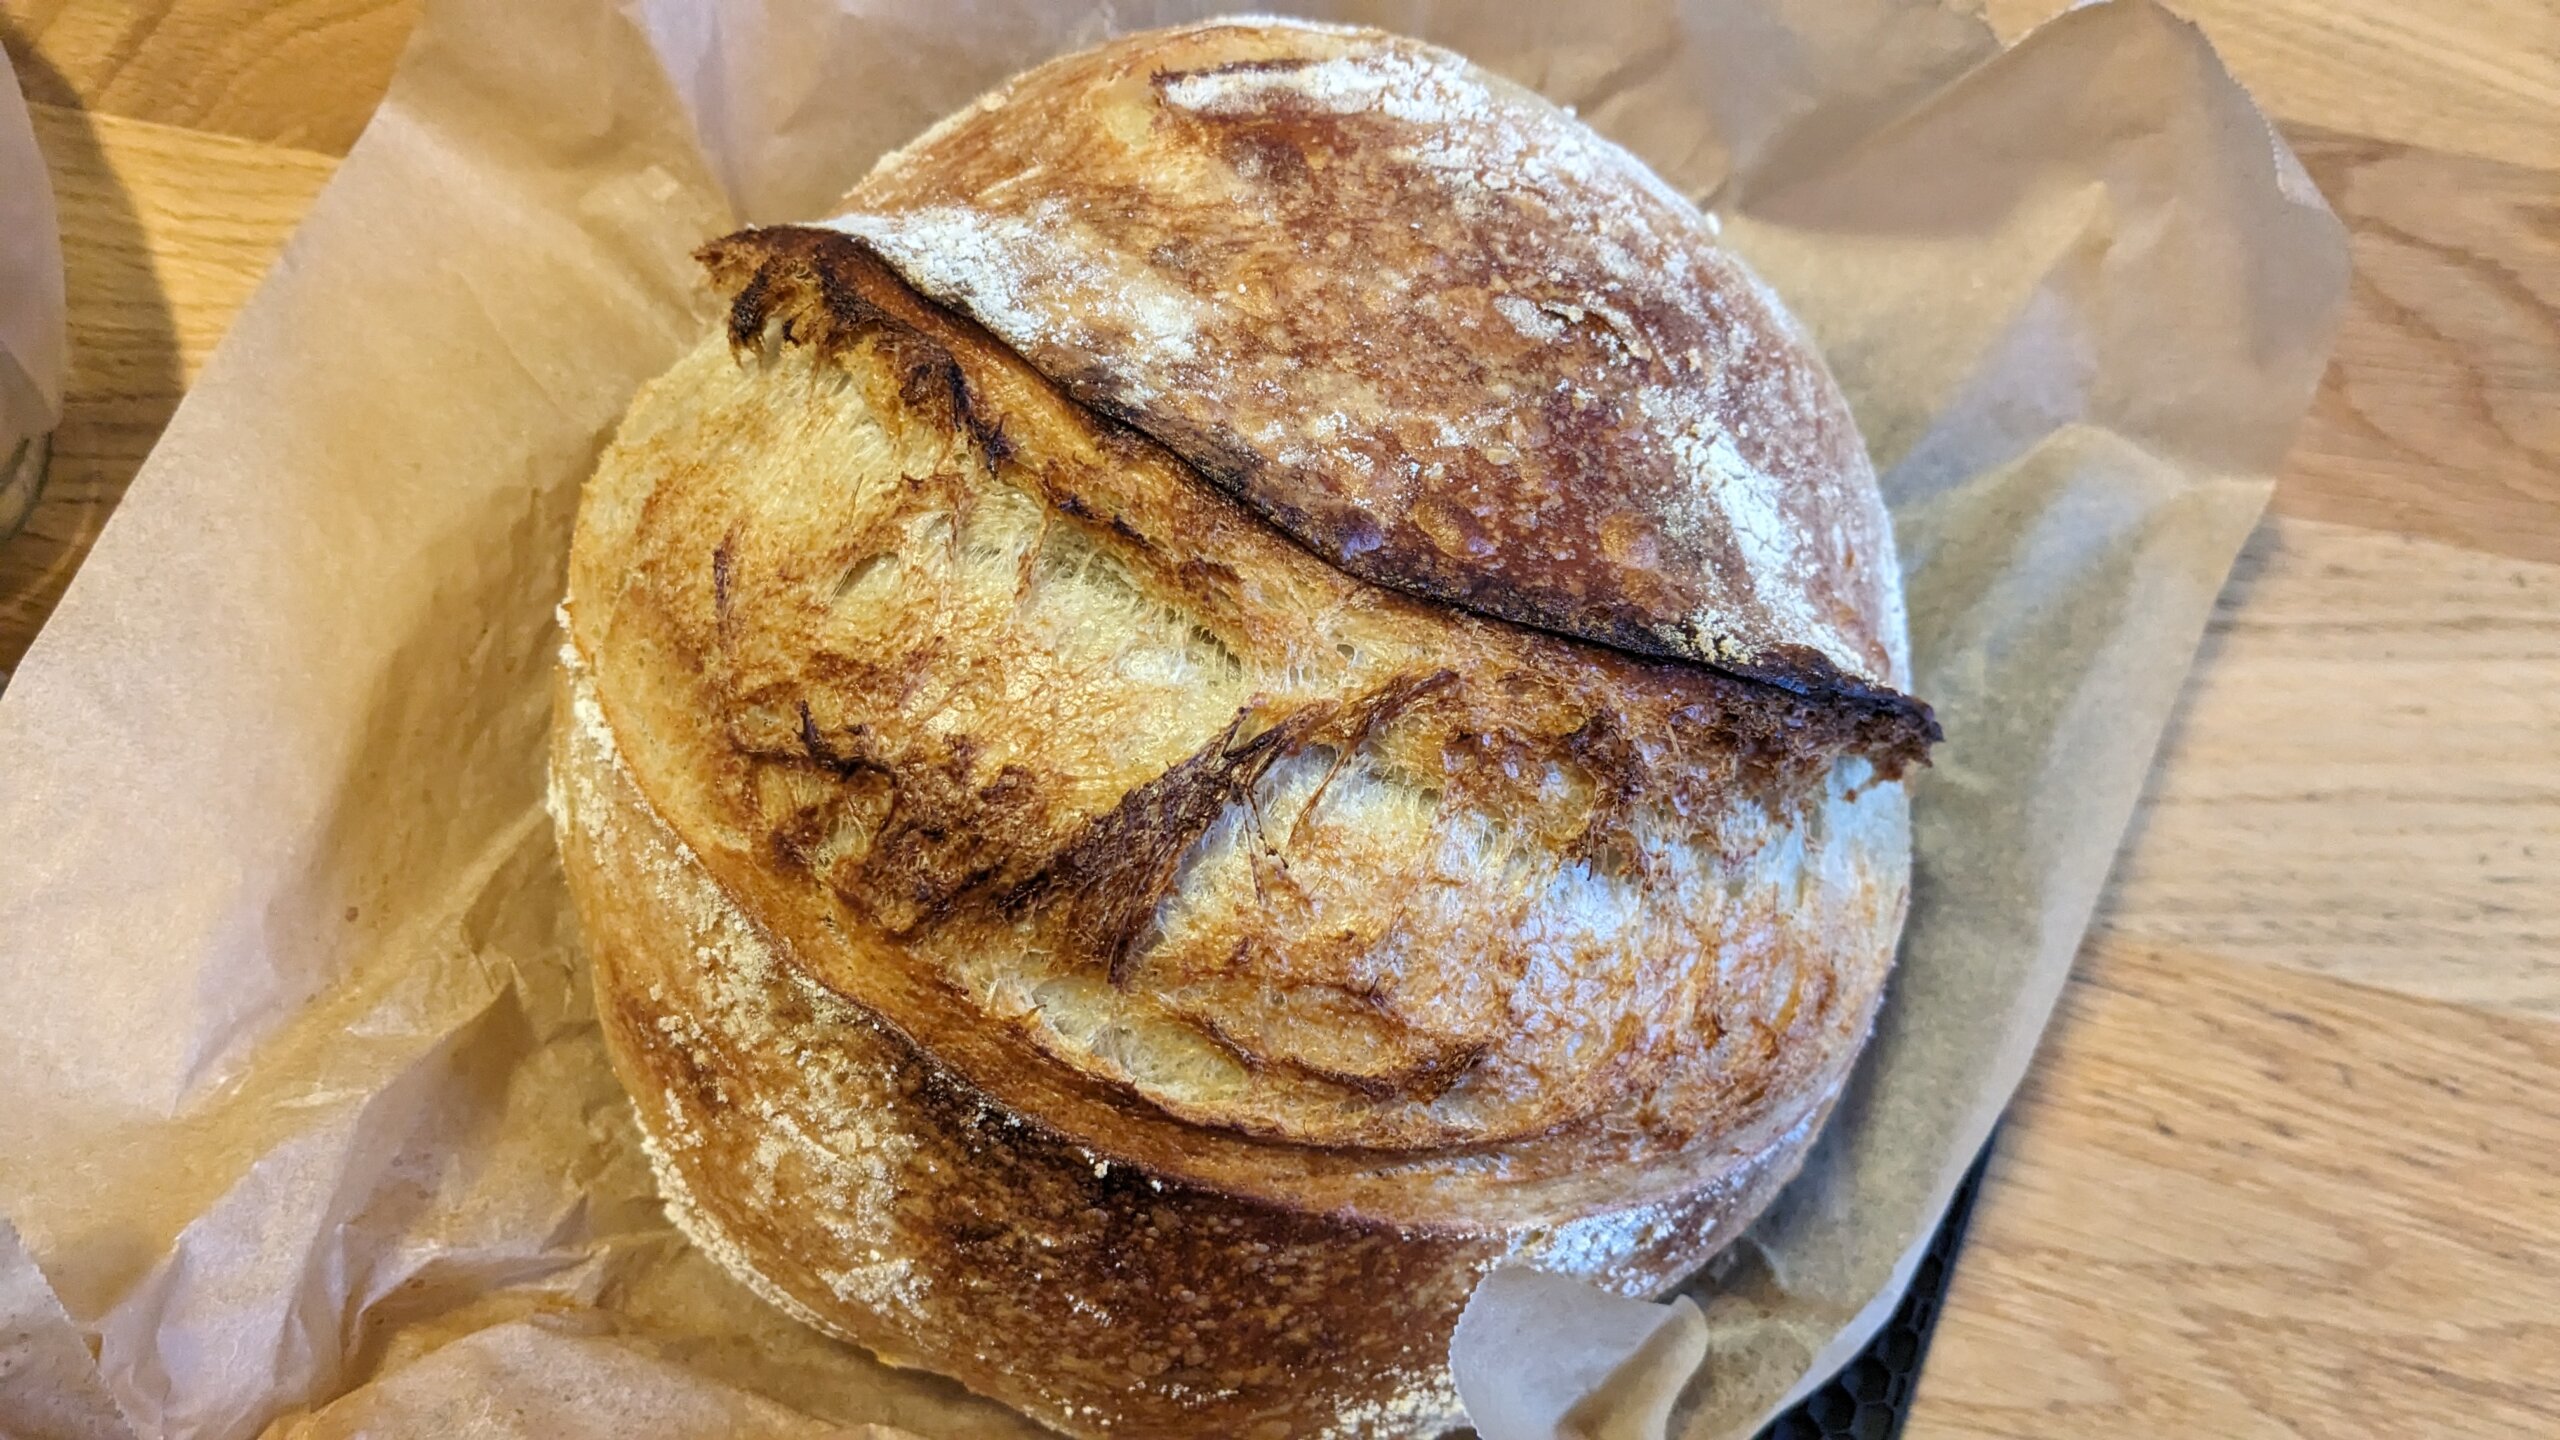
It is recommended to not cut into your sourdough bread until it has cooled off. I know it’s hard to wait! Who doesn’t want a fresh out-of-the-oven slice of bread? If you cut it too soon though, your bread might end up on the gummier side of texture. ![]()

This artisan sourdough loaf is a fantastic addition to your kitchen. Use it for sandwiches, toast, egg-in-a-hole breakfast, or as a side dish to most dinners. We frequently have it with this herb butter recipe!

I know that this is a lot of information and might be overwhelming to a new sourdough baker. I hope that it was helpful and let me know if you have any questions or comments about this below! I’d be happy to help troubleshoot.

Ingredients
Equipment
Method
- In a bowl, mix 750 grams white flour, 250 grams whole wheat flour and 650-675 grams water. Cover with a damp towel and let sit for 15-60 minutes.
- Add 18 grams of sea salt to the bowl. Mix.
- Add 250-275 grams of active and bubbly starter to the bowl. Mix.
- Cover with a damp towel and let rest for 20-30 minutes.
- Perform a series of stretch and folds. Cover with a damp towel and let rest for 20-30 minutes. Repeat this 4-5 times over the span of 2-3 hours.
- After you perform the last stretch and fold, cover the bowl with a damp towel and place in a warm area for the bulk rise. This can take anywhere from 4-8 hours depending on how warm the location you place the bowl is. You are looking for the dough to grow by at least 50%, at most double.
- After the bulk rise, turn the dough out onto a lightly floured surface and separate into two equal amounts. Let rest, covered, for about 10 to 15 minutes.
- Creat tension by forming each loaf, pushing and pulling the dough until it forms.
- Place each dough ball in a banneton lightly lined with flour and cover with a wet towl or tie in a plastic bag. Place in fridge for at least 12 hours.
- Pre-heat the dutch oven at 500 degrees.
- Once the oven/dutch oven are preheated to 500 degrees, take one loaf of bread out of the oven and turn out of the banneton onto a piece of parchment paper.
- Using a razor or very sharp knife, score the dough by running the blade down the center of the loaf.
- Place in the dutch oven (on the parchment paper) and cover with a lid. Set a timer for 25 minutes.
- Ater 25 minutes, remove the lid from the dutch oven (if you plan on making the second loaf right away, leave the lid in the oven, just off of your bread). Set the timer for an additional 20.
- Remove the loaf from the oven and let cool for at least 2 hours before cutting.
Save it for later!
This is exactly the technic I use and it works EVERY TIME! Love it!
Thank you!
Great post & very detailed. I love making bread. I will need to try your technique!
Thank you so much! I appreciate that!
Your instructions are very well written out and you’ve made this look very doable for me. Thanks for sharing!
Thank you so much for such kind encouragement. It means the world to me!
It’s beautiful and the crumb is perfect!
Thank you so much, that is an incredibly high complement!
Love these instructions! Super easy to follow!
Thank you so much!
I’m not a beginner, but I found great value in all your helpful tips! Thank you!
Thank you so much, that’s really encouraging!
I love sourdough bread. I make many loaves each year.
Your instructions are very well thought out and I’m positive a beginner could easily follow and create a beautiful loaf through your tutelage.
I love the simplicity of your website, somedays I look at mine and think a toddler got at it with a crayon box. I haven’t worked on mine in a while and you inspire me.
Peace.
Thank you so much for your encouragement! It means a lot to me! And thank you for your positivity about our site! It’s a continual work in progress.
I am only 2 months into my sourdough journey and a post like this would have helped me tremendously! I will definitely be tweaking my so-so technique with some of yours !! Thank You!
Oh thank you so much for your encouragement! I hope that you find it helps!
Love this post! I have been making my own sourdough bread for four years now. I forgot all about autolysing! Thanks for the reminder. I look forward to your next post!
Thank you! I think that once you get into a routine with sourdough it’s really easy to skip steps entirely! It was good for me to slow down to evaluate each step in order to write this.
this post is so helpful!! Thank you!
Thank you! I’m so glad!
Making sourdough has always intimidated me, but with Megan’s detailed instructions, along with the photos, I was able to make my first loaf of sourdough bread! It turned out so good! The inside of the bread was very soft and the crust was perfect!
Thank you so much Jade! I’m so glad that it was helpful.
This recipe is the best one, hands down! Every time I follow Megan’s exact instructions, I turn out with beautiful and delicious loaves that are impressing my family and friends! Megan has taught me so much on bread making and answers all of my millions of questions! She has such a natural passion for teaching others and she is such a blessing in my life!
Awe, thank you so much Holly. That’s such an encouragement to me!
This is so informative as I have never made sourdough before. Thanks so much for this. I feel less intimidated now.
Thank you! I hope it helps!