
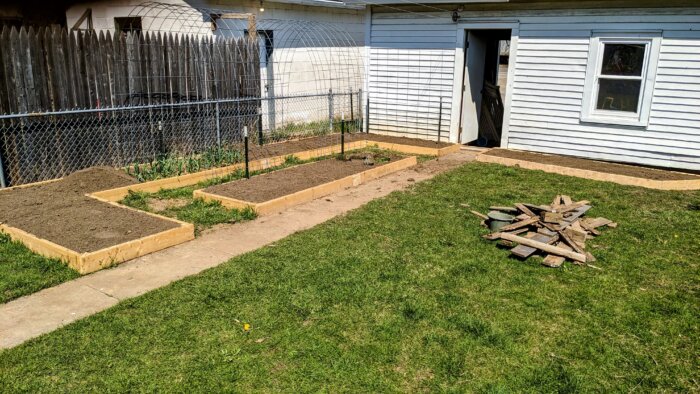
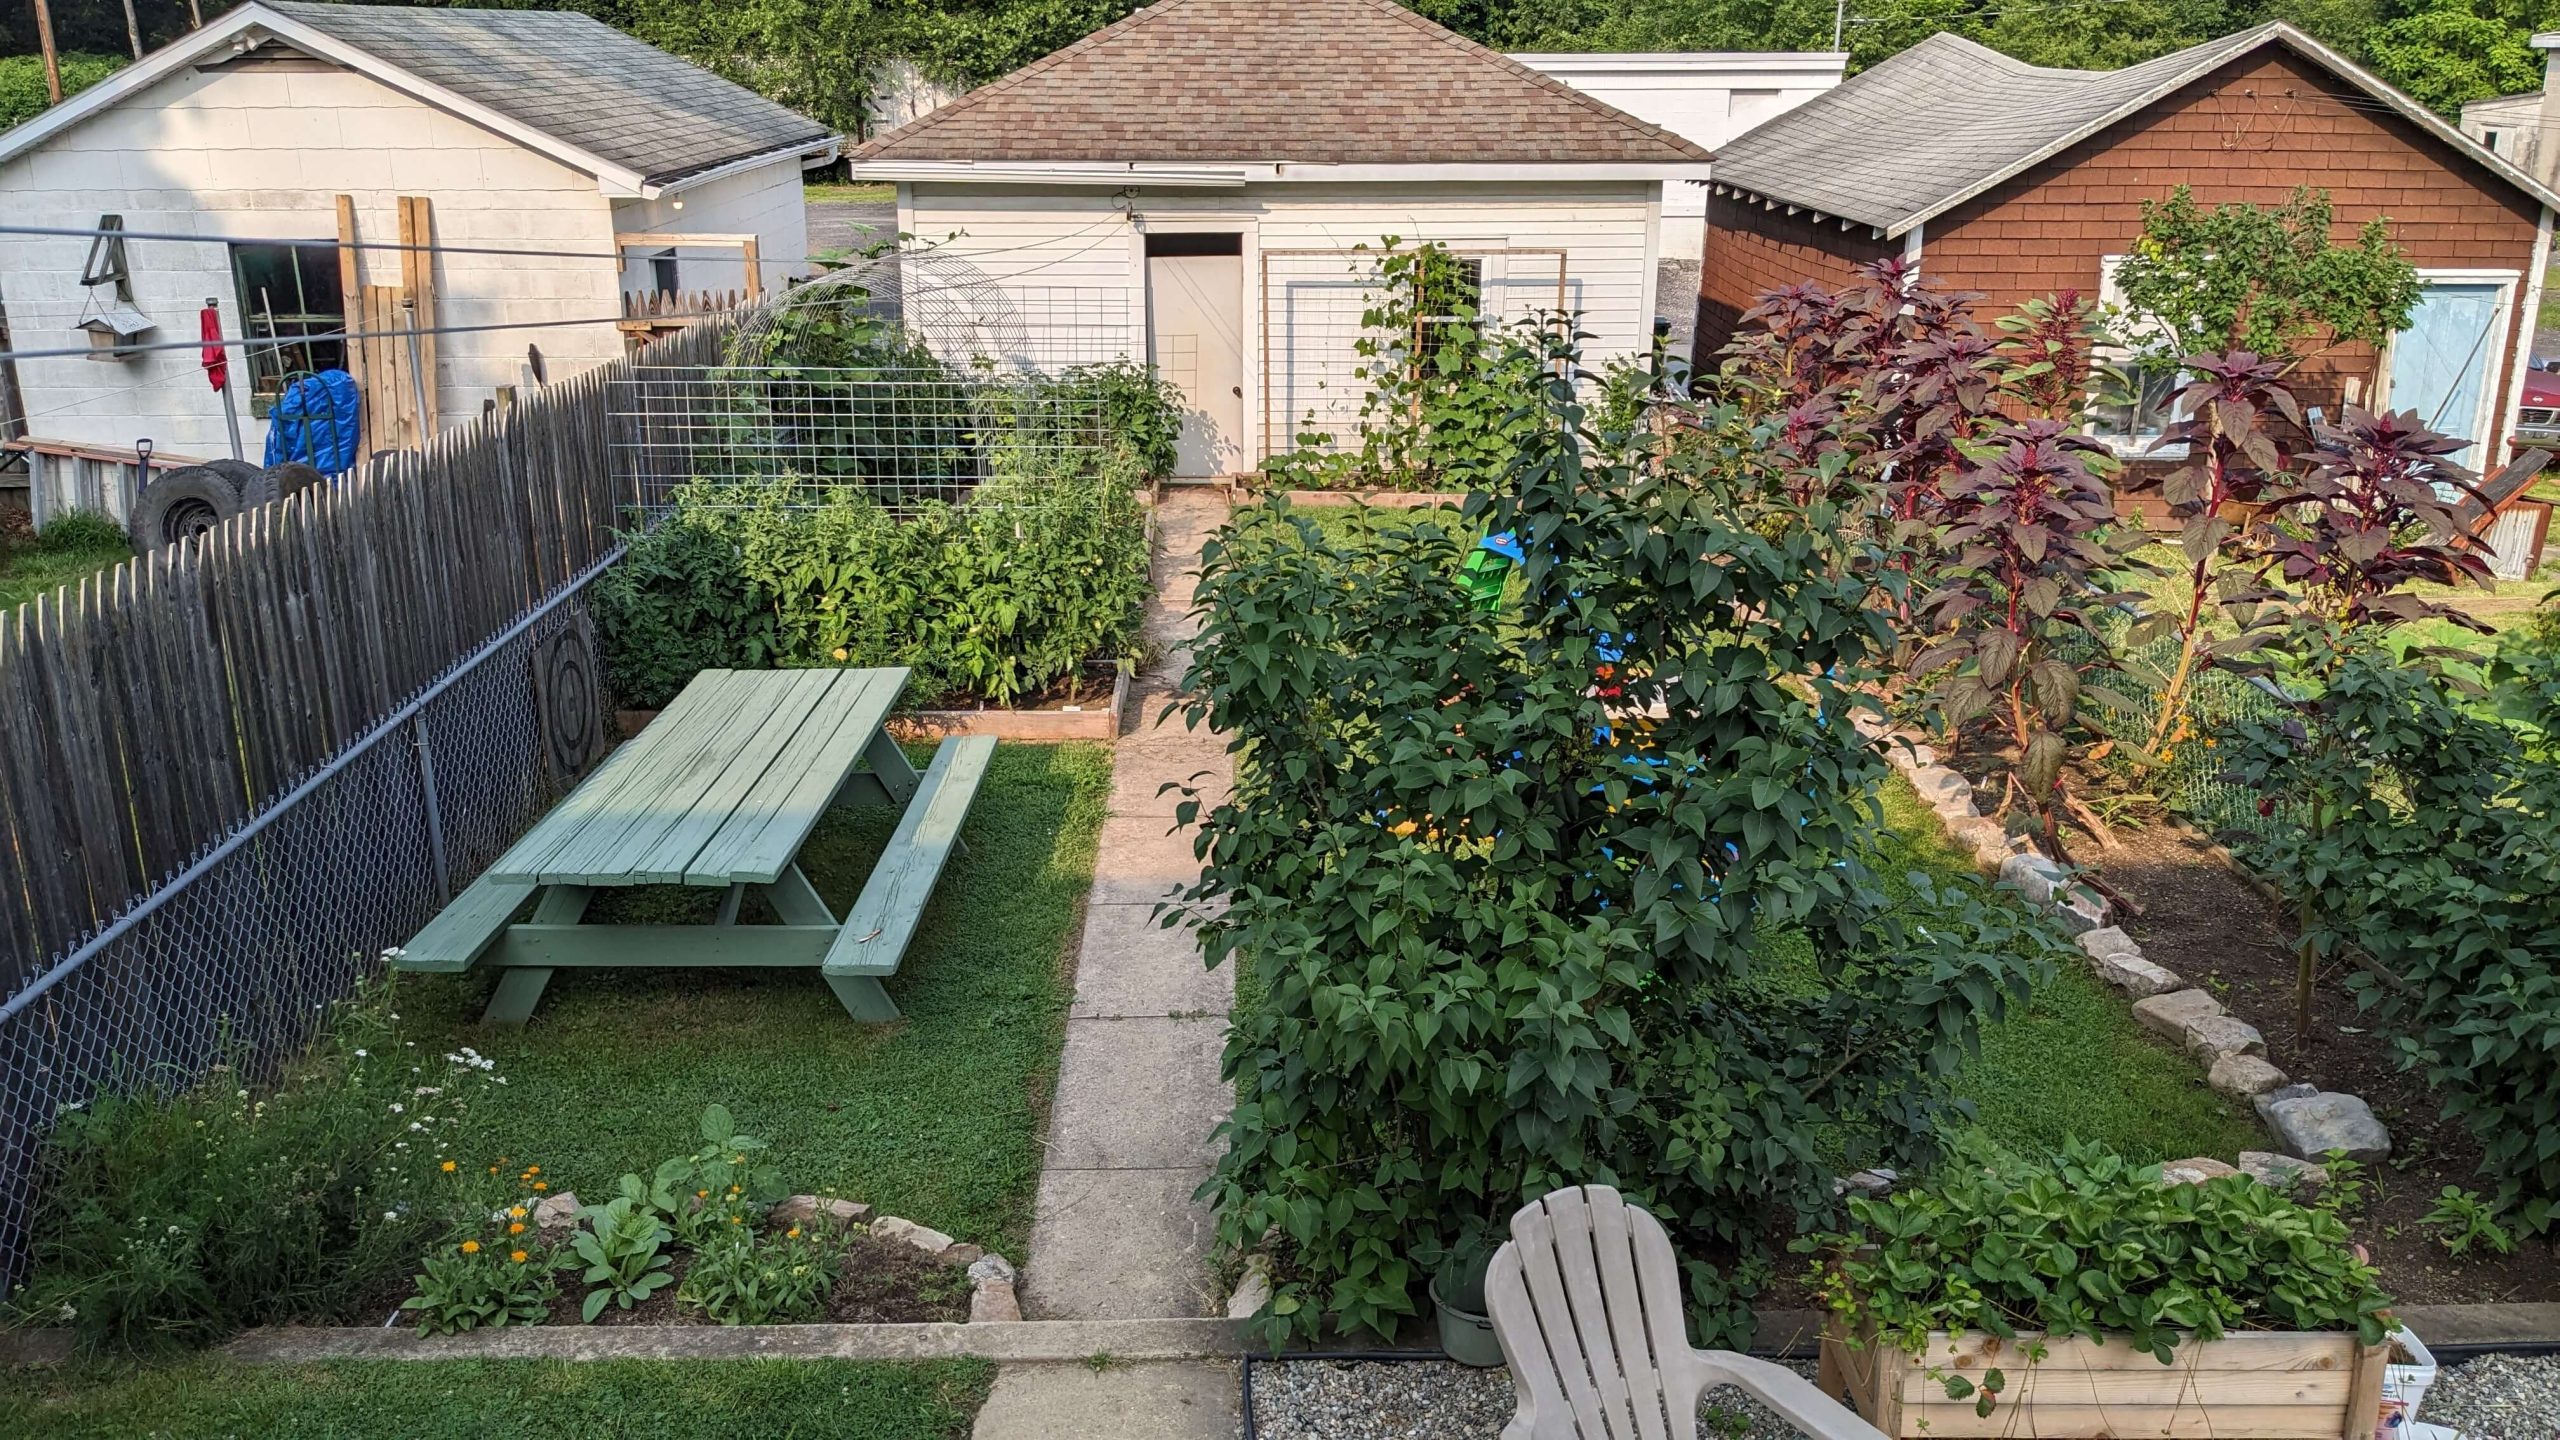
Looking out at our raised beds at the beginning of spring, I knew we would need an upgrade from the old rotten boards holding our garden together. Our family lives in a half-double, so raised beds in a small backyard are one of the best ways we help our plants thrive. I created a custom layout that helps us maximize the space that we have in the back left corner of our yard. I ended up removing a sidewalk to add another one in front of our garage. We had one of the best harvests in the 10 years that Megan has been gardening. Some of that can be attributed to these raised beds!
Raised beds are a well-known way to increase root development, increase drainage, and decrease soil erosion. There are hundreds of different ways that you could create them, from wood boards to metal sheets to brick walls. You can make them into raised boxes with legs or hooked onto fences. For building DIY-raised beds in a small backyard, Megan and I drew out a custom layout. Our goal was that it would maximize the available space. You can easily recreate these raised beds and the steps I took to make them are found below.
How much do DIY raised beds cost?
This depends on the materials you are using and their price at the time. Using 2×4 or 2×6 pine, untreated, #2 lumber from a local store, would be one of the cheapest options. This is what we used for our beds and we spent less than $100 building them. If you decide to use more expensive, longer-lasting wood the cost would go up accordingly.
How long will raised beds last?
This would depend on your materials. The untreated pine wood raised beds we used will last about 5 years. Other types of wood such as cedar will last longer. There are also natural ways to treat your wood to extend the life of them. Other longer-lasting materials would be bricks, metal, or cement blocks.
What material should you use for DIY raised beds?
This is really up to your personal preference, whether you have any materials lying around, and how much money you want to spend. Options include a wide variety of wood planks, metal, bricks, concrete blocks, and stone. There are no wrong answers to raised beds as long as you are not introducing harmful chemicals to the soil. You should stay away from treated materials that can leak into your plants.
How deep should you make raised beds?
I am taking some advice from my favorite gardening book, “The Vegetable Gardener’s Bible”. Basically, the deeper the better. Plant roots extend much farther and wider than we can see from the surface. Giving your plants at least 18 inches of uncompacted soil will do wonders for them! If you are building a raised bed over a hard surface, you would want them to be even deeper.
What are the benefits of DIY raised beds?
The main reason that gardeners create raised beds is for their plants’ roots. Deep, uncompacted soil allows plant roots to spread more easily to absorb water and nutrients. Raised beds are also used as a way to increase soil drainage to prevent overwatering. Raised beds also allow you to grow more plants in a smaller space, which is great for a small backyard, and they are easier on your back if you build them high enough.
Are there any disadvantages of raised beds?
The only disadvantage of having a raised bed would be the time and money to make it. However, there are ways that you can make raised beds without any materials at all if you have enough space. You can form rows of raised beds by taking soil from the pathway in between your rows and adding them to the top of your garden beds.
What tools do I need for DIY raised beds?
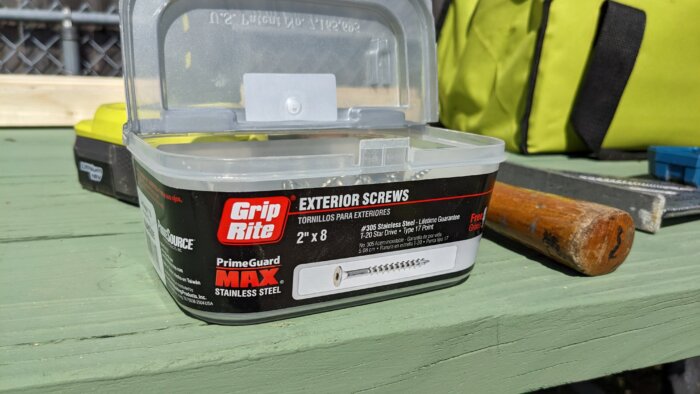
If you are making simple wooden beds, all you need are some nails or screws and therefore a drill or hammer. It’s best if they are rated for outdoor use, as indoor nails and screws will rust very quickly!
How can I learn more about raised beds?
There are a lot of resources online about making raised beds, however, I respect the advice given in the book “The Vegetable Gardener’s Bible”. It gives a great explanation of why raised beds are beneficial and some great ways to increase soil depth. This is not a paid endorsement, I just really enjoyed it!
How to make DIY raised beds in a small backyard:
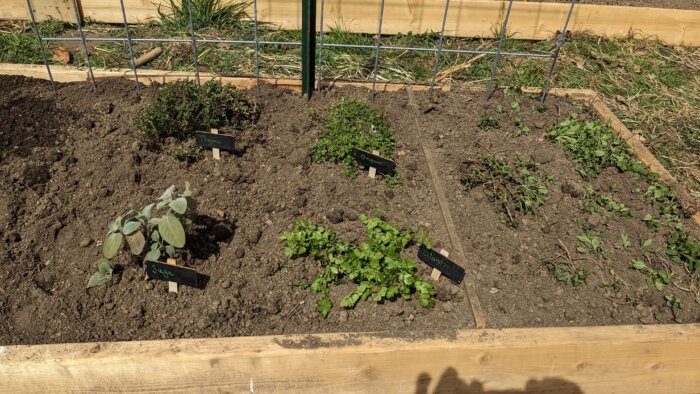
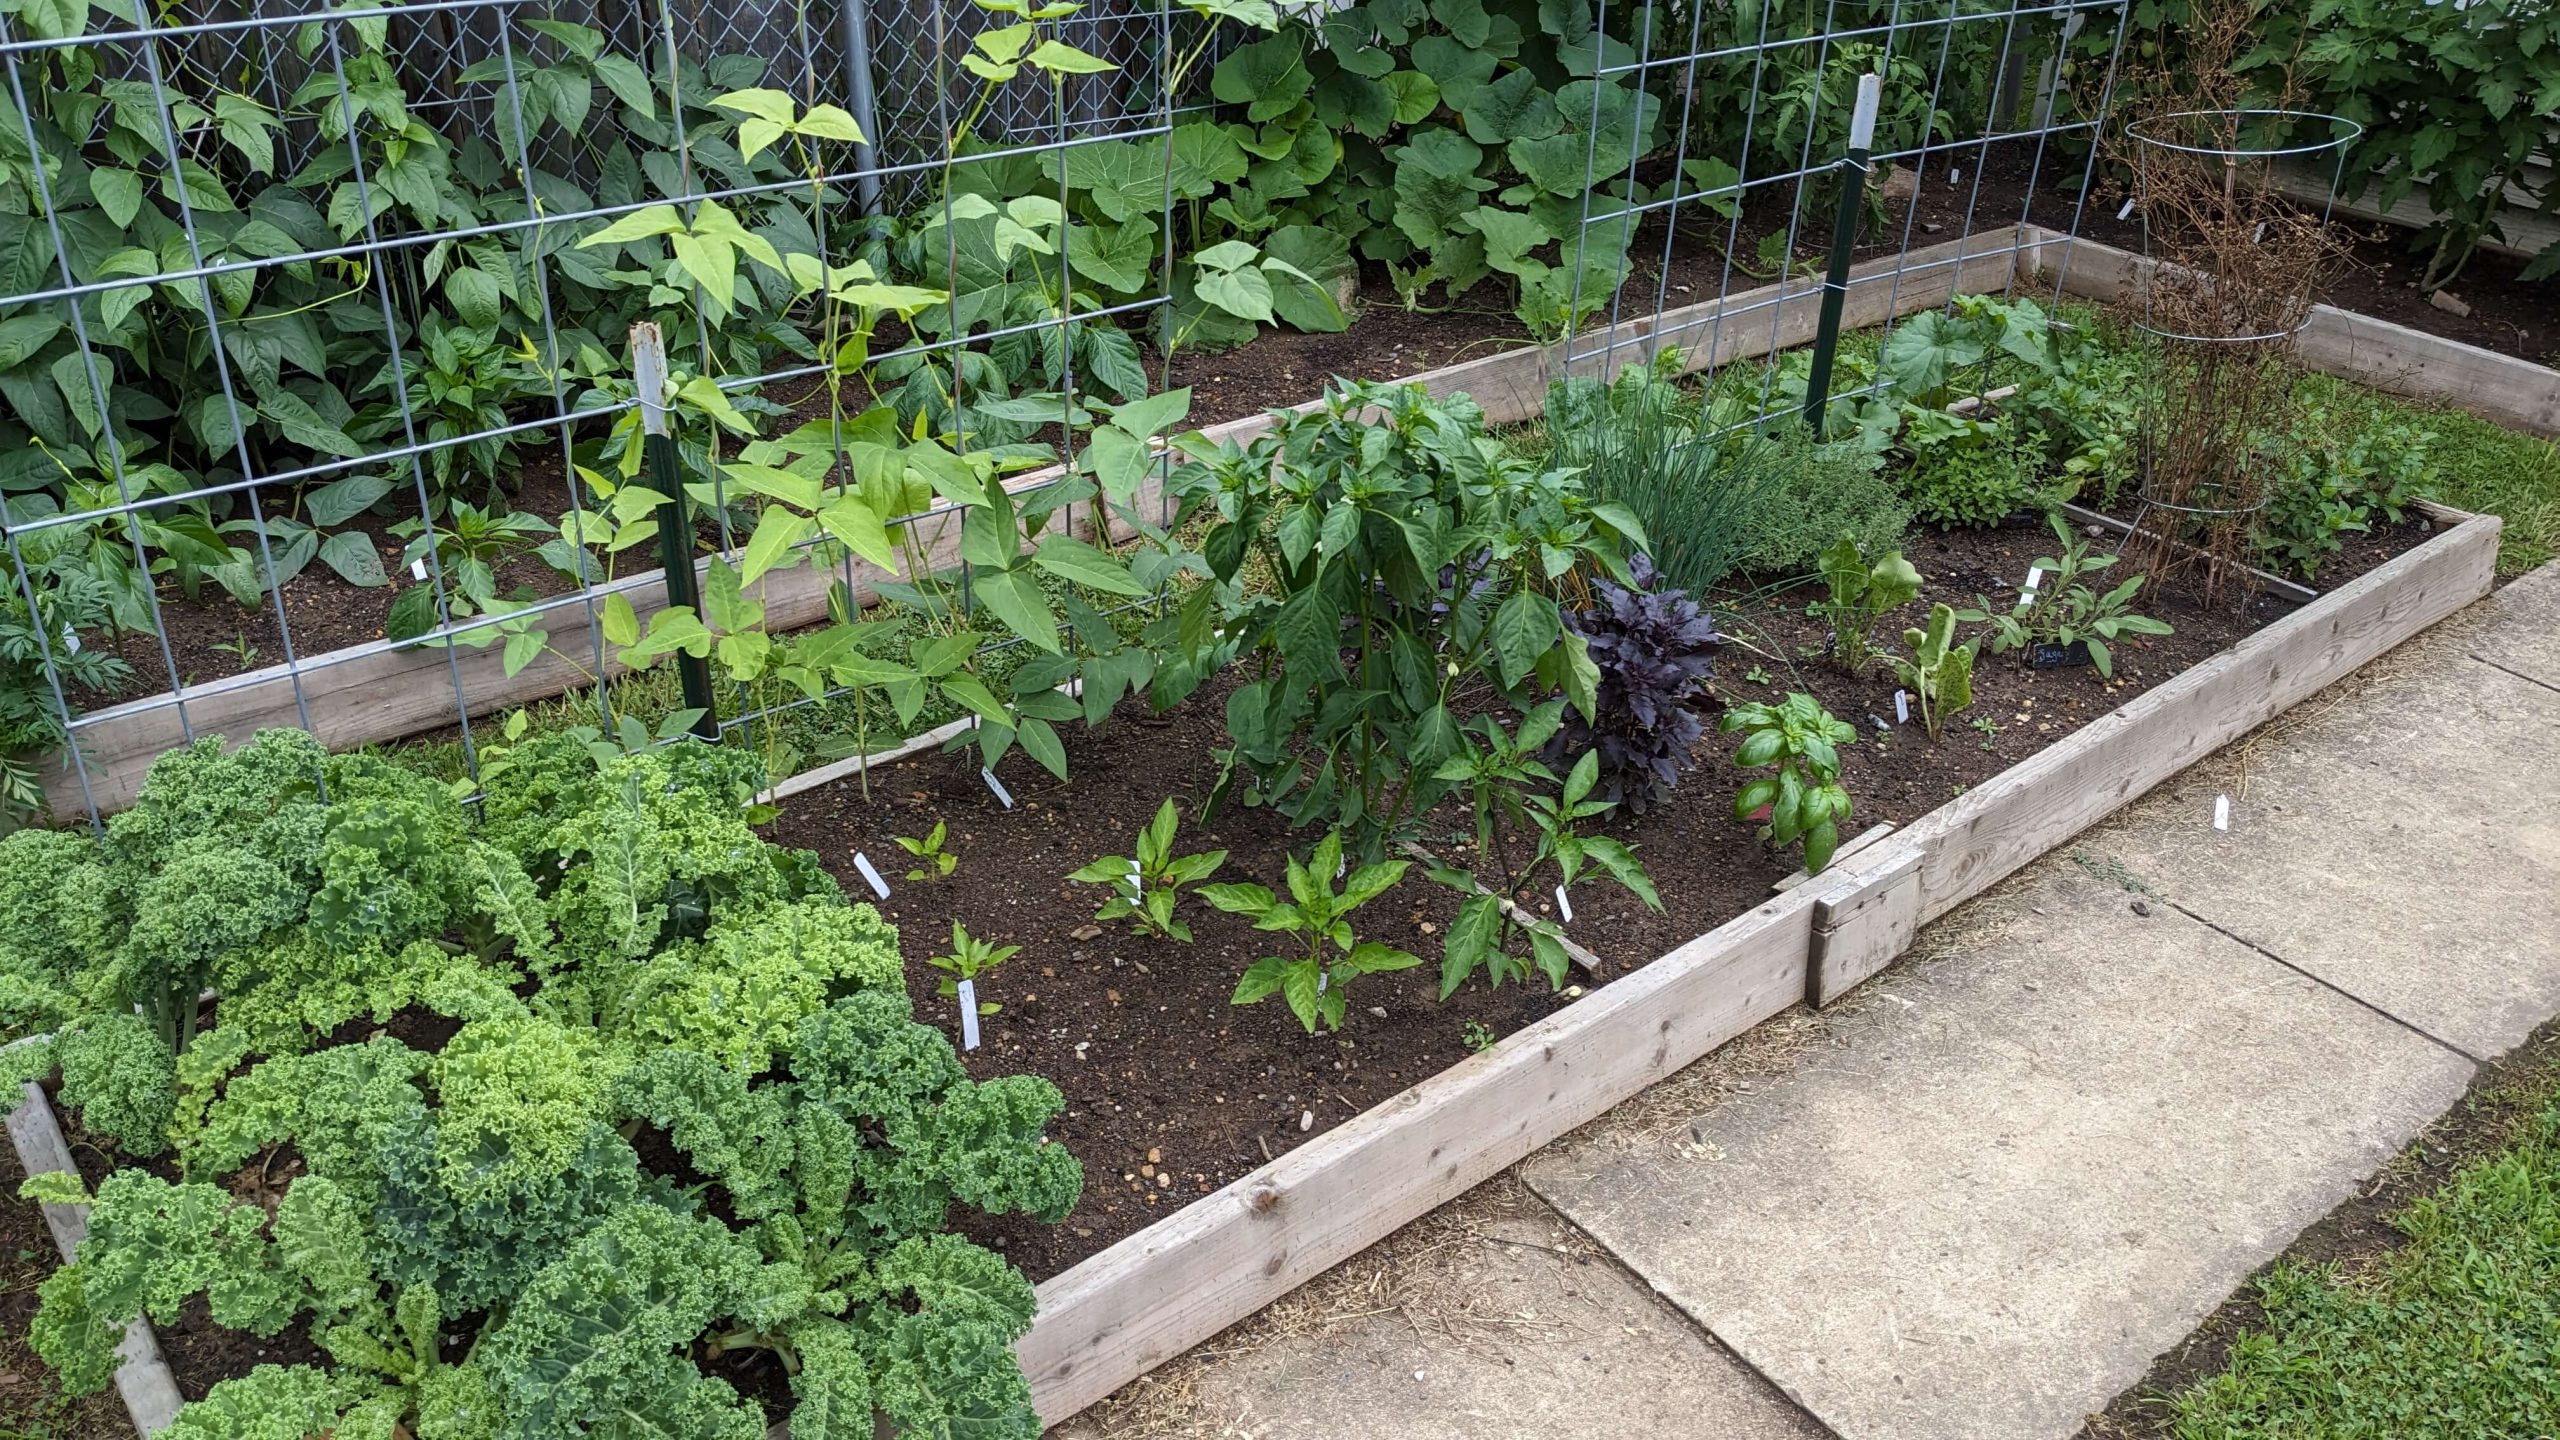
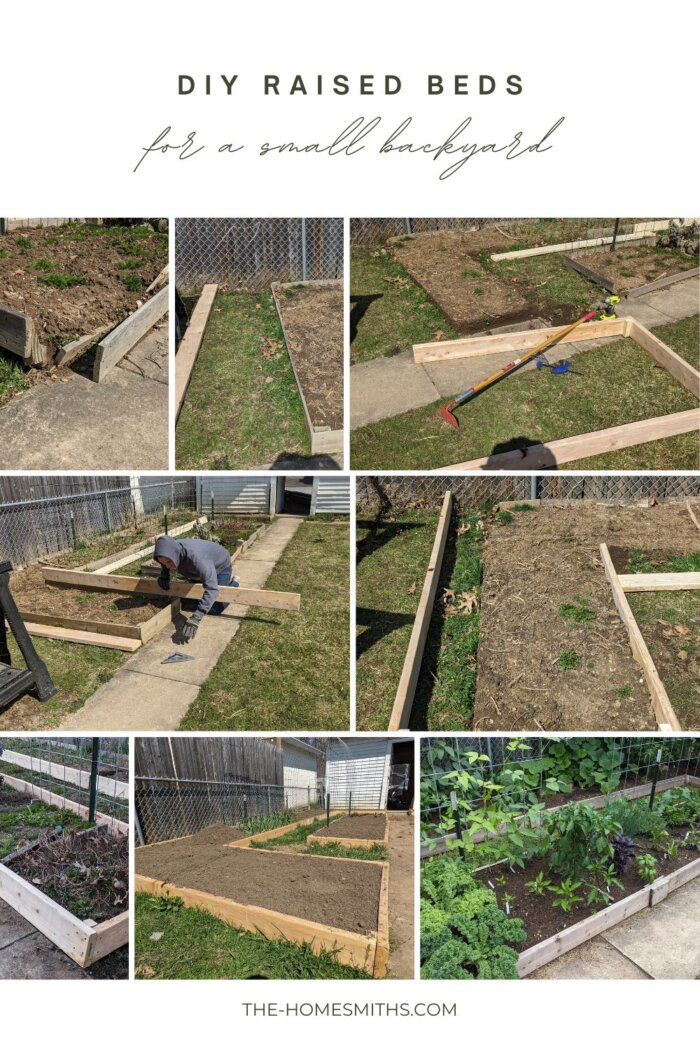
When we first designed our garden, we decided we were going to make a small section for herbs and a main section for our tomatoes, peppers, squash, etc. I threw together some old 1-inch thick boards, bought some soil from the Home Depot, and we had a pretty decent garden. However, by the end of two winters, the garden was already starting to fall apart and we needed to make an upgrade.

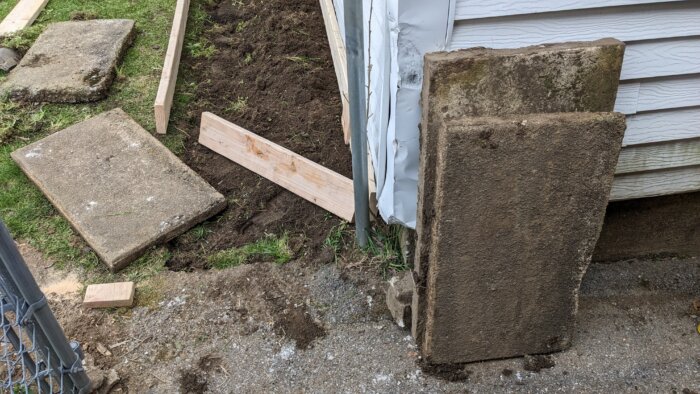
I started by taking apart the old boards to throw in a burn pile. The boards were full of holes, rotting, and all of the screws were rusted because I had used indoor screws.

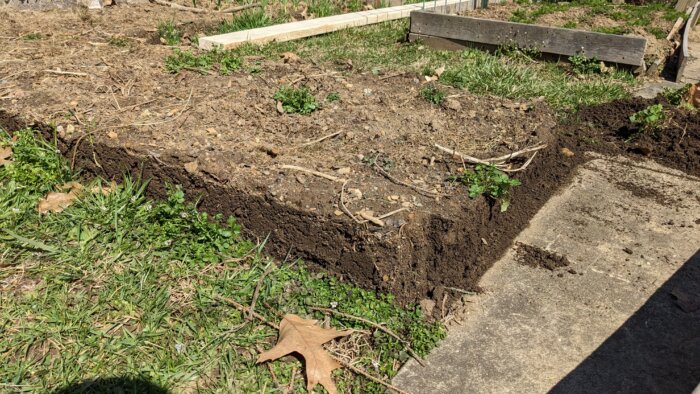
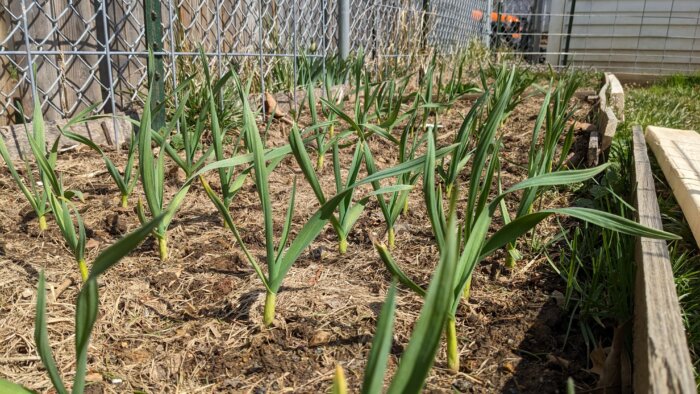
Luckily, when I removed the boards the soil stayed in its original shape which made it easier to replace the planks. I was also able to do it without disturbing our hardneck garlic!
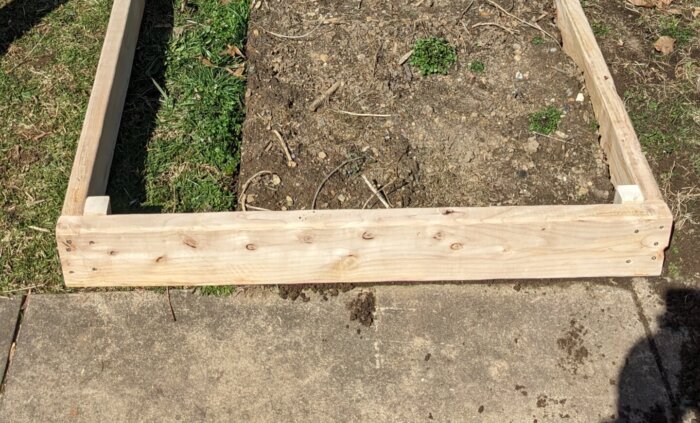
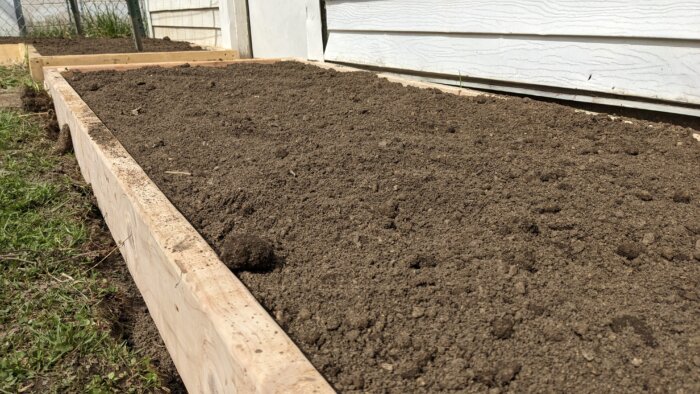
As for how to rebuild them, I had been inspired in the fall by the raised garden beds in Colonial Williamsburg, Virginia. They had a simple design and were sturdy enough to last quite a few winters. So, I measured out how much wood I would need and bought 2x6x8 untreated pine boards from our local store. I also bought some external screws.
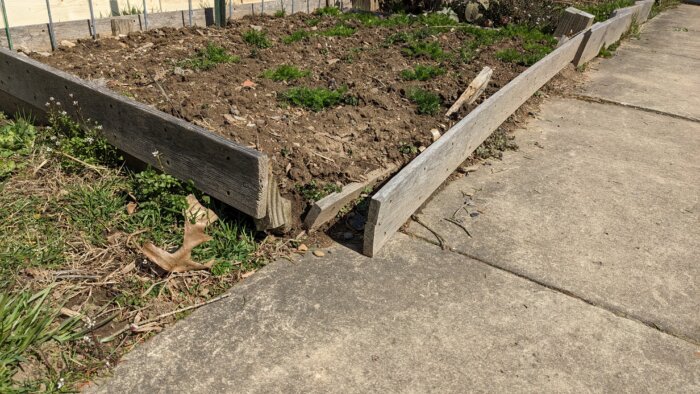
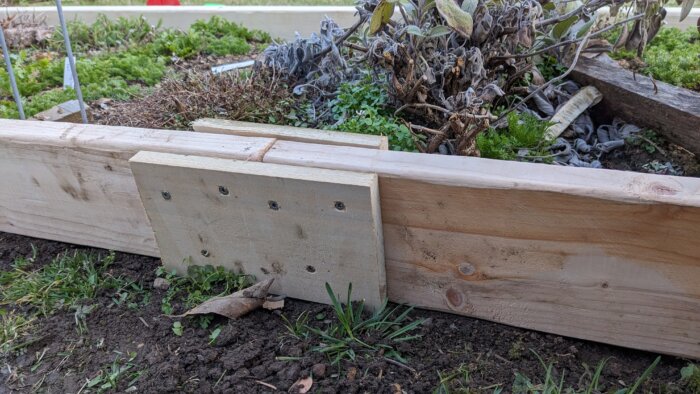
I first built the raised bed for the small herb garden, which was easy enough to measure, screw together, and set over the existing herb garden. There were six screws used for each corner, four on one side and two on the other (see image below). I decided to use short 3×3 or 2×4 wood pieces I had lying around to better support the corners and make the raised beds last a little bit longer.
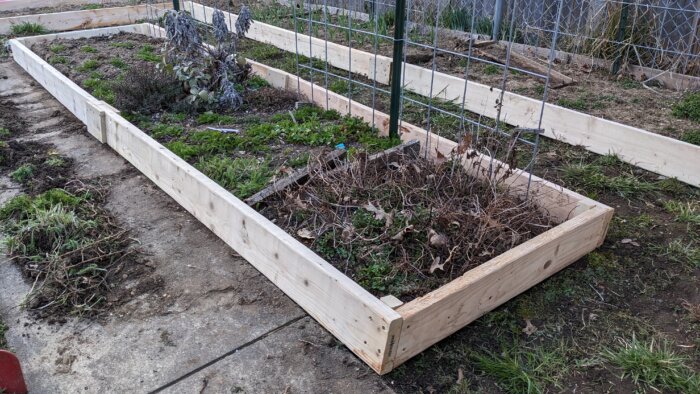
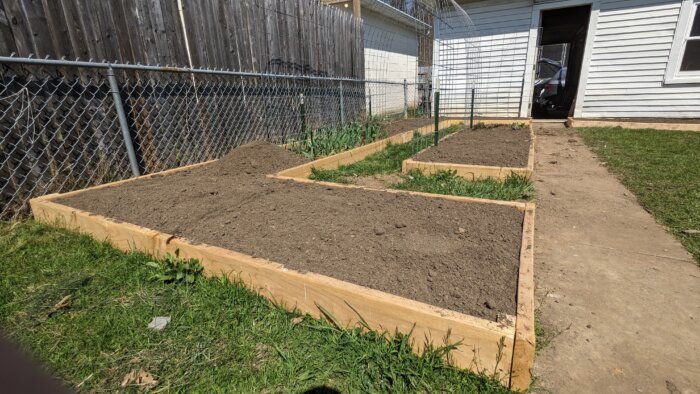
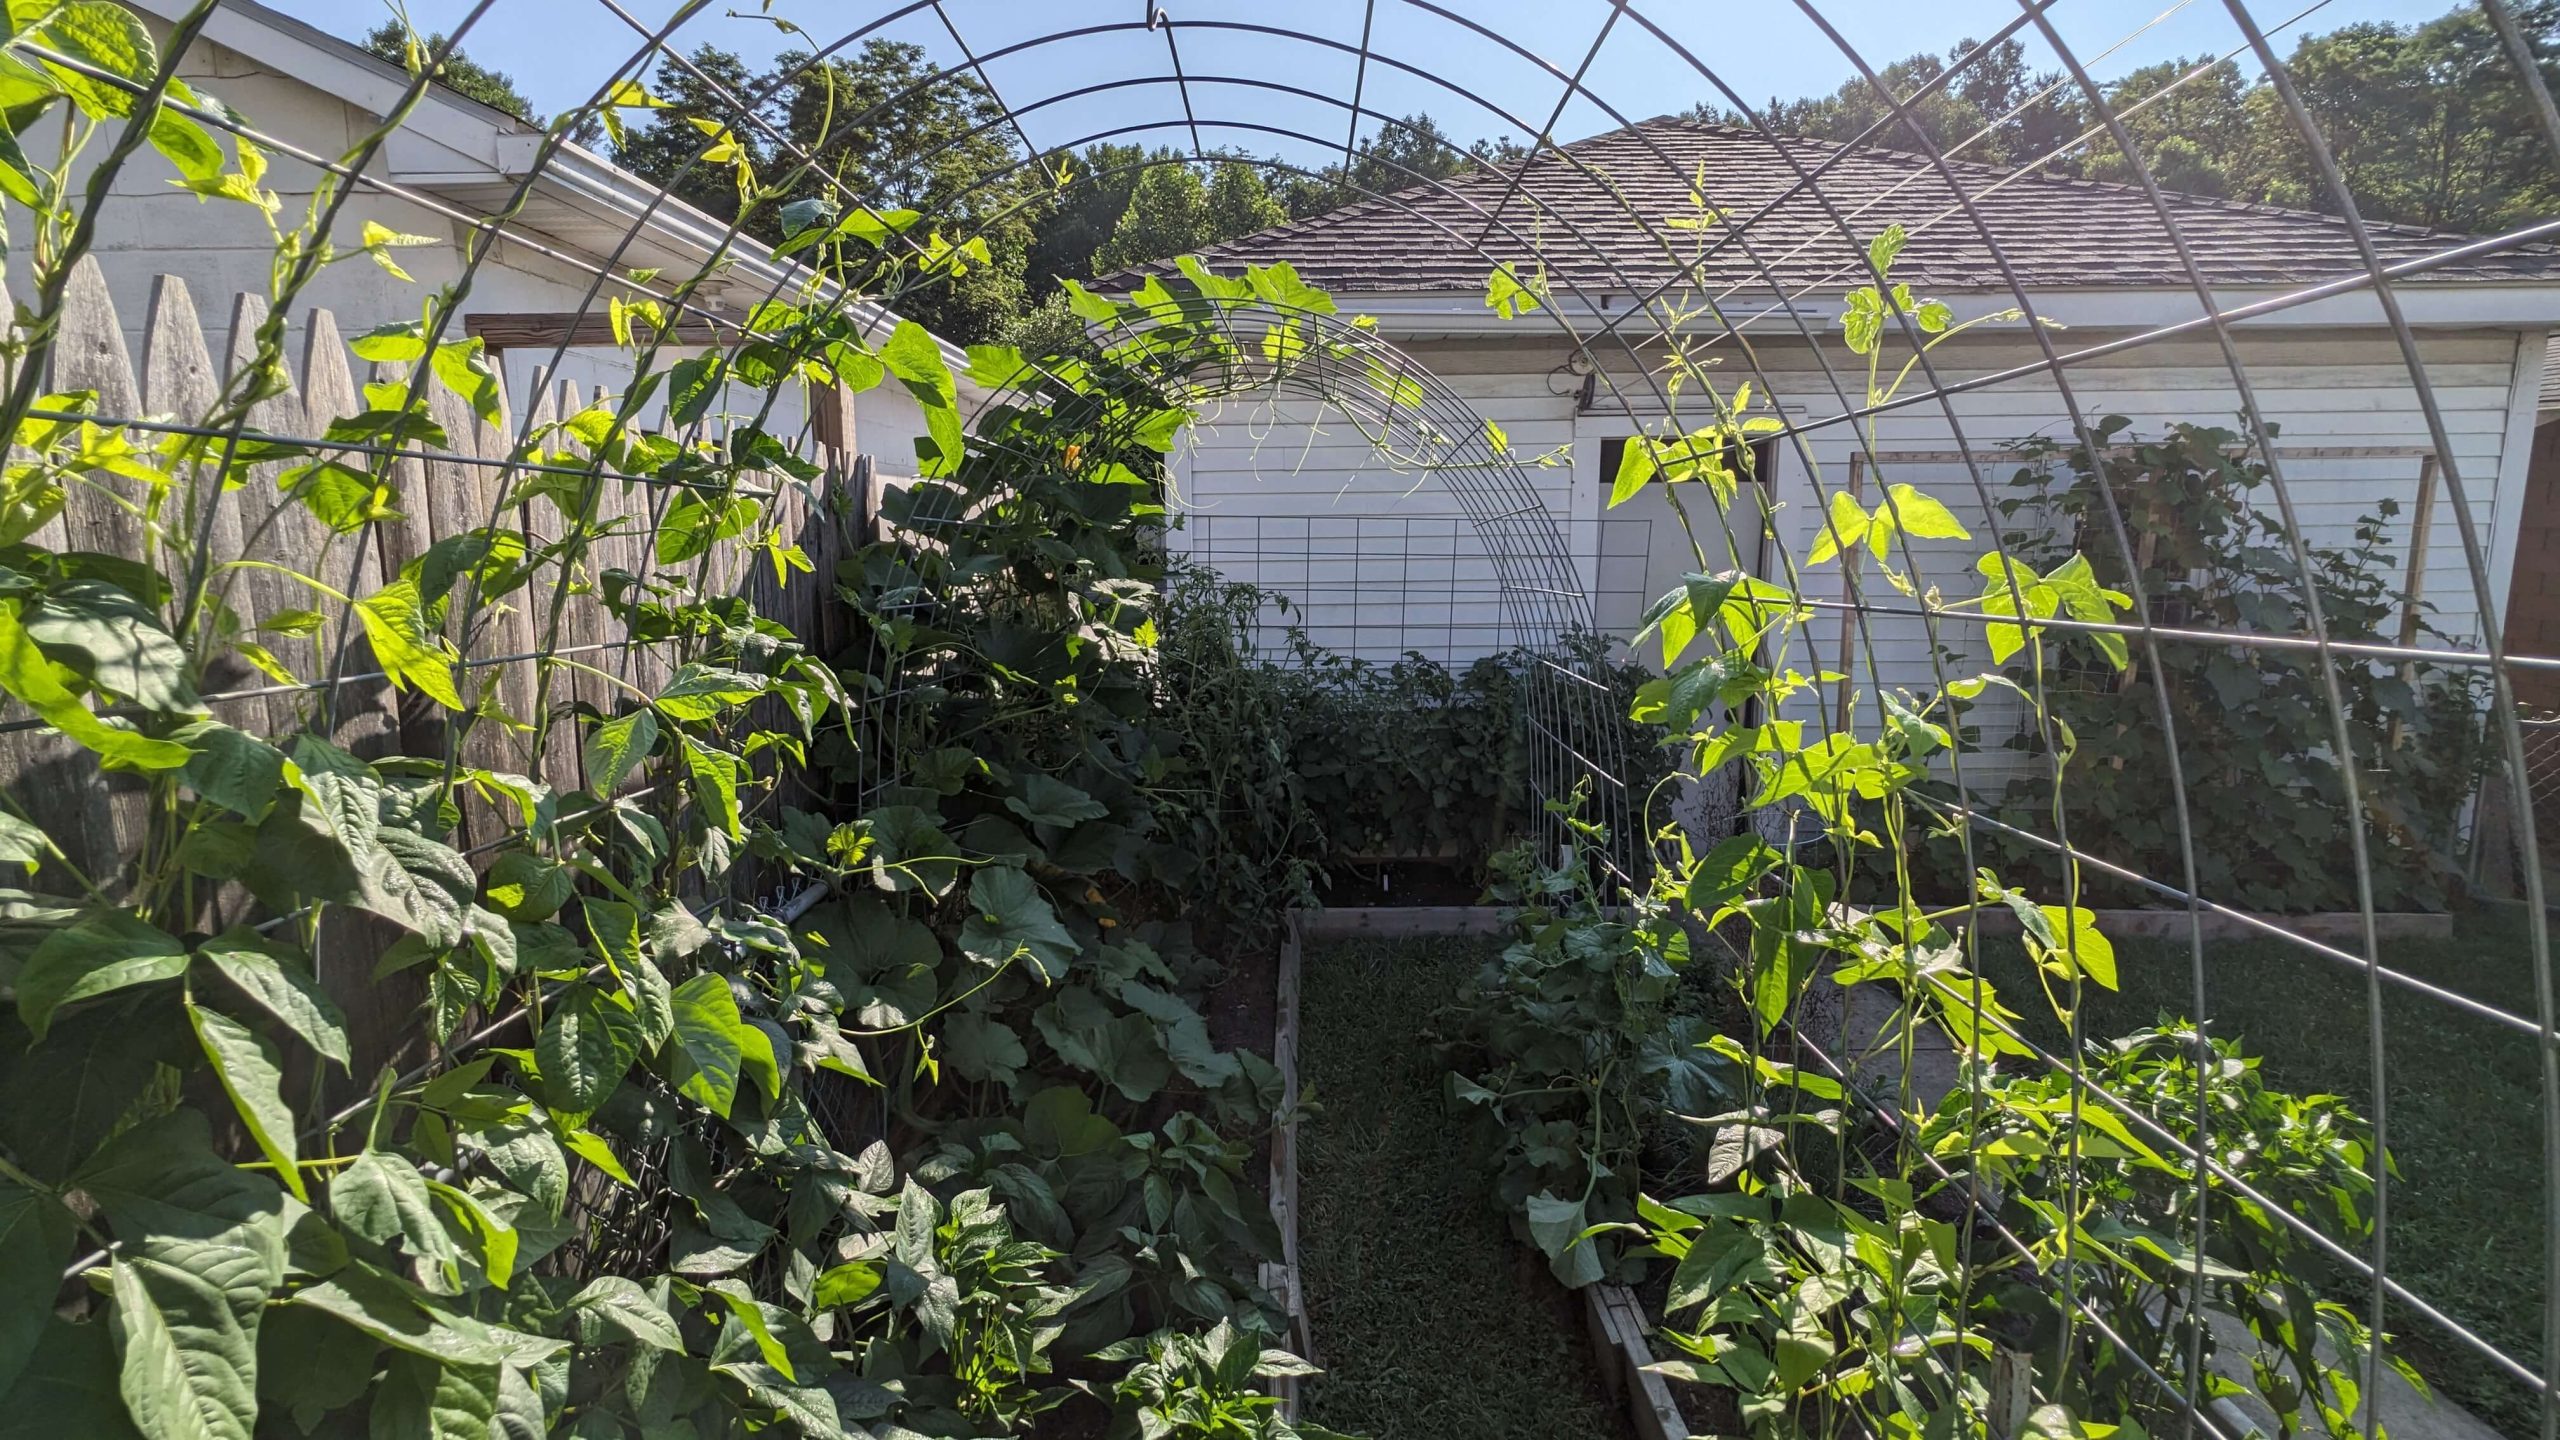
Next, I built each section of the main raised bed separately and attached them as I went along. I also made the left side of the garden a bit wide because it could be accessed from both sides.
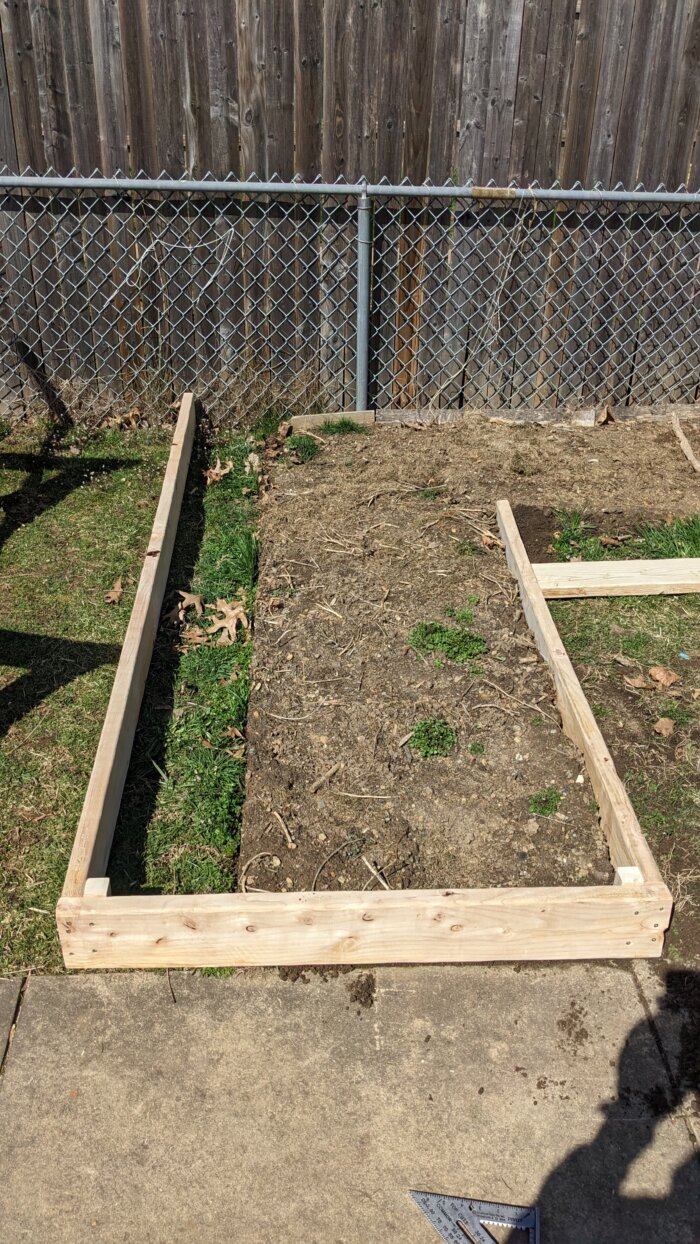
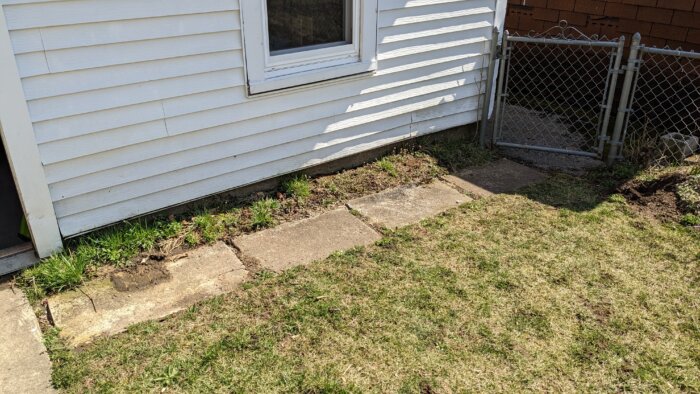
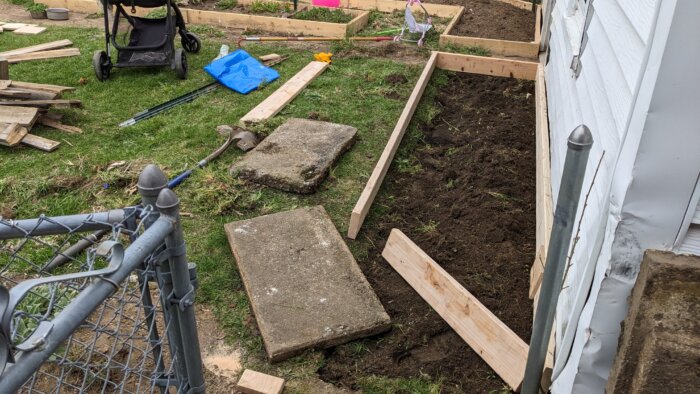
The process was pretty straightforward and I attached all of the corners the same way except for the tiny back right corner. After those two raised beds were built, we decided to also add another raised bed by removing the sidewalk that led to the side of the garage (we never used it anyway). I built the raised bed in this area in the same fashion as the others and learned that it was surprisingly easy to dig up a sidewalk.

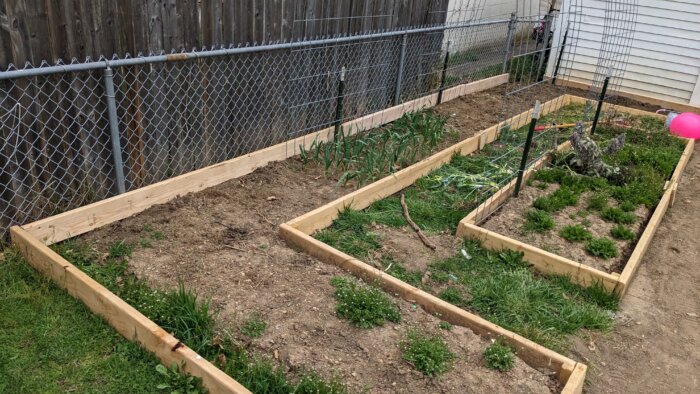
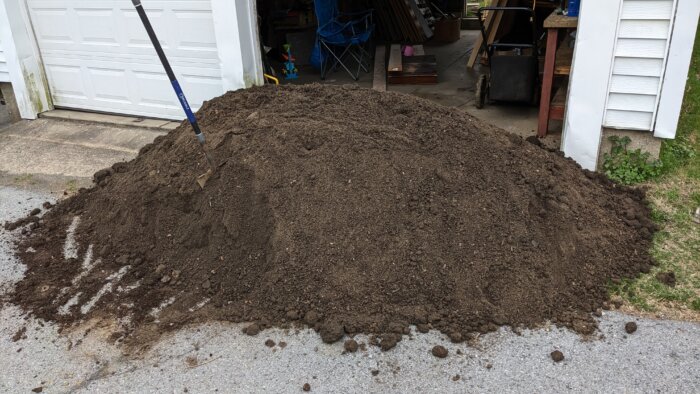
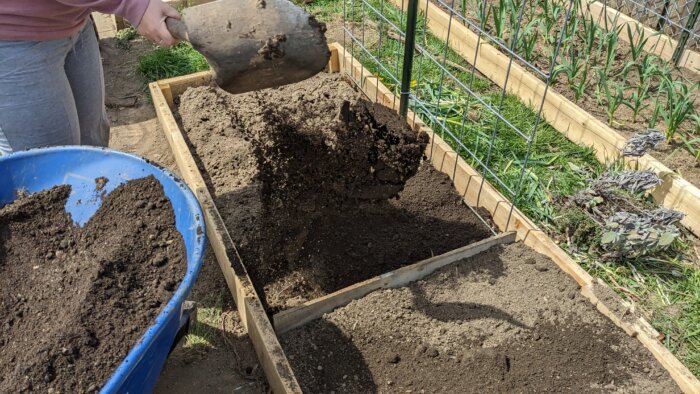
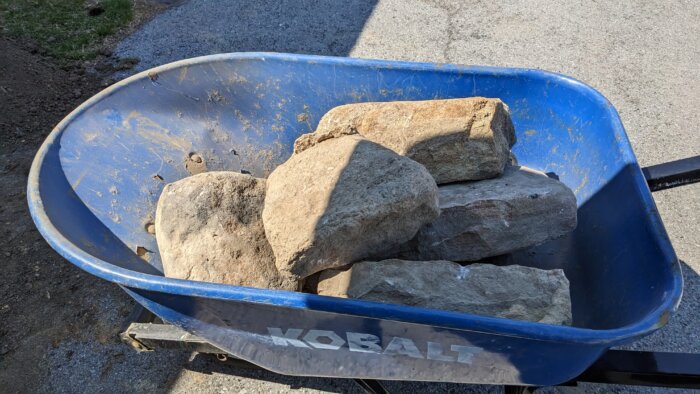
After all of the beds were built, we ordered two tons of topsoil from a local landscaping company which was a lot cheaper than buying it in bags from the store. We asked them to dump it outside the garage and we used our wheelbarrow to transport it all to our new beds.
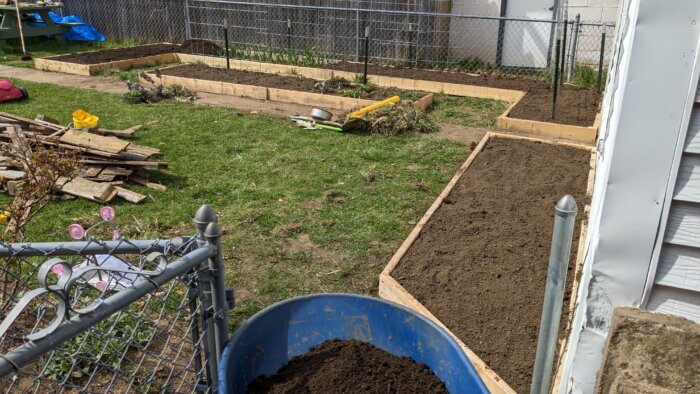
I was pleased with the look of them and we had amazing results from the increase in soil depth. We added a few more cattle panel trellises and our small backyard had an amazing harvest of tomatoes, peppers, long beans, and green beans.
![]()
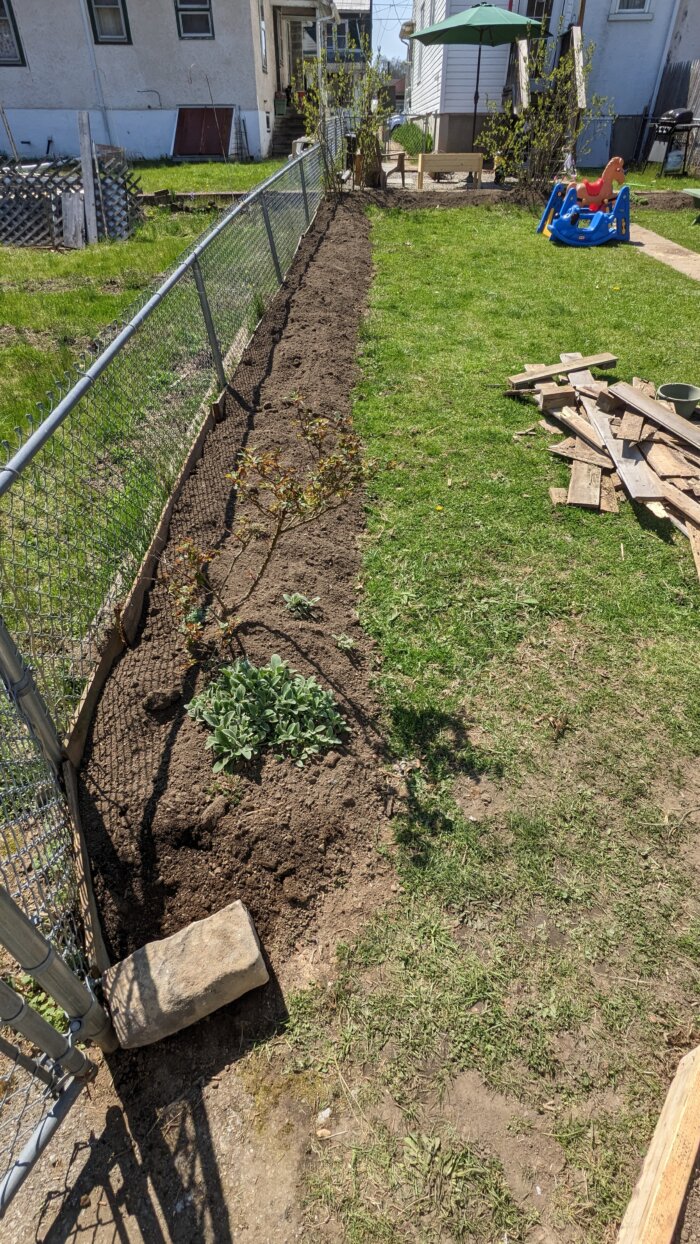
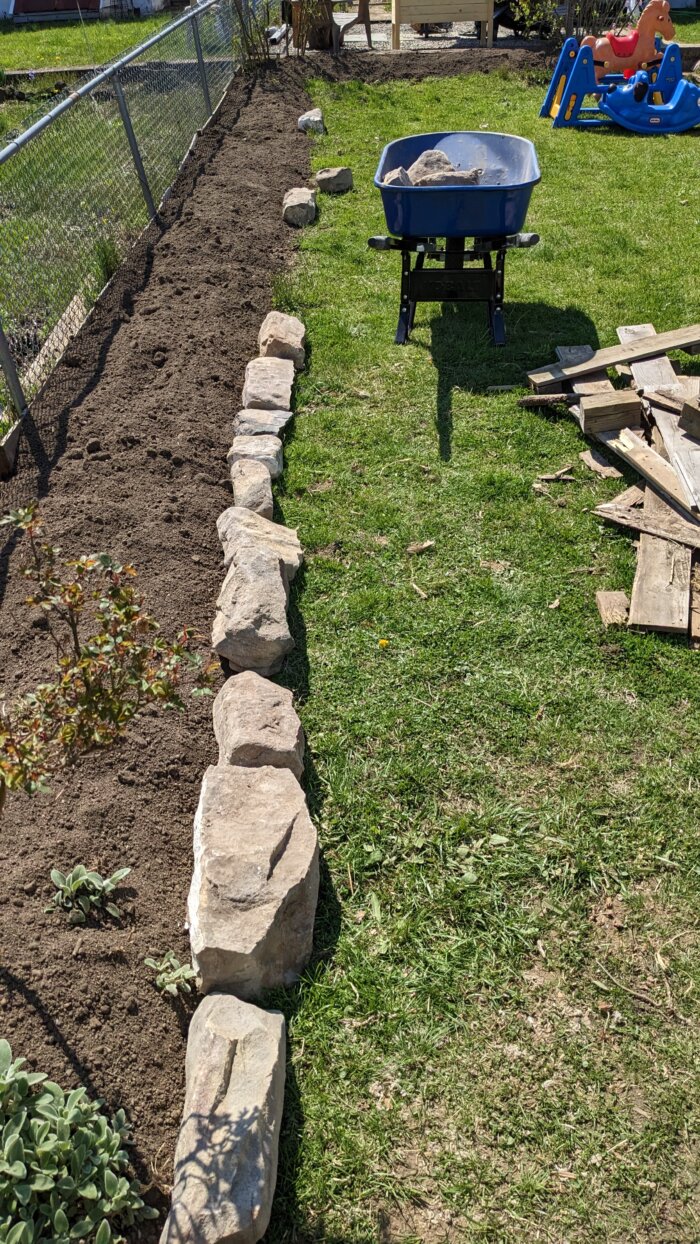
As a bonus example of how to make a raised bed, while we were building these we noticed on Facebook marketplace that someone was giving away stones. They were from an old shed that had collapsed. I took a few trips out to the site and gathered as much rock as our minivan could carry.
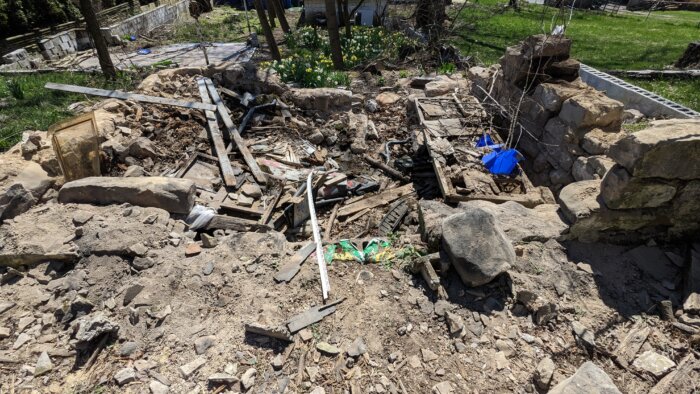
We decided to use the stone to add raised beds for our flower garden, tea garden, and in the front of our house. The stones were beautiful and a great addition to our yard, as well as giving our beds some extra height.
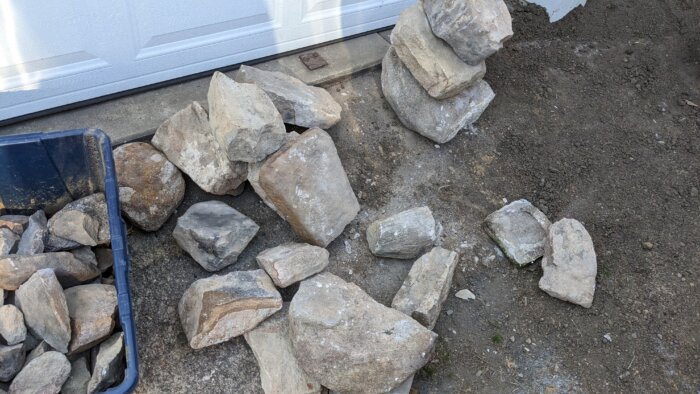
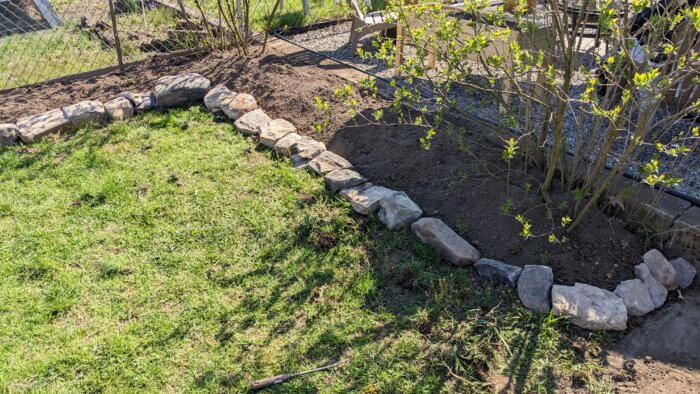
![]() Frugal Living Tip: I have a friend who opens up the “free” section of Facebook marketplace every time he stops in a town or goes somewhere new. He has found so much stuff on there. It worked for us too!
Frugal Living Tip: I have a friend who opens up the “free” section of Facebook marketplace every time he stops in a town or goes somewhere new. He has found so much stuff on there. It worked for us too!
Raised beds step-by-step:
-
Step 1: Prepare the Area
- Clean up and measure out the area in which you plan on building your raised bed.
- If there is grass where you want to build the beds, dig it up and flip it over so that the soil side is up. Then chop it up so that it mixes better with the soil.
- Make sure that you think about the depth of your beds. Deep beds look amazing, but if you can’t reach the middle of them it can become a frustration.
- Before building the beds, you may want to loosen the soil. You can use a pitchfork, tiller, or broad fork if you have one.
-
Step 2: Gather the Materials
- You will need the wood, stone, brick, or metal that you decided to use for your raised beds. If you choose to use wood, all you will need are some screws or nails rated for outdoor use.
-
Step 3: Measure, Cut and Assemble
- If you are using wood, measure and cut all of your boards to the sizes you need.
- You can use the extra pieces or other wood you have around to reinforce the corners.
- If the ground under your raised bed is not flat, dig up the higher ground until you can set the wood down without any gaps underneath. This will prevent rain from washing your soil out of the bottom of your raised beds.
-
Step 4: Add your topsoil and compost
- Add your topsoil and compost until the bed is full. If you loosen the existing soil before adding your new topsoil, you will have a deep bed ready for your plants! For example, if you can loosen the existing soil 10 inches down, and then add an 8-inch raised bed on top of it, you will have an 18-inch deep bed!
- If you can’t or do not want to loosen your existing soil, you can build higher beds!
By the middle of the summer, we had a more beautiful garden than I thought we could have that year. Do you have raised beds? If so, how did you build them? Let us know your thoughts and questions below and have fun gardening!
Pin it for later!
I love this idea! We have a big backyard, but I may still incorporate your ideas to our space!
Thank you! We are hoping to get a much larger property in the future and I think we will be using some of these ideas there too!
I love that you included so many pictures! The way you explain everything, it doesn’t seem so daunting anymore 🙂
Thank you! Bennett wanted to make sure there were lots of photos for that reason!
This is such a helpful tutorial! I love how you can customize the beds to fit your space perfectly. Makes use of otherwise unproductive space!
Thank you! It was a fun project and made the garden so much better!
Love the visuals! What a difference. Thank you for the encouragement that you can make a garden possible even in a small space. Love it!
Thank you! I’m so glad you were encouraged!
Love this idea!
Thank you!
What a big project! I love all the photos. Looks great. I look forward to your next post!
Thank you so much, that is such an encouragement!
I’ve always wanted to do raised beds, and we have a pretty small backyard too, so this is a great idea!
Hopefully you’ll be able to make some sort of raised bed work!
Hoping to move our garden and make it bigger this year! I am excited about raised beds!
We love ours! Good luck with moving your garden!
Great post! I am planning on making my own raised garden beds in the Spring. This post will come in handy!
Oh I hope it does! I would love to hear an update on your raised beds after you’ve completed them!
Great tutorial! Love how detailed & thorough this is! Thank you!
Thank you so much!
Saving for spring! So helpful!
I’m so glad! Thank you!
I love raised garden beds! They are what I am planning for my garden… when we get around to preparing the area where they are going to go! Great post, love all the step by step photos xx
Thank you for your encouragement!